
Updated from March 2019
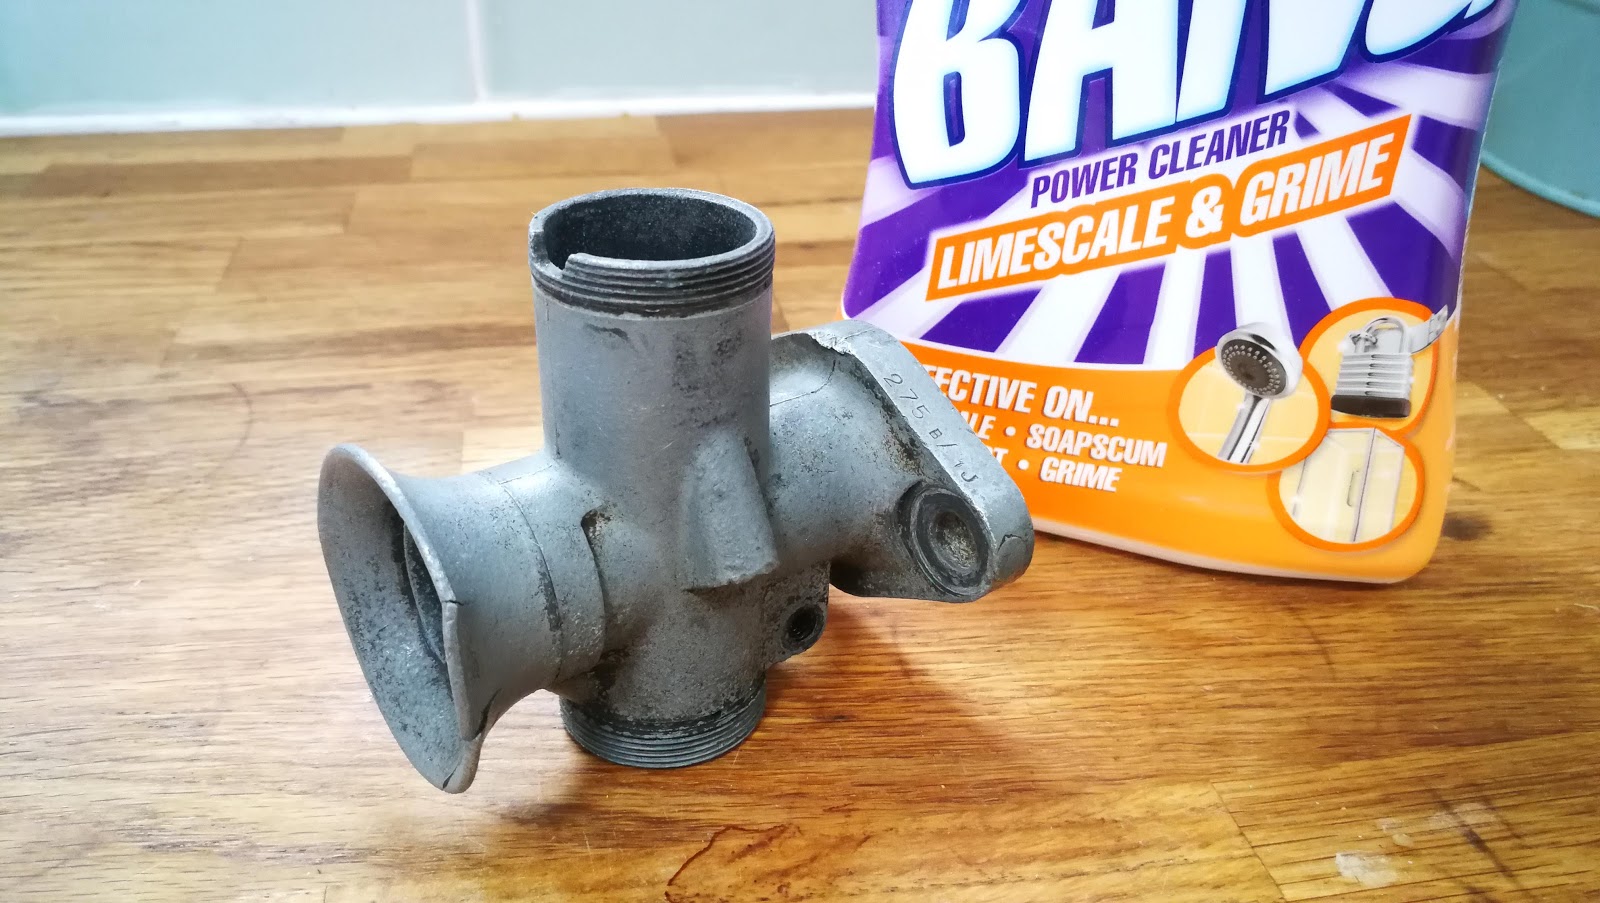
I put a bid on this carburetter body (and won the auction!) thinking that I would have a go at sleeving a carburetter back to size, having some fun with my lathe and getting an original carburetter for the W/NG in the process. I know I can more easily go and buy a new 276 from Amal, jetted to suit my bike but where's the fun in that?
This 275B/1J came up on eBay at a good price, and is perfect for my W/NG:

For less than £20, I have a body, a slide, the jet block and the big union nut. There's a needle and a bent air intake bellmouth. It's all a bit fluffy, but we can attack it like we did the Solex.
It's actually in better shape than the 3HW 276 fitted to my bike, so I will get it up and running and see how it goes. Maybe I'll save the tired 276 for a bit of mini-lathe practice.
It will need an air valve, a mixing chamber top and a top ring, but most of the rest will transfer from the 276. The 5/045 air valves are available from Drags - the top and the ring might be more difficult...
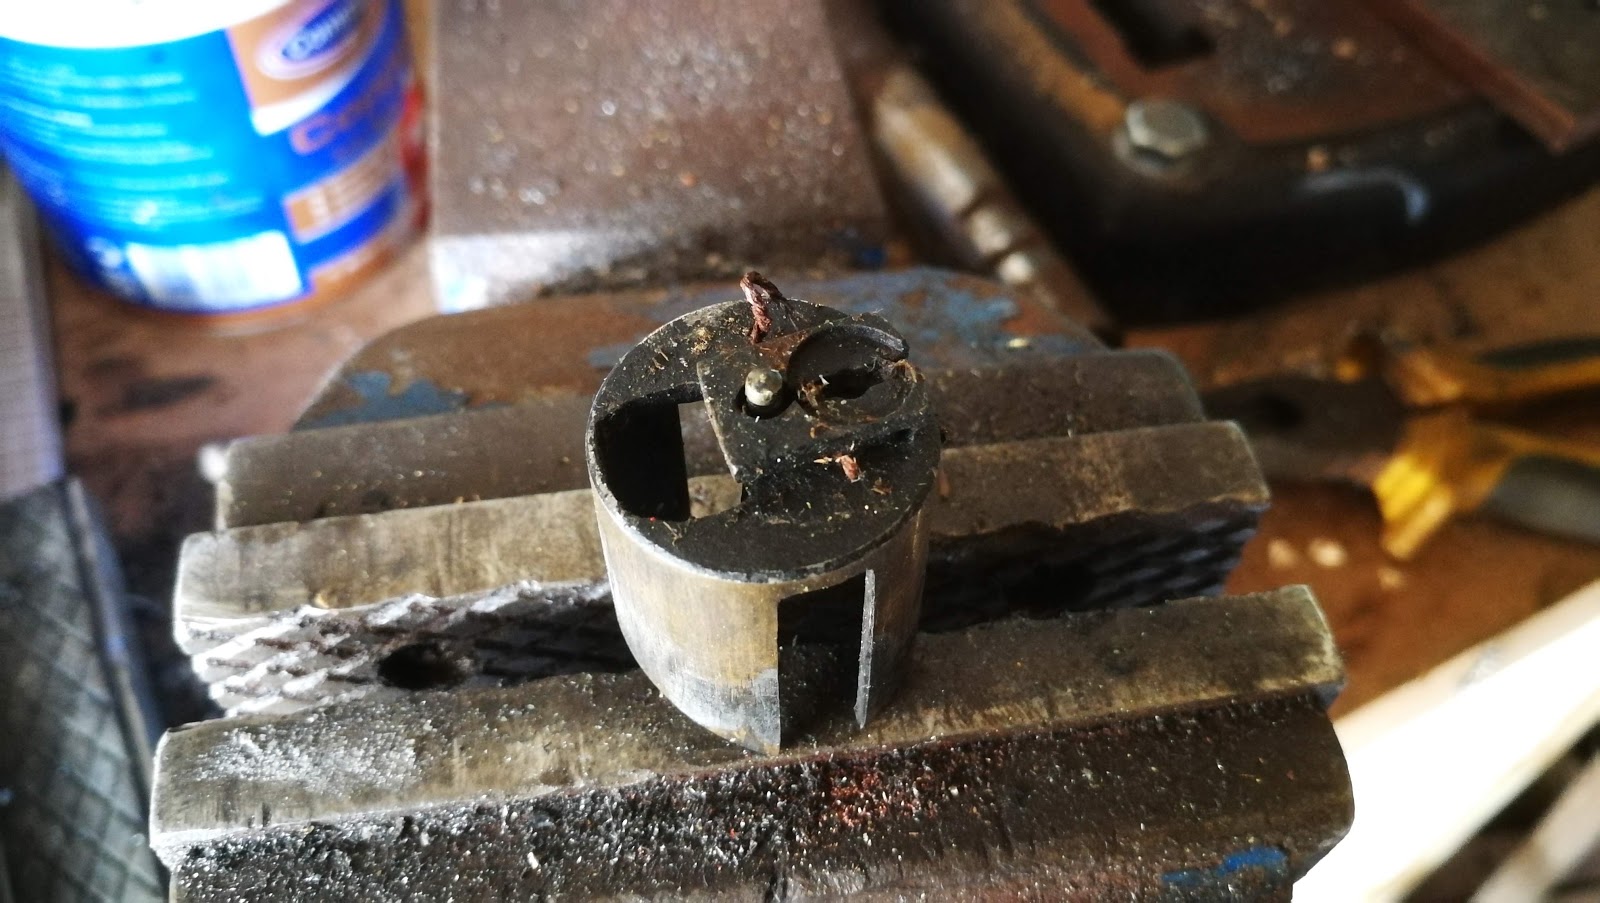
Now to clean it up. With the bottom cap in the vice, we can use a large tube through the bore to provide some gentle leverage after the Plus-Gas has done it's job:

This is the first time I have seen the needle held in place with a bit of wire...

It's interesting how these things wear. That slide is nominally 1" OD; at the bottom, it's close to that:

It's very worn at the top, where the differential pressure pushes the slide against the body. It's about 0.965" here:

The top of the carburetter body is close to nominal:

The nations favourite carburetter cleaner. It's the fact that you are not supposed to use it on aluminium which makes it attractive - it's good at removing zinc oxides too, as well as old petrol deposits.

The brush on the right is called a 'file card' - it's for cleaning debris out of file teeth. It's also very good at cleaning threads in soft carburetter bodies:

Talking of threads, the throttle stop and air screw threads are 2 BA and are easily cleaned with a suitable plug tap. Don't force a taper tap into the air screw port though, or you will destroy the needle seat.
All the bits I have:

Rubbing the flange joint on some 120 grit sandpaper on a glass plate shows it is in pretty good shape:

Eventually I got a top and a threaded ring from eBay and I have just ordered a slide and an air valve from Drags, at vast cost. Here's the top ring and the top, of which both cable adjuster threads are intact. I'm happy about that; but not so much about the ding in the choke adjuster thread, which means the adjuster won't go in.


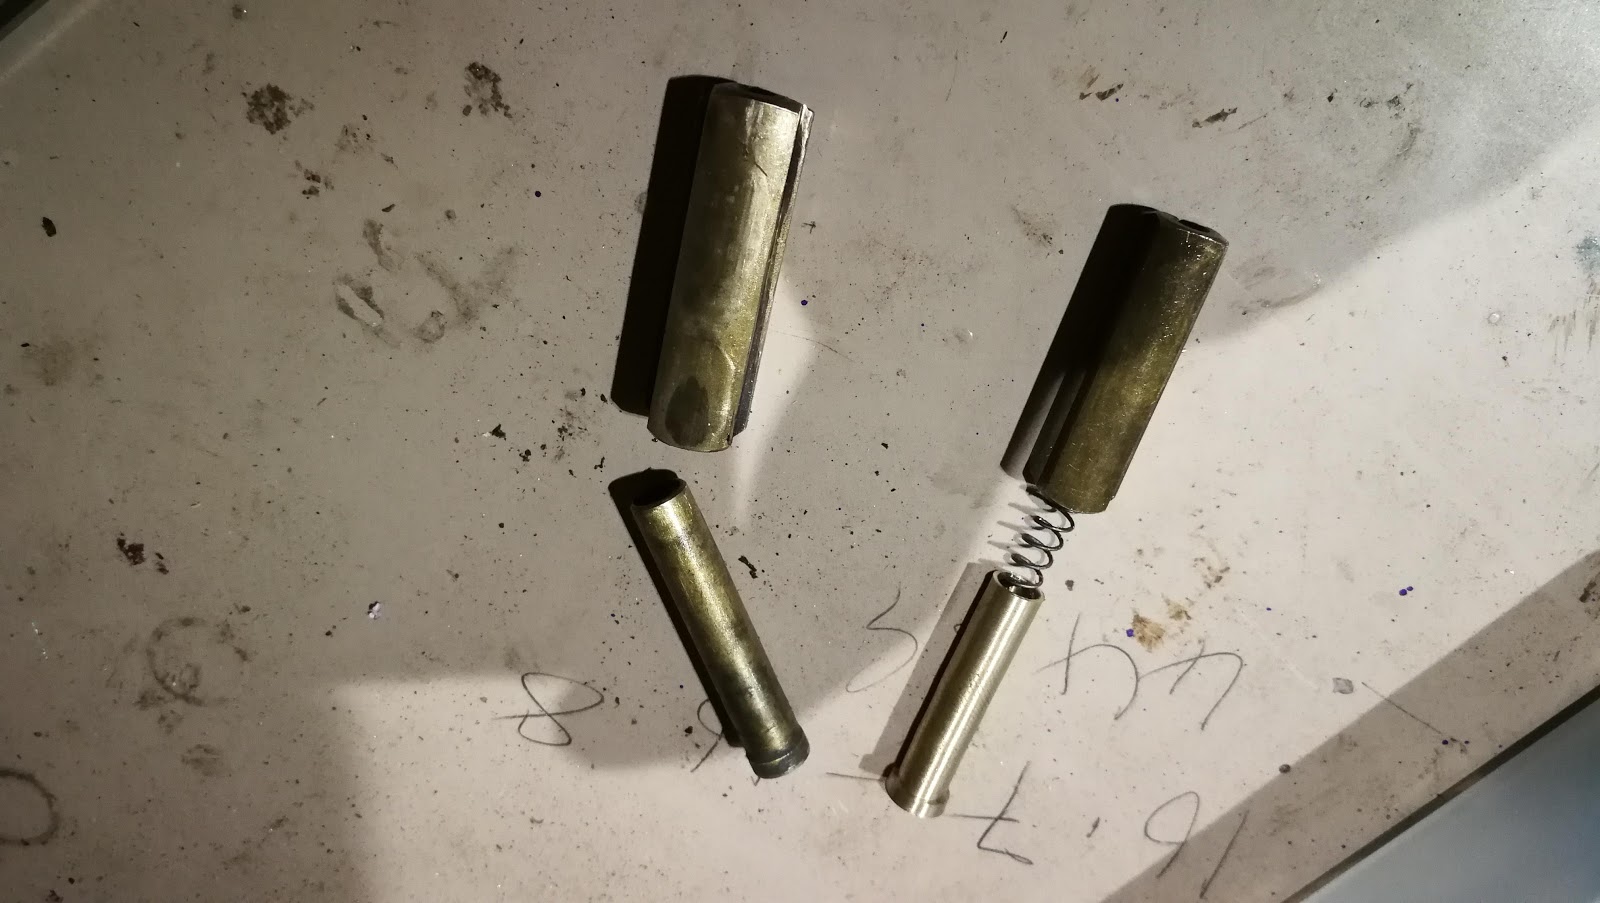
Here's the air valve and guide from a 276, alongside the air valve for the 275 and the new guide I made:


I needed to shorten the cables by about 1/4", but other than that it's all back together. The fuel tap has a solid but old filter, and I have replaced the corks in both plungers; the return plunger has a new screw as well. Fuel tap repairs are shown in the first half of this post.

I put a bid on this carburetter body (and won the auction!) thinking that I would have a go at sleeving a carburetter back to size, having some fun with my lathe and getting an original carburetter for the W/NG in the process. I know I can more easily go and buy a new 276 from Amal, jetted to suit my bike but where's the fun in that?
This 275B/1J came up on eBay at a good price, and is perfect for my W/NG:

For less than £20, I have a body, a slide, the jet block and the big union nut. There's a needle and a bent air intake bellmouth. It's all a bit fluffy, but we can attack it like we did the Solex.
It's actually in better shape than the 3HW 276 fitted to my bike, so I will get it up and running and see how it goes. Maybe I'll save the tired 276 for a bit of mini-lathe practice.
It will need an air valve, a mixing chamber top and a top ring, but most of the rest will transfer from the 276. The 5/045 air valves are available from Drags - the top and the ring might be more difficult...
Now to clean it up. With the bottom cap in the vice, we can use a large tube through the bore to provide some gentle leverage after the Plus-Gas has done it's job:

This is the first time I have seen the needle held in place with a bit of wire...
It's interesting how these things wear. That slide is nominally 1" OD; at the bottom, it's close to that:

It's very worn at the top, where the differential pressure pushes the slide against the body. It's about 0.965" here:

The top of the carburetter body is close to nominal:

The nations favourite carburetter cleaner. It's the fact that you are not supposed to use it on aluminium which makes it attractive - it's good at removing zinc oxides too, as well as old petrol deposits.
The brush on the right is called a 'file card' - it's for cleaning debris out of file teeth. It's also very good at cleaning threads in soft carburetter bodies:

Talking of threads, the throttle stop and air screw threads are 2 BA and are easily cleaned with a suitable plug tap. Don't force a taper tap into the air screw port though, or you will destroy the needle seat.
All the bits I have:

Rubbing the flange joint on some 120 grit sandpaper on a glass plate shows it is in pretty good shape:

Eventually I got a top and a threaded ring from eBay and I have just ordered a slide and an air valve from Drags, at vast cost. Here's the top ring and the top, of which both cable adjuster threads are intact. I'm happy about that; but not so much about the ding in the choke adjuster thread, which means the adjuster won't go in.

These threads are a little unusual - they are 7/32" x 40 tpi, which is a ME (Model Engineer's) series thread. These are a fine Whitworth form, and fortunately the taps and dies are readily available fromt the excellent Tracy Tools:

Next, while assembling the slide and choke into the carburetter top, I realise that the air valve guide is missing. I can turn that up from a bit of 10 mm brass round bar I have in stock - it's 6 mm on the OD, 7.6 mm where it goes into the top, and the spring is 4 mm OD. I drilled the ID 4.5 mm and then decided to open that up to 5 mm to ensure the spring does not bind.

Here's the air valve and guide from a 276, alongside the air valve for the 275 and the new guide I made:
Works beautifully, so it is on to reassembly.
Close observation of the parts diagram showed that the throttle slide has a split pin fitted to retain the cable. I've never seen that before:

I needed to shorten the cables by about 1/4", but other than that it's all back together. The fuel tap has a solid but old filter, and I have replaced the corks in both plungers; the return plunger has a new screw as well. Fuel tap repairs are shown in the first half of this post.


