Updated: first published November 2020
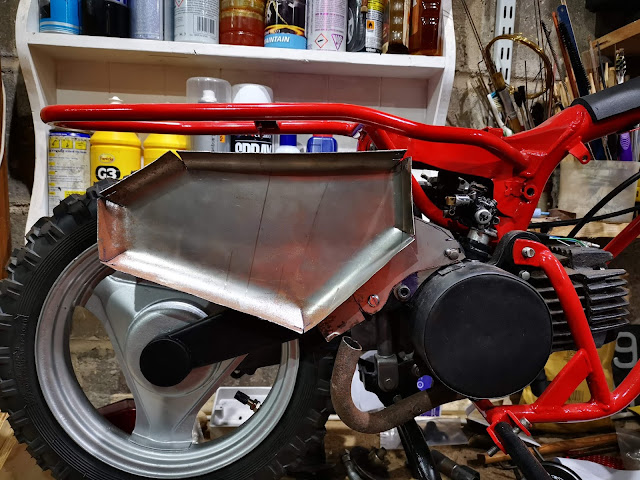
There's been a lot of sheet metal work on this bike - the magneto cover, the faux swinging arm and the silencer which was completely missing. It's one of those pressed sheet metal affairs quite widely used in the 70s and 80s on bikes when it can be hidden and some (think the last BSA and Triumph unit singles) where it cannot.
Here's one from eBay:
It's got an integral exhaust pipe, the only part of it I had left, and a separate tail pipe which looks like this and mounts in the and of the silencer. see how long it is?
It appears in the parts book like this. I haven't got those perforated guards either:
Now, these come up on eBay from time to time but at over £100 a go I was never going to buy a new one, or even a second hand one but I have a welder, a bandsaw, a brain and a calculator and making one couldn't be too hard could it? Of course, because it was entirely missing I had little idea of scale so I took this library picture and scaled off it:
You can get some idea of the thickness from the diameter of the tailpipe. I made a cardboard template for the sides, with an allowance for the curved edges:
I started to make a model from the template, to mock it up and work out how to form some of the details, like the spherical corners:
Try as I might, I couldn't see what Honda had built into their silencer but I did know that the exhaust gas went in at the front end and that the tailpipe was long enough reach to the front, so the gases must be led around various chambers inside. The formed ridges obvious from the outside of the original silencers seemed to confirm this, so I used my template to work out a series of chambers and modelled them mathematically. I found the calculations online at
https://www.glue-it.com/wp/knowledge/exhaust-silencer-design/ and built a simple spreadsheet to calculate what a silencer would do at various engine speeds.
Here's the equation for one of the silencer/pipe combinations:
The resonant frequency fn for the chamber is calculated as :
Where C is the speed of sound and Lc is the length of the chamber. I plotted the results of the calculations:
From a rough sketch, I built a cardboard mockup. I started with the inner shell, and built the divisions into it:
The tailpipe needs a large tube to receive it:
The silencer is supported by the exhaust pipe and the bracket at the front. The pipe will be welded into the shell and have a brace inside:
The complete internal layout:
Here's the model with the outer shell added, fitted to the bike to determine the shape and hole positions for the bracket:
Now that the model has proven the fit of the silencer, we can use it to start on the build 'in the metal'. What I have done here is use the template again to transfer the shape onto the two sheets that will form the inner and outer shells. I've used spray paint to transfer the shape:
I've used the model to mark out a piece of thicker sheet for the bracket:
Using a couple of short lengths of scaffold pole, I have started rolling the edges of the inner shell. Here, it is held onto the bracket with magnets:
Using the same technique as that used on the cardboard model, I have split the hemispherical corners ready for bedning:
I closed them up around the same scaffold pole, so the radii are correct:
Welded and painted:
When all the corners are done, we can cut the dividers using the bandsaw, linisher and some cone drills. They are set up temporarily with welding magnets:
There will be a fourth piece which will be used to reinforce the exhaust pipe as it enters the silancer:
The tubing is just cheap 19 mm ERW steel tube. In a former life it was a curtain pole.
The tail pipe needs a mounting tube welded in the shell. This needs to fit tightly around the tailpipe, so I will roll it up from sheet:
The original tailpipe features a frustrum at one end. I've used the model to transfer the shape to a bit of sheet, which we can roll up using a hammer and a small mandrel:
Here are the pieces of the tailpipe and it's mounting tube:
Tacking up the tailpipe:
We need to assemble the silencer to locate the tailpipe in the right place, prior to tacking in the mounting tube:
With that done, we can have a look at the tube arrangement inside prior to welding it up.
The location of the incoming exhaust pipe and its bracing plate are key to the internal tubing location, so we will have to put some time into that. I had considered making a die and hot forming the tube, but a few experiments showed that the bend needed would be too tight to successfully form by that method, so I decided to mitre & weld the bend instead:
Here's the tube in position. I used this set up to mark the position of the brace inside the shell with a Sharpie.
Knowing the position of the brace I could tack in the internal tubes into the dividers:
You see the position of the brace in this shot. The tube from the front chamber to the rear is tacked in all three dividers in this shot, and I am setting up the tube between the two middle chambers:
This shows all the tubes tacked in. The empty holes in the dividers are for the tail pipe.
Next step is to get ready to weld the bracket on. The bracket will have five plug welds and four fillets' the Dykem marking blue is to mark the radii prior to linishing and welding the double sheet.
The whole silencer assembly is fitted (yet again) to determine the final position of the incoming pipe and it's brace. Whilst the internal assembly is tacked together, it is held in the shell with magnets at this stage.
Here's the incoming pipe, trimmed a little and with the brace in plate. I've introdcued another small plate to provide some flexibility around the position of the pipe as it passes through the shell:
Here's the assembly tacked together and in place in the shell - it's not in the right place - something must have slipped during clamping...
With that last element in, we can replace the baffle and tube assembly and put the two shells together. I should have allowed considerably more (spare) material since for some reason there is a gap at the bottom. I'll make a 1/2" wide strip to go all the way around the seam.
I've now tacked the shells to the baffles and to each other:
These two images are from eBay - someone is selling laser cut heat shields for these exhausts but unfortunately they are in aluminium. I will have to make my own as I want them in steel - they won't last five minutes in ally, before they are bent out of shape.
Here we go. I cut the shape from a bit of 0.9 mm cold rolled sheet using aviation snips and started to raise the edges on a dolly:
I worked the edge up gradually:
Until I had the shape I wanted. I trimmed out parts of this raised edge to let the pipe pass underneath:
I also reduced the height a little using the linisher, and cut some holes with a cone drill:
The heat shield is held to the pipe with a couple of M5 screws. These go into weld nuts I fitted:


