Wednesday, 27 April 2016

An unexpected trip to Peterborough

With a trip to Russia impending, and only four months left on my passport there was no option but to go and spend the day fluffing around Peterborough, to get my passport replaced using the same-day service.

The 75 mile drive over from Sheringham was very pleasant in the morning sun and I was soon parked up in the centre of Peterborough, on the top floor of the Market Street car park, which commands a good view of the 12th century Cathedral.


This is the west door, usually the most impressive facade of any cathedral.


Having had my interview at the passport office, narrowly avoiding losing my favourite pen knife to the security guards I had four hours to kill before collecting it. I needed somewhere to sit down, do some emails and get some breakfast (although it was almost lunchtime), so I walked down to Railworld near the Peterborough East Coast Mainline station. Railworld is located on the site of the former LNWR Woodstone Locomotive Shed, closed in 1932, which is next to the Peterborough terminus of the Nene Valley Railway. They have a variety of international locomotives, other rolling stock, model railways, and a peaceful wildlife garden .


This is a Vauclain 4 cylinder compound Pacific locomotive which saw service with the Danish State Railway until the 1950's, though it is a Swedish locomotive originally. It's part of an ongoing restoration at RailWorld.

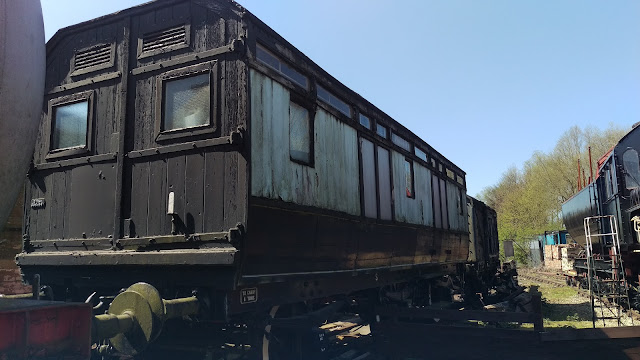
Various wagons are also stored at RailWorld in varying states of decay:


I had a walk around the Wildlife Haven at lunchtime.


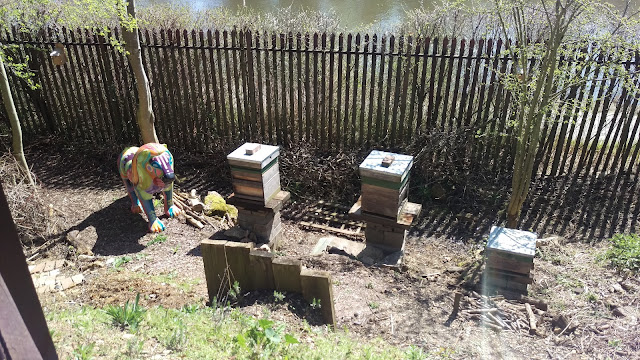
Beehives:


Bridges, originally part of an aqueduct from Abbots Ripton in Cambridgeshire. Each piece weighs 22 tonnes and carried the river over the railway until 1987.


The NVR station at Peterborough is a modern incarnation, opened in 1986. The signal-box came from Welland Bridge in Spalding and there are some freight wagons to look at while you wait for your train.


Here's my train, hauled by the LMS Black 5 45337, which I'm sure I have seen on the NNR. I was very lucky, since I happened to be in Peterborough on the first day of operations for 2016.


LMS Class 5 4-6-0s, known as Black 5s, were designed by LMS Locomotive Superintendant Sir William Stanier and introduced in 1934; they were built, with some modifications from George Ivatt, until 1951. There were five LMS Black 5 locomotives sent to Barry Scrapyard in the 1960s; 45337 was purchased in 1984 and was restored to working order at the East Lancashire Railway in Bury.

As the name suggests, the railway follows the River Nene away from Peterborough in a westerly direction passing through peaceful countryside and a number of small stations.


It's quite flat - well, it is a river valley...


Arriving at Wansford, the NVR's main station the first loco we see is Wissington, on test after arriving from the NNR. Wissington is owned by the Midland & Great Northern Joint Railway Society and has been a regular sight in our neck of the woods. It's currently on loan to the NVR to take part in their Small Engines Gala.


The Black 5 at Wansford, posing for a few snaps before departing for run around at Yarwell Junction:


A view of the yard and station at Wansford, looking east.


Here's something I've never seen in the flesh - a turntable! The turntable bridge was recovered from Ipswich and was built by Ransomes & Rapier of Ipswich in 1933.


This is the Wansford signal box, grade 2 listed and sitting over the level crossing where the old Great North Road crosses the line. It's a large 60 lever box built in 1907 and it replaced three earlier signal-boxes. The signalman also controls the level crossing gates.


Wansford yard again, looking west toward the loco sheds.


This was my first time in a heritage railway tunnel!


The 617 yards long. Wansford tunnel is straight and level and has no ventilation shafts. At the western end of the tunnel, the NVR have a halt at Yarwell Junction where the locomotive runs around for the return trip to Peterborough.


Here's the Black 5 back at Peterborough about to run around for the return trip to Wansford. Arriving on a weekday afternoon, there weren't a huge number of visitors about and I was able to chat to most of the train crew. A very friendly bunch who really helped me enjoy my day out. Thanks guys!


Just to counter those who suggest that I might be slightly obsessed by ancient technology, here's an example of new technology lurking in a street in Peterborough:


Friday, 15 April 2016

Ian Soady's Web Page

As part of my writing activities, I came across Ian Soady; Ian was kind enough to provide an illustration, hitherto published in RealClassic Magazine, for the Bantam Restoration Guide. Here's his website - check out the Sunbeam restoration:

http://www.iansoady.org.uk/

Here's Ian on George Brough's SS100 at the National Motorcycle Museum's "Ride a Classic" day:


Thursday, 7 April 2016

Charlie's Shed - Captive Nuts

As part of the Huntmaster fork rebuild, I discovered that one of the captive nuts in the headlamp was damaged and no longer being retained by it's little steel cage; a bit more investigation revealed that it was not the correct nut. You can't buy these, since they are an integral part of the MCH60 headlamp supplied to Ariel by Lucas and as such don't have an Ariel part number; they are not available as spare Lucas parts either (and nor is the shallow-bowl MCH60 headlamp, for that matter).

Its quite easy to make your own, however. Start with some thin cold rolled sheet, about 0.6 mm or 24 SWG; I have to confess I have cut up an old baking tray in the shop which I use for stuff like this! You'll start by making a square nut from some 1/4" or 3/16" plate, and drill and tap a 5/16" CEI hole in the centre. Cut out a 'cross' shape with snips from a small piece of sheet a couple of millimeters wider than the nut, and about 2" longer; the width of the long arms of the cross needs to fit in the square hole in the headlamp shell. You'll need a clearance hole for 5/16 in the centre of the cross.

You should end up with something like this, with the short arms folded part way up the sides of the nut. The short arms are only about 2 mm long.


You can fold up the two long arms of the cross in the vice. Take care to fold them tight around the nut, and fold them at 45 degrees over the top of the nut. You will then fold them back such that they come up through the square hole in the headlamp shell; trim them to about 4 mm and nip off the corners:


Slip the captive nut into the hole in the headlamp shell. Using a large hammer, held in the vice as a dolly, you can fold the short ends of the captive nut outwards into the hole, tightening them down with a hammer. This is how it looks from the inside, with one of the bolts in place:


And this is how it looks from the outside - the fold is less neat than I would have liked it, but it is 100% better than it was before.


Monday, 4 April 2016

Schoolboy MOT's the MZ and makes lots of Errors

Starting the MZ to go for it's MOT proved difficult - I have not mastered this yet, though the lack of time on the road hasn't enabled me to tune the carburetter properly, so that may be the problem. We had the MOT done at H Curtis & Sons at Overstrand, so we could have a nice little blat along the coast in the sunshine, through Cromer and out the other side.


I was a bit nervous, since this is the first time I have been out & about on any MZ in about 30 years. Initial reaction is that it's very steady, and the road holding feels very safe. There was a hint of a wheel alignment problem, and the rear brake is a long way down; the front brake is also quite worn & grabby but overall the bike seems to have a good deal of get up and go and we arrived safe & sound at the garage in Overstrand.

Throughout the trip, the front brake had got progressively less noisy, though the clutch is dragging and I think that there is a bit of a top end rattle. As I was a bit early, I took the opportunity to lean out the idle mixture a bit now that the engine was warm.


Leaving my helmet & gloves at the garage, I went for a mooch around Overstrand which has some pretty buildings, including the Methodist church designed by Edwardian architect Sir Edwin Lutyens:


Nearer the beach, we have the ubiqutous Fordson Major draped in a tarpaulin, and rusting away. These are used all along the coast in for hauling boats about:


Down to the beach, with Trimingham in the background:


This pretty bit of Overstrand is called the Londs:


Boats:


Lobster & crab fishing is very popular around here:


So, after an hour I wandered back to the garage to be greeted by an MOT certificate! It seems to have started for the MOT tester, which surprised me almost as much as the fact that he put it on the sidestand - it does look a bit precarious...


The MOT test had also found that the rear wheel alignment was a bit wayward, so I will have to fix that as he made it an advisory notice; and that was it. It started for me once I'd had a chat and got all my stuff back on.

Unfortunately, the pleasure did not last long, and some 100 yards spluttering towards Cromer saw it stop, and refuse to go on. It was fairly obvious that it was not going to move again so it was helmet & gloves off and out with the tools. It was so dead that I was fairly sure it was ignition so I started there, only to realize that I had packed the wrong size plug spanner and I had to pull off the side cover to get at the points to be able to see any evidence of sparks. A screwdriver in the plug cap revealed a relatively weak spark so I set about cleaning points, coil & condenser connections, plug cap etc. to the sound of some encouragement from people passing by on the pavement.

Bikers are a friendly lot by and large, especially if you are in trouble. A chap I now know to be Jimmy Lee Shreeve stopped to see what was up and he was kind enough to stay to the end. An interesting chap, his website is here. Besides keeping me company, he had a plug wrench under his saddle, which was a godsend. Since the last time I broke down (on the Cyclemaster, about two weeks ago) was a whiskered plug (and I didn't have a plug wrench then either - you'd think I'd learn), I was glad to check the spark plug with Jimmy's help - and it was fine. A van driver also stopped and got his tools out to see if he could help, offering to fetch anything I needed from the garage down the road.

Next the petrol tap came apart, followed by the carburetter - nothing amiss anywhere. I was just giving it a last kick before giving up and calling the RAC, when it fired, and spat back a couple of times, probably due to the serious clean out it had had when testing for sparks with the plug out. Memories of the first time I flooded the Bantam in Tesco's car park came to mind as did the serious tweak I had given the mixture screw when I had stopped earlier in the afternoon. Winding this out well beyond the normal 1 1/2 turn position had the bike running reasonably consistently, apart from the violent banging in the exhaust. This was so bad that it had become very obvious - the exhaust nut had shaken itself out. I wound it in again as best I could (no C spanner), which quietened things down considerably - so much so that I realised the top-end rattle must have been a leak starting.


So with a farewell from Jimmy I charged off to Cromer, exhaust banging away and sounding great. Tickover was not too brilliant, but I didn't let it die and got safely back to the workshop in 20 minutes or so. Once back, breaking out the C spanner had the engine running much more quietly, but I think we still have a leak. Judging by the smoke, it's probably an engine oil seal, but I am loathe to fix that when I have the Huntmaster waiting.

So I'll use it while I sort out a few little jobs on the SQ4 prior to the summer season, and then get it onto eBay. More of that later. 

So all in all, a good trip out. Best part? Meeting new folks and seeing just how kind people can be!

A Few Little Jobs before the Summer starts

So rounding off the winter activity, I have cleaned the new/old fuel tank to get it ready for use. Whilst I am at it, there are a few service activities to carry out, and I best make a list to get them identified and make sure I don't forget!

Here we go:
  1. Take the tank off and transfer all the parts onto the new tank
  2. Torque down the head nuts again
  3. Rotate the distributor to give the carburetter more clearance.
  4. Fit the carburetter insulator
  5. Ignition service, while the plugs are out and the distributor is apart. Ignition at TDC, points at 0.012" and plugs at 0.020"
  6. Tappets, while the tank is off and after re-torquing the head - 0.001" inlet and exhaust, with a cold engine.
  7. Fit the new tank, and make sure the balance pipe doesn't leak.
  8. Road test & oil change
  9. Fit the cable clips to the headstock
  10. Make and fit the proper cable clip to the front mudguard
I'd better buy an oil filter. Now which oil shall I use????