Monday, 25 June 2012

In response to a query...

In response to a comment on the blog, here is a photograph of the front stand bracket:

And some dimensions:


Monday, 18 June 2012

On to brighter things?

After the doom & gloom of the gearbox story, I fitted a few more parts and had a general clear up of the summer house - we don't want domestic bliss to be troubled by Ariel parts in the way of deck chair deployment!

The oil tank went in first:

Fitting was relatively straightforward; the ding in the filler neck was not as bad as I had remembered but the dent in the front was a worry.

This was laid to rest by the ever helpful Brenton Roy, AOMCC member & correspondent from Australia who confirmed this is as Ariel intended and is there to clear the distributor.

Not so the other picture!

A Dutch correspondent, and another fellow AOMCC member, suggest that the dent in the oil tank behind the battery was probably due to an exploding battery...

We may leave that one alone, since you can't see it when the battery is in place.

However, also visible in the picture is the very nice stud arrangement from Acme Stainless, holding the oil tank in the frame lug under the saddle.

Here's the oil tank again from the battery side, with the inside primary case in place albeit loosely.

Apparently the spare hole in the engine plate is for the clutch cable.
Here's a view of the primary case from behind, to try and ascertain what happens here. That shiny bit (there is only one shiny bit) is the brake lever stop, another Acme Stainless component. You can see it behind the primary case where there should apparently be a spacer. Thanks again to various AOMCC folks.

And here she is as she is today, looking a bit more like a motorcycle!

Father's Day

Having spent most of my spare time this month either working on the house or stripping the Bantam engine, Father's Day bought the first chance to take a look at all the bits I had collected for the Ariel and to try some of them out.

An eBay auction brought a pair of handlebars purporting to have been taken from a plunger NH - these should be correct for the Square Four if indeed they did come from a plunger NH, which I am beginning to doubt - they look a bit high to me:


Whatever they are from, they look a lot better than the flat 'Norton Straights' that were previously fitted, snaffled from the box of bits that came with the MZ.

The next job was driven, as I have said previously, by a suspicion that the gearbox was wrong. In an earlier post I reported that a G106J51 gearbox comes from a 1951 KH, VH, KG & one or two others. There was a suspicion that the main shaft was different and I was trying to get the transmission together to check the chain alignment, and I though I had achieved that. Secondly, a Burman BA gearbox purporting to be a 1951 Square Four gearbox, labelled G107K51 (the correct code) appeared on eBay - but it was quite obviously not a Square Four gearbox casing - or even an Ariel casing - however it was attractive (or would have been at the right price) because the kickstart housing carried the correct number and the clutch cable abutment was intact - mine is broken.

I'd also checked through the engine mounting plates & studs, and started to talk to Acme Stainless about replacements, so it was time to get the gearbox in it's plates. The result was not too happy.

See the arrows? In this picture, the bottom lug of the box is in the correct location in the frame. The left hand engine plate, on the right in the picture, is fitted correctly to the frame lugs, but there is a 1/8" gap between it and the gearbox. This gap is repeated on the other side, where it appears at the frame. This is because the casing on a Square Four box is different to that for the singles & twins, because for some reason the gearbox is shifted to the left. Research reveals that the mainshaft is also different.

So, pleas are out to DragAnFly, the AOMCC members, and to the nice lady from Essex to try and locate the correct box!

Thursday, 14 June 2012

Broken Bantam

Regular readers may have noticed that there has been a wanton lack of progress on the Ariel lately... as I mentioned earlier, the Bantam has decided that it doesn't like it's crankshaft.

We were out for a nice little bimble about, such as can only be found in North Norfolk's finest countryside, when she started clattering and misfiring. After the usual carburetter cleaning, plug gapping etc. and a couple more miles with enforced stops, I turned to the points only to find the cover very loose and the screws backing themselves out.

So I pull it all apart, and find myself with the flywheel in the road:

This signalled end of play for that day, and for the first time she came home on a truck. Several weeks of DIY activity plus a trip to Houston and a busy time at work followed, until last weekend we had the engine out & stripped.

It's now on it's way to Rex Caunt Racing to have the mainshaft replaced.

Hopefully, since the Bantam is down (but not out) we'll get some Ariel time this weekend!

Thursday, 7 June 2012

Stainless bits...

Here are some parts from Acme Stainless, a new supplier I've discovered who copies original motorcycle parts in stainless.
These are a few parts totally missing from by boxes - a gearbox pivot bolt, gearbox adjuster and gear position indicator.
Also shown are a set of tank bolts & the tiny 2BA CSK screws for the tank badges.
Here's the brake rod - again totally missing from my bike. The butterfly nut is original.
And here is the clevis at the brake lever end. All very nicely machined & presented, and at a good price.

Saturday, 19 May 2012

Front Mudguard & Stands

Here she is in all her slightly less moth-eaten-than-last-month glory...

Front mudguard, first trial fit - looks fine. That stay is slightly bent though, and the front stand bolts (to the fork leg) are also wrong. They shouldn't be plain machine screws as fitted at the moment. Or should they?
Rear view. Looking good. Front stay bolt hole looks stretched/bodged.
Side stand, first trial fit. Needs the primary case to locate the short end of the spring, but coming on. Not sure I would want to use it though, looks rather wobbly.
Here's my triumphant shot of the rear stand spring - all working now. I have scraped up the huge pile of pennies from the shed floor, released from the spring when I used it the first time.

Battery Carrier

Amelia is completely devoid of any battery carrying facilities. She should have the big Lucas GU11E battery that appeared in 1951.

Thanks to Brenton Roy & Guy Rayner of the AOMCC for these images of what I need to make, find, swap or a combination of the three:

What I need is the dimensions of this part. Anyone measure one for me?
Underside, showing the screws that clamp it to the primary cases.
Here is the strap, best English chrome plate, available from Acme Stainless in a rather more appropriate material.
And here is the large battery carrier, in position on Guy's 4G. As he says, his bike should have the small battery. Alas I don't have one to swap...

As a postscript to this request, the ever helpful Brenton sent me this:
We'll be making one of those later.

Monday, 14 May 2012

Welding under way

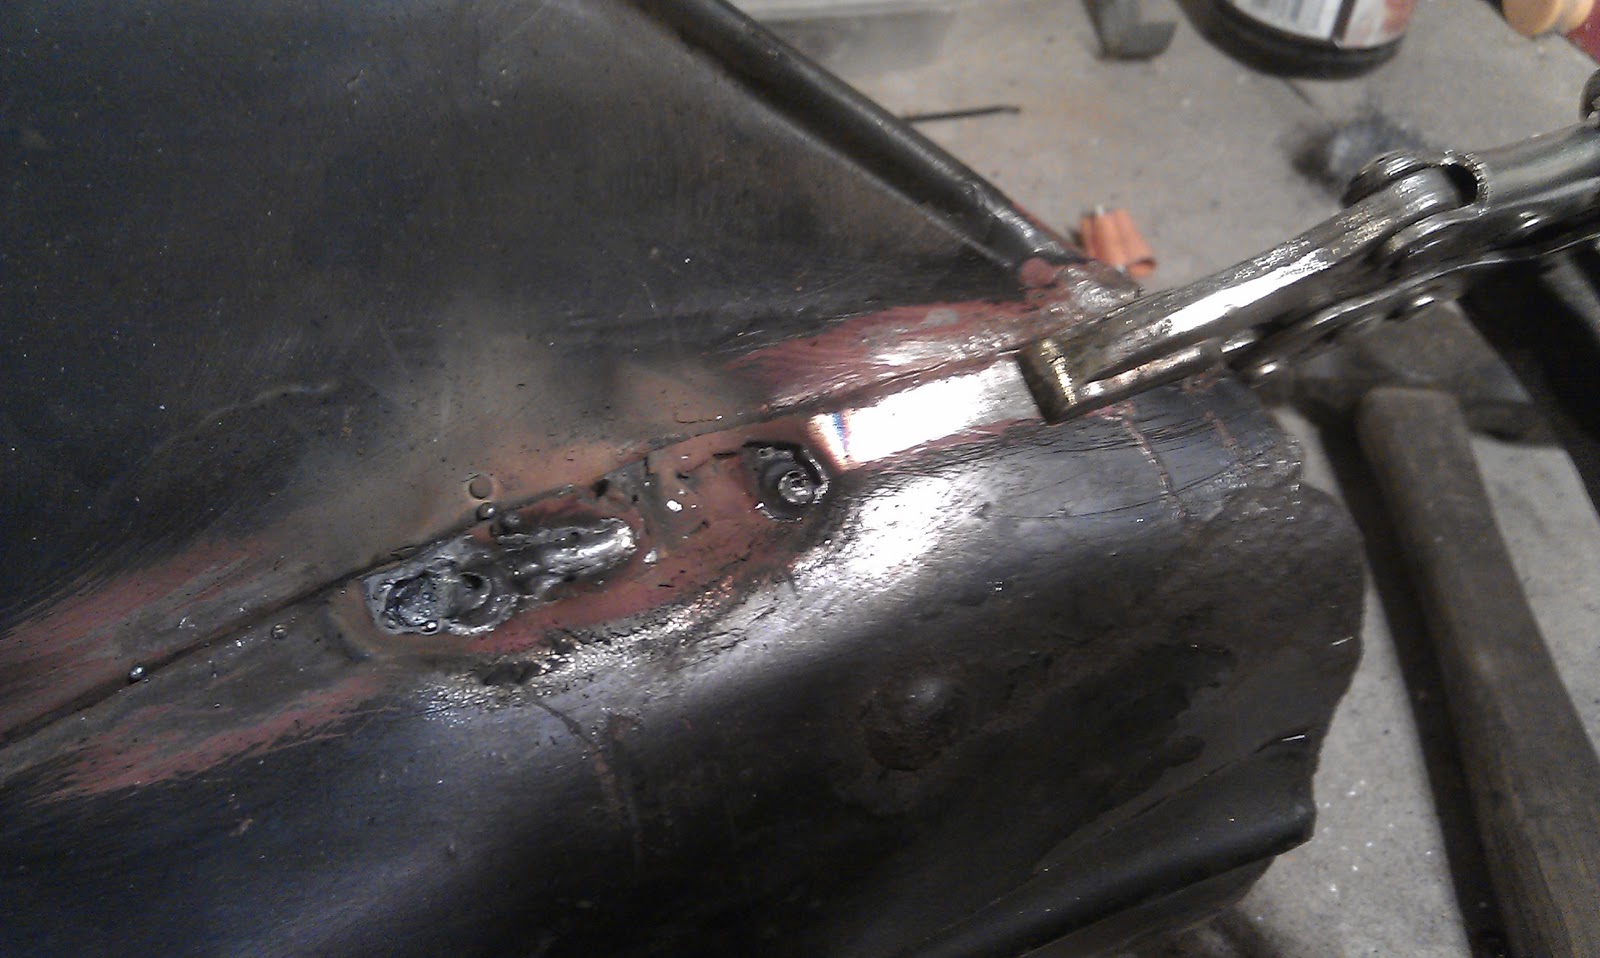
And so onto the repair of the front mudguard:

Here's a section on the offside, welding up the rusted folded seam
Here's the fatigue fracture in the mounting bracket, cleaned of paint but not ready for welding.
 Here's the offside at the bottom of the flare, burning away as fast as I can weld it.
And here is the long rusted seam on the near side, all repaired.
Well almost. Run out of gas.

Hopefully more tomorrow if I can get to MachineMart Norwich.

Back to the weld shop...

With the rear mudguard mounted and the forks in place, it's time to look at the front.

You haven't seen the mudguard I bought from eBay, but it is an original Ariel guard from I think 1953. Luckily it came with the correct aluminium number plate but, like the rear guard it is full of holes.

Here are some 'before' pictures:

There is a nice brass dealer plate. This bike was originally supplied  to Marcel Hallet, of Canterbury.
As usual, we have a fatigue fracture around the mounting thoughtfully chalked in by the eBay seller.
Then a series of pictures showing how the folded seam has rusted out from the inside
This is the worst of it. About 8" of the seam on the nearside has parted company. We will either weld this up & fill with weld or patch from the inside. The side panels are quite sound and will form a strong base to weld to.
And, matching fatigue fracture on the other side.

Time to break out the MIG set again!

Monday, 7 May 2012

No blogging...

Apologies to my avid readers for not providing any updates yet this month...

I have been in the USA for work, and my poor Bantam has decided it no longer likes it's crankshaft. I guess the SQ 4 engine won't be on the bench next...

I have however, courtesy of some helpful hints from the AOMCC web site, managed to fit the rear stand spring!


Monday, 30 April 2012

It Moves!

And here she is - a rolling motorcycle! You can see if you look carefully that the mudguard is not fitted to the L stays at the rear - the radius is slightly too large and I will have to cut & reweld.

I won't do that however until I am convinced that the front mounts are in the right place, and I need the proper spacers for that.

Tuesday, 10 April 2012

Tin bashing...

So remember planishing pieces of copper at school? making bowls & beakers surrounded by 30 other 14 year olds? well it continues in my cellar workshop, courtesy of some sheet from a local fabricator, some cheap panel beating hammers and a lump of sapele with a scoop out of it.


The plan was to make some repair panels to bridge and reinforce the cracks, then to butt weld the original material so that when the original metal, since it was so thin inevitably burn through there would be some meat behind it.

Here is the underside of the rear mudguard, with the first two patches in place. I'm quite pleased with the quality of the welds though this work is a graphic illustration of why welders are coded for the position of the weld - the horizontal welds with the torch held above the weld are of much better quality than the vertical ones! That mole grip is doing double duty, holding the patch in place and providing the earth connection.

Here is the topside of the same patches.

Good penetration all the way around and no holes! Below this you can see two large holes which had been used to mount the spring pillion. The two bolt heads above are, I guess, the other two pillion seat holes. I'll be leaving these until I am sure that I don't need them!

On to the outside of the mudguard. This is a small hole which appears to have been caused by the chain guard chafing on the mudguard. Looks ugly - I didn't really have the orientation right when I tried to weld this up. Nothing the flap wheel can't sort out.


And here is the outside of the area around the upper L-stay mount, where the pillion seat mounts were. Those two holes are uppermost in the picture, below that are the cracks which have now been welded up. The mudguard is now very stiff, compared to the wet rag it was before. 


Here is another shot of the same zone, in its more natural orientation.

Lastly, this is the area around where the chainguard fits. There was a long crack on a fold here, where residual stresses in the material would have led to increased levels of corrosion. This was backed up with a narrow strip on the inside with continuous peripheral fillet welds, with a continuous seam weld on the outside. 

So that is it. the next step is to fit it to the bike, and for that I need a delivery from Mike Peters at www.polished-stainless.com, and the special studs for the L stays from Drags.

Saturday, 7 April 2012

Building up

So, a few shots of half an hour's work, putting in the yokes:

Bottom bearing greased...


Steering damper parts all assembled. All from Drags bar the star washer and centre stem which are original


Top bearing greased


Bottom yoke in & bearings adjusted.


On to more serious work...

So, a while ago I promised to share the contents of some cool eBay finds...

These were a set of mudguards and chainguards I found in Doncaster, which were won at a very reasonable price and duly arrived. They were wellmarked and  photographed by the seller, and I knew I was in for some serious welding.

Here is the worst of the rear guard:


Here's one of the upper L-stay lugs, broken off and thoughtfully retained by the vendor:


So essentially we have a maze of cracks in each of the lugs for the L-stay at the top of the mudguard, along with two large holes left by a pillion seat fitted in the dim & distant past.

The metal is also very thin in these areas, badly pitted by moisture retained by a seat bracket that was still fitted when I got the parts.

There are also cracks at each of the lifting handle lugs. and a worn hole where (I guess) the chain guard rubs against the mud guard.
Unknown at the time of taking these pictures was the long crack above the chainguard recess.

A while ago I realised that the number plate that I had was a later BSA pattern, repaired it with the trusty MIG welder and sold it on eBay, to further fund the Ariel rebuild.

Of course, the holes for this are not the same as the ones I need and will have to be filled, along with the pillion seat holes and any others that I find I don't need - but then, this is the main purpose of the non-cosmetic Phase 1 build.

I've mentioned the fantastic AOMCC forum once or twice. Yet again Brenton Roy comes to the rescue with some photos of his Dad's '51 SQ4:

Here are the pillion mounts on Roy's bike's rear mudguard, looking down to the front mudguard mounts:
Front mudguard mounts in more detail. My mudguard has the front stay inside the mudguard bade.
Here is the routing for the rear light cable - presumably that is the end of the ignition coil. I'm not sure where mine fits yet.
And here is the whole rear end. I'm not fitting a pillion seat, though I am going to repair the holes left by the previous one, and reinforce the mudguard at those points in case I change my mind. That way I will have powder-coated a mudguard that is strong enough to be re-drilled for a seat.

This is what it is supposed to look like. You can see the L shaped stay and the lifting handle: