Saturday, 25 February 2017

Chained for Safety

Various bits of my W/NG are supposed to be chained in place to avoid loss in the field, like the fuel and oil caps and the toolbox lid. Having looked around for the right sort of chain, and not found anything suitable I set about making some.

I figured that I could weave figure-8s from brass wire and solder them together, so I made a hairpin jig out of some 4 mm rod, thinking this would give me a nominally 1/4" chain by the time the loops had sprung apart:


Holding this in the vice, with enough of the legs protruding for me to make a couple of links, I set about weaving:


And some more, pushing down and extending the legs as I went:


When I had made 5 links, and pushing them links down the legs was getting difficult, I stopped and cut the ends of the links. I cut twice on each link, to make sure the loops were equal and that the ends butted down onto the middle wire. I used a regular hacksaw for the prototype:


Here's how they look:


I wanted each link to have a right angle twist, so I twisted them with pliers:


Next job, hook them together and close them up


Make a lot more...


And here's the petrol cap chained in:


Here's the oil tank cap with its original chain, sent to me by JΓΈrgen Andersen of the AOMCC, all the way from Denmark:


Friday, 24 February 2017

More TIG Welding

You might have seen my recent post on my first attempts at TIG. This is the second lesson, repeating the first and adding some specific tasks related to the real welding jobs immediately at hand. To this end, I cut a piece of 1.0 mm cold rolled mild steel sheet, about 5" x 8", and cut three 1" strips so that I ended up with a 5" square and three 1" strips. I cleaned the metal with a wire brush in the bench grinder.

I set the machine up with pure argon shielding at 3-5 l/min; I used a 1.6 mm red band tungsten electrode ground in a long taper; a number 4 ceramic and a welding current of 30-50 Amps. Tungsten stick-out was about 3 mm in most cases.

I planned to do a lap weld, a butt weld, a fillet weld with thin to thin material and with thick to thin material, and to plug some holes. All these welds were to be autogenous - no filler rod was used.

Lap Weld

This is a simple lap weld, with two sheets of 1.0 mm; welding current was 30 Amps. The material was cleaned much more thoroughly this time, and the results are much more pleasing:


Plug Welds

I wanted to test the TIG set on some plug welds: I have to reduce the size of a hole in one of the toolbox lids which is 1.0 mm thick, so this is an attempt to close a hole prior to redrilling. The back of these plugs is the same 1.0 mm sheet that I used for the lap weld.

Again the welder is set to 30 Amps; this is possible a little high as there is some burning here.


This pictures shows good penetration from the lap joint. In the lap joint picture, you can see the penetration from these welds - not quite as good as the lap joint penetration.

Butt Joint

This is a 1.0 mm autogenous butt joint, welder set to 30 Amps. The fit here was much better than the previous attempt, and this shows in the quality of the weld:


Penetration is mostly good:


Fillet Welds

This is a 1.0 mm to 1.0 mm fillet joint. Fit as good for most of the length, worse at the left hand end where I have blown that hole:


Penetration is good too:


Thick to Thin Fillet

This is a 2 mm wall tube fillet welded to a 1.0 mm sheet. Not so successful, but this is more down to access than welding technique.


Wednesday, 22 February 2017

Toolbox Knobs

Someone posted on the forum about toolbox knobs. Here are some pictures from my 1951 SQ4:


Saturday, 18 February 2017

TIG Welding

I do a lot of sheet metal work, working on my bikes; I also run a solar powered workshop. Putting the two together lead me to looking at a way of welding & using less power - with better control of welding current. My answer was to buy a 180 Amp inverter type TIG welder and teach myself to use it.

After playing around with the machine for a while (enough to consume 110 litres of Argon, to be exact) I decided to structure my practice a bit more and try and focus on problems as they arose. To this end, I cut a piece of 1.5 mm cold rolled mild steel sheet, about 5" x 8", and cut three 1" strips so that I ended up with a 5" square and three 1" strips. I cleaned the metal with a wire brush in the bench grinder.

I set the machine up with pure argon shielding at 3-5 l/min; I used a 1.6 mm red band tungsten electrode ground in a long taper; a number 4 ceramic and a welding current of 50 Amps. Tungsten stick-out was about 3 mm in most cases.

I planned to do a lap weld, a butt weld, an outside corner weld and a fillet weld. All these welds were to be autogenous - no filler rod was used.

Lap Weld

The first weld I tried was a lap joint, and it did not turn out too well. There was fine sparking during welding and a lot of porosity in the weld. The metal was not cleaned well enough, and I think that is why the welds are porous:


They are however very strong.

Outside Corner

The second was an outside corner joint. These are cut edges, cleaned for a second time on the wire wheel. The weld was much more successful and I think shows that my previous attempts were failing due to poor cleaning.


Butt Weld

This is an autogenous butt weld, with a gap of up to 1 mm. It's pretty poor - I blew through in several places though it is quite strong


The penetration is poor:


Fillet Weld

The fillet was the last weld I tried today, and suffered from poor torch setup and a joint that was not supported well enough - I tacked the weld at one end (on the extreme right) and tried to tack it at the other end, but the two parts were not close enough - the left of the weld shows a lot of blow through.

I balled the tungsten at one point and had to regrind - when I did, I increased the stick-out to about 7 mm and was able to make those neat little fillets to the right.


Penetration looks OK


All in all, a satisfactory practice session. Next I will do the same thing again, adjusting for my experience this time.

W/NG progress

Progress on the W/NG is slowing down as I near completion, so much so that I need to write it down to get a handle on where I am...

  1. Engine - running, but no other work done 
  2. Ignition - Magneto working; HT system overhauled
  3. Fuel - Carburetter float bowl replaced & fuel lines made
  4. Exhaust - exhaust clamp remade but needs replacing with a bigger one
  5. Charging - dynamo rebuilt; battery replaced; regulator not working
  6. Electrics & instruments  - made a new wiring harness; replaced the missing speedo and made the brackets. The horn doesn't work - it clicks, so the switch & supply is OK - it needs cleaning & adjusting.
  7. Cycle parts - relined both brakes; brake pedal stop is missing & I need to make a new one; lower chain guard is missing; I have a plunger chain guard but need to modify the brackets for a rigid frame
  8. Tool boxes - both tool boxes knobs replaced but the female threads in the box need repair as both have been drilled for M8.
  9. Lubrication - sludge trap needs cleaning
I'm sure there is more, but for now that will sum it up. There are a few jobs (chainguard, brake pedal stop, tool boxes) that need welding. More of that, and my new TIG welder, in the next post.

Missing pedal stop

Friday, 17 February 2017

Gear Indicator

Burman gearboxes fitted to bikes of the 1950's are often provided with a gear position indicator, or neutral indicator which is always handy as there may be more than one neutral position in the box... (!)

The indicator is nothing fancy, no dial on the headlamp nacelle or coloured lamp to wink at you; it's a simple pointer or or rotating bobbin with a fixed indicator on the kickstart case. The CP gearbox fitted to the W/NG has a pointer made from sheet steel fixed to the gearbox cover, with a moving pointer, also sheet steel, fixed to the gearbox camshaft. When the two pointers align, you have found neutral in its normal position between 1st and 2nd gear. It will also tell you if you have found the other neutral that can appear in these boxes, between 2nd and 3rd when the bike is going nowhere and the clutch is engaged, and the gear indicator is pointing forwards...

The W/NG gear indicator was incomplete - it had the fixed pointer, but the moving one was missing. As found:


With an appeal on the AOMCC forum, I soon found what was supposed to be fitted to W/NGs of this era. A kind member, Ian Scott, found an original indicator in 'patinated' condition that was just right:


This was easily fitted. The nut shown here retaining the indicator should, according to the factory parts list be a domed nut; this one has obviously been there for years and I have no intention of changing it:


Looks the part doesn't it!

Monday, 13 February 2017

Almost ready for the road

The spring is on the way and the old war-horse is about ready for the DVLA age-related number ritual.

The bike has never been registered in the UK, as it was imported from Italy only last year. We need to arrange an age related registration based on a dating certificate from the AOMCC.

The bike has been inspected by a local club member, and I have the certificate from the Dating Officer.

Then we need to fill in the V55/5, and provide two photographs, one of each side of the bike plus the obligatory fee:


This usually takes about 10 days.

Thursday, 12 January 2017

New Blog: Classic Bike Tech

A large part of the enjoyment I get from bikes & biking is from the technology. It’s in the blood – I’ve enjoyed 35 years in engineering so far both professionally and in my private life.

My new blog describes the technology behind the machine and old bikes in general – a basic 'how it works' – covering the engine, gearbox, cycle parts, and fuel & electrical systems. 

The blog is at http://classicbiketech.blogspot.co.uk/

It's based initially around Britain's favourite two-stroke learner bike, the BSA Bantam. I'll add to it as I come up with technical stuff that might be useful to others.

I hope you enjoy it.


Sunday, 8 January 2017

Ariel Lower Chainguards

I have two bikes with missing lower chainguards, and two lower chain guards on the shelves. Here they are:


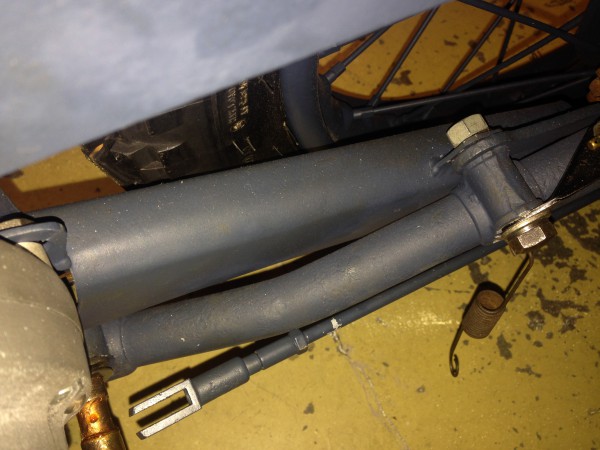
The two bikes are my W/NG and my Anstey SQ4. I'm hoping to make a chainguard to fit each bike out of these two but I don't think either of these is a straight fit on either bike. I believe that the upper of the two in the pictures is for an Anstey frame single, and Paul Jameson of the AOMCC has confirmed the lower is from a rigid SQ4.

W/NG Chainguard

One of them looks like it is close to a fit for the W/NG, at the front:


Clearly the rear bracket is in completely the wrong place:


If we change the rear mount to suit the rigid frame, we can trial fit the front more effectively. Right now, the guard looks like it will foul the chain oiler so perhaps it will need a little adjustment. We'll see.

Thanks to Vincent van Ginneke (again) we know what it is supposed to look like:


So to get started, we will use the cut off wheel in the Dremel to make a tidy job of removing the rear bracket from the anstey frame chainguard:


We'll use this mount  to convert the SQ4 chainguard, or perhaps to make a completely new one:


Using the rigid frame chainguard as a guide, we can mark the position of the rear bracket with chalk:


Below the frame, we can see it sitting in the right place:


So off we go. First job is to clean up the old mounting position with the wire brush & bench grinder:


Then we cut & drill a piece of 1/8" sheet to make the new top mount. It seems I forgot to take a picture, but here it is held in place with a magnet and mounted in the frame:


Now TIG welded in place:


This converted Anstey frame chainguard does not fit too well at the front - the guard fits higher up in an Anstey frame which provides more clearance at the front, as we can see in Vincent's picture


Marked up:


Trimmed with the shears and refitted:


Square Four Chainguard


The other chainguard is for a Square Four, but a rigid model which means the rear bracket is in the wrong place, or rather, it does not reach the mounting bolt. The width of the shock absorbers increase the distance from the frame to the chain run, and necessitate a wider bracket on the lower chainguard like the one shown fitted to the W/NG. We can see here that the chainguard will fit around the sprocket and is more or less aligned with the mounting bolt, along the length of the bike:


We can see here that the length is about right, as it looks like it will align with both mountings:


And here, that the front mounting is correct and will fit. We can see also that the chain oil can still reach the chain:


This story is continued in https://ariel-square-four....sq4-chainguard.