
I bought this Huntmaster kit on eBay in July 2013 - I was part way through assembling the Square Four, and the acquisition of the W/NG was still three years away but the Ariel bug was biting hard - and still is; long after buying the first one I now have four and am the Ariel Owner's Motorcycle Club's Machine Registrar, providing dating certificates for other owners. It was one of those 'itchy mouse finger' purchases and I got it for £1500. It was complete and original, bar a couple of bits.

It arrived in the trailer at my workshop one sunny afternoon and I spent a few happy hours stashing it in the loft and in various boxes in which it stayed for a long time. I spent the next few years gathering parts including this Burgess air filter, an eBay find for which I paid an exorbitant amount which is not going to be revealed here!

There wasn't actually very much missing apart from this air filter and a horn but as I learnt about swinging arm Ariels I realised I would need the fully enclosed rear chain case which would have been a standard fitment in 1958.

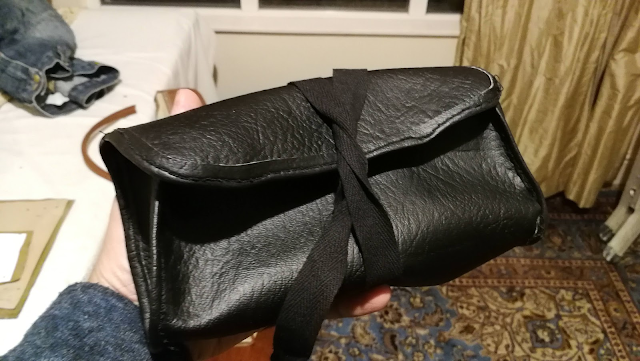
In 2016 I was making a lot of tool rolls, and I put the sewing machine through hell to make this one for the FH. The main issue of course is the fact that it's made from PVC and the machine struggles to get a needle through that sticky material.
I sold the Bantam in the September of 2018 and wrote a piece on my motorcycle collection policy describing how I would have a machine on the bench in restoration, a fast road machine for riding, and something else to plod around the country lanes. By this time, the W/NG had arrived and the FH fulfilled the role of restoration project.
I started the engine strip in December 2018.

It was a 1955 engine, complete, and I had the original 1958 crankcases. The barrels were in good shape but the big ends were toast; my plan was to build the engine into the original cases so that I would have a matching numbers bike - but of course the original engine would have had the large bearing crankshaft with associated connecting rods. Eventually I found a replacement crankshaft and rods from Draganfly.
Since this was my first swinging arm Ariel and I had little idea of how it went together, I planned to do a dry build. The frame went onto the bench in January 2019.

At the time, AOMCC member Steve was using his Huntmaster for work and regularly updated us on the club forum with his weekly travels. Steve was travelling up and down the country using only his Huntmaster, regularly traversing the M25. One of the things Steve had done to modify his machine was to fit the swinging arm with Oilite bushes in place of the original rubber Silentbloc type bushes. Steve helped me with a suitable spindle that was too big to make on my own lathe and I machined the bushes to fit myself. I spent a lot of time siting an oil filter, eventually locating it beneath the swinging arm, forward of the rear wheel and under the mudguard. Long BSA A10 oil pipes were used to connect it up.
The engine rebuild, putting new rods and a crankshaft into the original cases started in March 2019; in April I started the long process of rebuilding the rusty rear mudguard. That job lasted a long time mainly because it was being constantly interrupted by a number of visiting machines. A Honda QR50 arrived in a million pieces all covered in red poster paint in July 2019, followed by a CX500 in September 2019. A guy from the VMCC contacted me to establish a price for his 1930 Ariel Model A in July 2020 and somehow I ended up buying it myself. The W/NG was in regular use that summer and revealed that it was using a lot of oil and making a lot of noise. It had an engine rebuild in September 2020. The QR was finished in May 2021 and went to amuse the grandchildren.
I eventually found a fully enclosed rear chain case in July 2021, which was yet another large piece of tin to knock around and get in shape on the ever-growing dry build project.

I fitted the empty engine cases to the frame on the bench in the Winter of 2021:

With the cases, barrel and head in place, there were lots of workfaces and areas where I could fit new parts including the side stand, carburetter, tail light plinth and front stand. By now it was Spring 2022, and whilst you might think these are all easy bits to fit you have to remember that some of them were made from scratch. The side stand was adapted from a Triumph one that came with the FH kit, and the front stand was way too short. I wasn't planning on a cheque book rebuild here - I wanted to make do with the bits that I had and make them look and behave like genuine Ariel parts.


After much deliberation over the years I had decided there were enough maroon Huntmasters around and took the decision to ask Damon the painter to finish the bike in the export paint colours, just like Buddy Holly's cyclone.
The painting was finished in October 2023 and looked marvellous. Damon and I had a long discussion about how we could reduce the cost of the paintwork and ended up reducing the level of filling and flatting on areas that nobody can ever see.

Damon had protected all the painted items with bubble wrap which had to come off as soon as I got them home as the paint would be curing for some time - it's two-pack by the way. The frame went straight back on the bench out of the back of the truck and various parts were hung on it over the next couple of days.
The forks were rebuilt early on in the process with new stanchions, progressive springs and new bushes. The seal carriers were a bit of a challenge - I bought a set from eBay from some supplier or other and found that the threads in one carrier were out of square and wouldn't go on to the slider properly. They were replaced with a set of Hawker carriers from Draganfly which are superb. The rear shocks are brand new from NJB and are a little longer than standard.

With most of the painted parts on the bench, indeed fitted back into the frame, I finished the bottom end of the engine with new camshaft bushes, camshaft, main bearings and shells in December 2023. Incidentally, with the exception of the wheel spindles which are original, all the fasteners are stainless and the vast majority are from Acme - others I made myself. All the rubber parts are from Jeff Hunter Engineering.

Fortunately I'd made the decision that I wouldn't touch the wheels until the end so that I could keep the chassis rolling. Running the Square Four over the winter revealed a horrible clattering noise coming from the gearbox and consequently the winter of 2023-2024 was devoted to giving the SQ4 a gearbox rebuild. The QR50 came back to the workshop as well for a much needed service, including some carburettor repairs and re-jetting as the kids had identified that it was hard to start and wasn't very fast. This was perfectly okay when it was new to them and they weren't used to it, but a little while later frustration showed!

There wasn't much progress through the summer, apart from machining some stems for some cheap eBay indicators and refurbishing the Square Four fuel tank but build started in earnest in September 2024. The engine got a new set of cam followers as I decided that cutting corners on what was rapidly becoming a brand new bike was rather foolish; it got a new clutch centre, valves, guides, a rebuilt ATD and I fitted the magneto that Tony Cooper had rebuilt years earlier.


November 2024 was all about wiring up - I built a harness from scratch with extra earth wires to the headlamp, tail lamp and engine and of course the indicator wiring was built in as well. I took the indicator feed from the ammeter and mounted the indicator relay in the headlamp nacelle.

The indicators were finally fitted in November along with smaller jobs like the ignition timing, tuning the horn, setting up the tappets and connecting the HT leads. The pillion footrests also went on and I made all the control cables.

I'd polished up the kickstart case and refitted that once I determined that the clutch was working properly - there was a lot of sludge in the hole up the centre of the main shaft where the pushrod goes which had to be cleaned out. I got the speedometer refurbished by Russell at Chronometrics in Nottingham, fitted the head steadies, made some bolts for the exhaust clamps, and fitted a new V-Reg 2 voltage regulator from AO Services in Watton. The dynamo needed repolarizing but we were getting close to starting the engine for the first time. I hadn't fitted the fuel tank or made a fuel line so I used an auxiliary tank to start the engine started for the first time in mid December - it ran quite roughly until I realised that the carburettor, which had come out of the box of bits didn't have a needle - you would have thought I'd have noticed that when I fitted the cables but these are the perils of a long-term project.

The brakes were appalling and didn't really respond to cleaning the drums and scuffing up the shoes but I had achieved what I wanted - to get the engine running and the bike riding before starting on the wheels. There were a few more small jobs to do like fitting the air filter, the fork drain plugs and filling the forks before starting on the wheels.
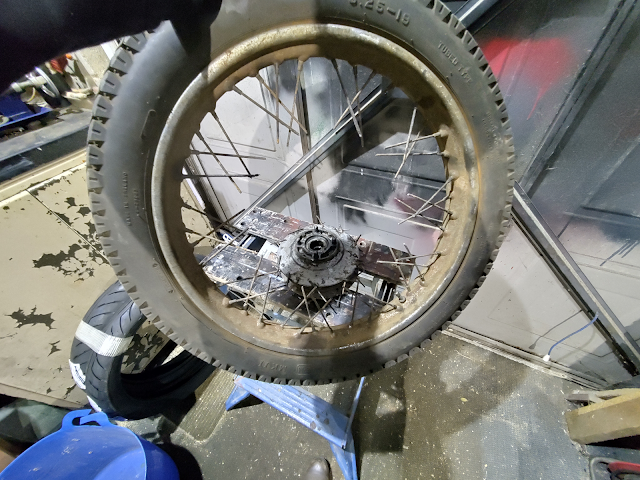
I started stripping the back wheel in February, cutting through the spokes with bolt cutters. These wheels are quite simple in that the front and rear spoke patterns are identical and there are only two types of spoke in each wheel. With the rims cut away and the spoke holes cleaned I polished both the hubs and the brake plates before starting on the wheel lacing.

I selected Avon Roadrider Mark 2 tyres that I have fitted to the Square Four and that I fitted to the CX500 some years back. They are an excellent tyre but are generally only available in metric sizes now. I'd intended to fit these myself but unfortunately managed to nick one of the tubes on fitting the rear tyre and realised that I was only punishing myself - I took them to SPS Services in Horsford to get them professionally fitted and balanced. As I had had little success getting the brakes to improve with abrasive paper and adjustment I removed the shoes and sent them to Villiers Services for re-lining. Despite advice to get the linings glued and riveted from folk in the owners club, Villiers indicated they weren't willing to fit rivets as they had had too much experience with cracking around the rivet holes in Ariel brake shoes.
Almost twelve years later, it emerged from the workshop at the end of March 2025.

I am delighted with how it appears and how it runs and was keen to start shaking down. To date it's done around 35 miles (I'm writing this in mid April 2025) and the brakes are improving all the time. It's had a few issues, one had me filling the tank up one day only to find a persistent drip from a pinhole the next day which required emptying, drying and filling with a suitable sealant; a short trip along the coast starting with a slightly disgruntled idle ended, arriving home, running on one cylinder due to the points closing up!

I think this is just down to the fibre heel bedding in as resetting the points to the proper gap had it starting with the merest tickle on the kickstart.
What a wonderful story that epitomizes the whole essence of owning a classic vehicle. Having just bought my own 1957 Huntsman as a one piece fully assembled kit I hope that I will be able to have the same level of fulfillment and satisfaction that you have obtained
ReplyDelete