Monday 31 January 2022

Tools - new connector for the FH tyre inflator

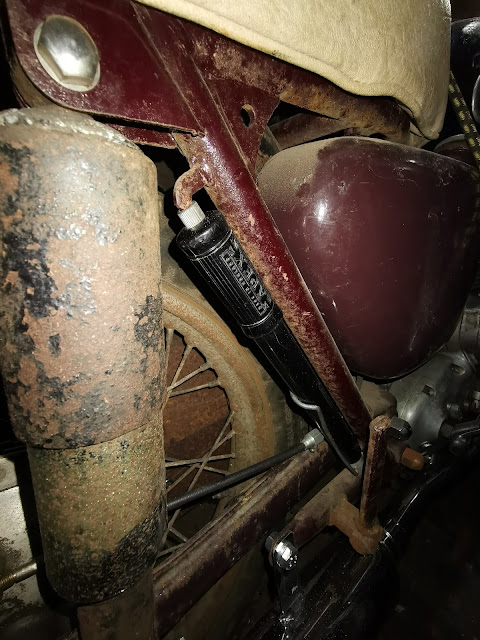
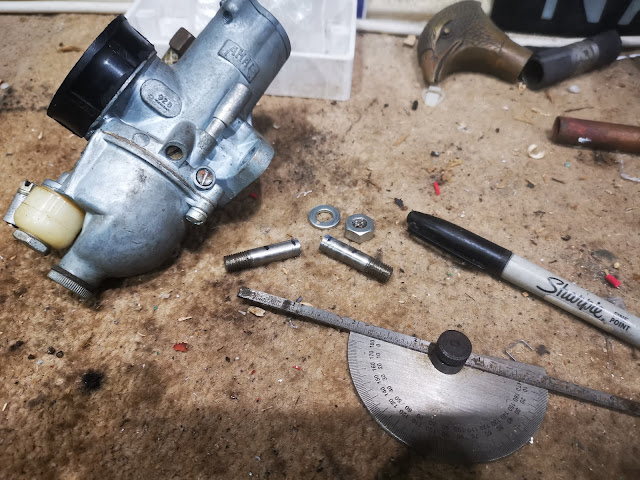
 Some of you might have seen my post on Thapex tyre pumps - click here, and the post on making pump washers. As I said before, pumps bought from eBay, autojumbles and car boot sales arrive in unpredictable condition, cracked, with missing or tired washers and almost invariably without their connectors.

This article is about making those connectors, but first a word on terminology.

While researching these things, and looking for a longer pump hose that I could buy, I came to realise that the cycling world doesn't recognise the word 'hose' in connection with cycle pumps - indeed, cycle pumps are a bit passé these days having disappeared in favour of CO2 powered inflators. No - the cycling world seems to use the word 'connector'.

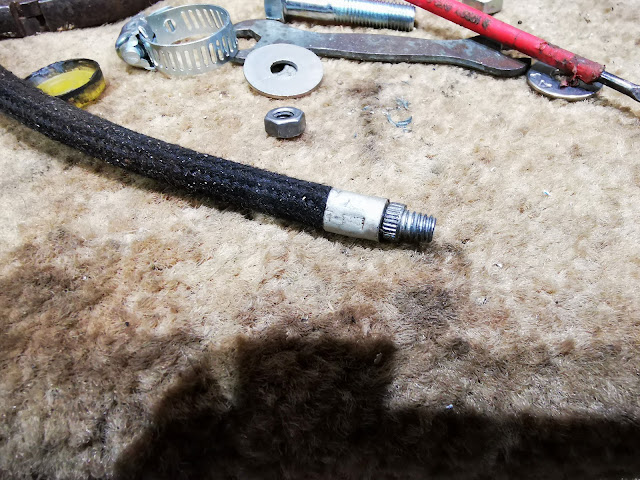
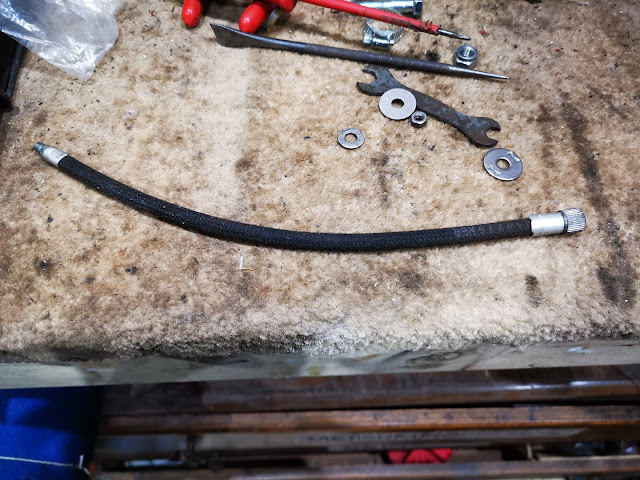
So, here we go. First we need a bit of hose - not too difficult, you can buy 1/4" braided fuel hose on eBay in various sizes - I bought 500 mm of 6.5 x 3mm black cotton braided hose for the princely sum of £2.68.

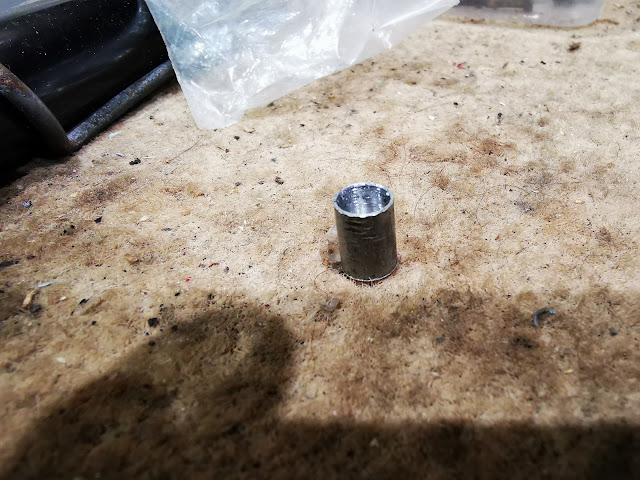
The difficult thing is always the ferrules, whether it is for a push bike or a motorcycle fuel line. They are either hideously expensive or just not available, so along comes another skip raid. Some time in the past I had acquired an aluminium cycle rack, the kind you put your shopping on and cycle home from town. It was full of weld but I had cut it up and stored it in my metal stock bin. It was 8mm OD. It machined well enough to make a couple of ferrules very easily - that is a 7 mm hole in the middle, they are 10 mm long and the 7 mm bore stops 1 mm short of the end. The end is drilled through 4 mm.


The aluminium bar gave me two replacement cooker knobs as well:


The ferrules fit nicely over the braiding:


The crimping was done in the three jaw chuck on the lathe:


And the completed article. The length wants to be as long as possible but is defined by how much you can store in the pump:


Here's the complete thing on the bike:


Sunday 30 January 2022

Tools again - New washer for the FH tyre inflator

Some of you might have seen my post on Thapex tyre pumps - click here. As you might expect, pumps bought from eBay, autojumbles and car boot sales arrive in unpredictable condition, cracked, missing or tired washers and almost invariably without their connectors.

Some while back, I bought a nice new washer purporting to fit one of my pumps and it sat on my desk for a number of years until I came to fit it - which of course it didn't. It's about 1 mm too small.


So, time to roll out a lost art shown to me by my grandfather Leslie, who was a serious cyclist - he worked at the docks during the war, and having relocated from West Ham to Ewell had a 18 mile commute to work, which he did twice each day on his bicycle. What you do is this:

Start with a piece of leather, in my case the cuff from an old Jalatte safety boot. For a 7/8" pump, you will want a disc of about 30 mm diameter which you can cut with scissors, or however you want.


Next, punch a hole in the middle. The washer screw in a Thapex pump is 2BA, so a 5 mm punch will do. Next, we are going to form the leather into a cup; before we do that we are going to reduce the thickness of the leather around the edge, a process called 'skiving'. You use a very sharp - no, very, very sharp knife to slice a layer off the surface, reducing the thickness at the edge to perhaps half what it was (the boot was about 2.4 mm thick).


Fix the retaining washer in place with the screw and add a second washer on the back - I used an M5 repair washer on the back and an M8 washer under the screw head, to support the flat part of the washer at the right diameter - all clamped tight with a 2BA nut. Drop the whole lot in a cup of water for a few hours until it is soaked through.


This is a 22mm Jubilee clip - the inside diameter it set to match the inside diameter of the pump. I have pushed the wet washer into the clip to form the cupped shape. Make sure it is square and leave it to dry out.


And that's it - next day, we have one perfect cup washer. I smear the washers in neat's foot oil and assemble it straight away, before it has a chance to return to it's original shape.

Here it is installed:


Wednesday 19 January 2022

FH Dry Build - Timing Cases

 Assembling the timing side, for the purposes of this dry build is a simple matter of cleaning the cases and clearing the threads.


There's some damage to the inner timing cover around the ATD, which I have asked the FaceBook panel of experts about:


The inner goes in place once I have cleaned the locating dowels of surface rust.


With clean thread and clean clearance holes, the outer goes on easily:

Monday 10 January 2022

FH Dry Build - tail light plinth

 The FH, along with other swinging arm Ariels of the period has an unusual feature used to mount the tail light vertically - a little pressed steel plinth, part number 5611-55. Drags do a very nice replica for about £15, but they have been out of stock for a while and it is an easy thing to make.

Starting with the Lucas 564 rear lamp, we need a calliper, some plastic holes, a piece of card and a scalpel.


I used the holes  and the calliper to mark out three holes in the card - one for the bulb holder and two for the mounting bolts. Then I can fit the lamp to the card and draw around it:


Next, I can develop the part around the shape of the lamp: 


Cut it out with the scalpel, using a wad punch for the holes if you have one of a suitable size. In my case, I punched the smaller holes and used a swivelling scalpel for the larger one:


Next, make some nice sharp folds with a ruler and use staples or a glue gun to fix the edges which will eventually be welded:


Now, we can do a test fit and trim the pattern to allow the lamp to sit vertically above the number plate:

With the part to the shape we want, we can undo the staples and stick the pattern to a suitable steel sheet. It's that old bread bin again, that gave us the air filter for the QR50:


I used the bandsaw to cut it out, but you can use a hacksaw, shears or whatever you have. The edges are cleaned and deburred with a variety of files.


Folding is quite straightforward using just the vice and my trusty bit of copper bar. With folding completed, the next step is to weld up the joints - most of which came together to weld autogenously. The linisher springs into action to clean it up:


After a couple of trial fits and a bit more time on the linisher, I treated the plinth to a bit of UPol etch primer before fitting it to the bike - temporarily, with a few magnets:


I think it looks fine.

Sunday 9 January 2022

FH Dry Build - Rear Brake Pedal Pivot

Assembling the FERC has revealed another little challenge - the brake pedal pivot will not fit without hitting the lower section of the FERC. This one, which came with the kit is identical to the one fitted to my 1951 Square Four and is 96.5 mm long:


AOMCC member Dean Waters provided this picture along with the information that his pivot was 92.5 mm long. Ariel did not change the part number of this component (which is 5412-51), but since it will function on non-FERC machines just as well in the shorter form, there was no need to change the part number.

You can see that Dean's is still very close to the FERC but does not touch it:


It's a simple matter to turn a few millimetres off in the lathe.


Friday 7 January 2022

FH Dry Build - that sidestand again

With the exhaust in place, I can look again at the sidestand and see where the 'foot finder' pedal needs to be, before I weld it on. I start with the sidestand fitted and the pedal held in place with a tool makers clamp, so I had some idea of where to weld it such that it wouldn't hit the exhaust.

I had the TIG set to 45 A to weld it all around. It's quite a big weld for my set up, but as long as I didn't drag the arc out it was fine - of course, with a fillet, drawing the arc out is what I always do to keep the tungsten out of the weld pool!

I tweaked the pedal a bit once the weld was done to get it in the right place...

I haven't used the stand yet, but it looks like the pedal will clear the ground:


Wednesday 5 January 2022

FH Dry Build - Carburetter

The FH kit arrived all those years ago with a brand new Amal Mk1 Concentric, a 928 and a carburetter that I have no experience with whatever, but I am not going to delve into that now. Today I am only concerned with mounting it to the head.

The standard carburetter for the FH is a Monobloc, retained with two 3/4" hexagon bolts with 5/16" CEI threads. All well and good, but the concentric has a rather large tickler button which prevents you getting the bolts in...


No matter, I can make a couple of studs on the lathe. These will be 5/16" CEI both ends, about 1 1/16" long with about 3/16" plain in the middle. Here they are, part way through manufacture:


I bought a new alloy bell mouth, which is very nice. The rubber fits neatly inside it:


The next problem is that either the carb thread or the bell mouth thread is not to size, or is damaged. This is as far as it will screw on: