Showing posts with label switch. Show all posts

Sunday, 5 October 2025

W/NG - Small Jobs

 A bit of workshop time this afternoon gave me the opportunity to complete some long-standing jobs on the W/NG.

This first is quite a simple one. There's been a leak from the rocker box oil feed for years - actually ever since I've had this bike. It's never had an acorn nut and in all the time I've been running it it's had a plain nut in this position which obviously won't seal the banjo. This afternoon I made a new acorn nut using a piece of suitable stainless steel hexagon bar finished with a specially ground form tool. 

Hopefully this will stop the leak!


Next up, a part that I didn't even know was missing until a chance post on the AOMCC forum. This little bit of bent sheet stops the field stand from moving upwards too far - it means that you can grab the stand with one hand whilst sitting on the bike and fit it neatly into its spring clips. Essentially the little bar guides the field stand into position and all you have to do is push it into the spring clip. 

It's made of a bit of 3 mm sheet, drilled for 7/16 and bent to shape.


Here it is, painted and in position.


Next is the new Lucas U39 switch - I have the proper one at last, including the 'T' position which illuminates only the tail lamp.

This is a picture of the underside of the existing switch, showing the position of all the wires.

I didn't get to finish this part of the job, so more of that later.

Thursday, 4 September 2025

SQ4 - dodgy connections

 Riding home a couple of days ago in rather poor light I became aware that the headlamp had turned itself off. A few minutes fiddling with the light switch made me realise that there was something going on with the contacts - I could wiggle the handle and the light would flash. This needed further investigation.

As far as I could tell from various blog posts, this original Lucas U39 light switch had not been apart for probably 10 years. My own skills and knowledge have improved immensely in that time and I now clean these switches with an ammonia based clock cleaning solution as shown in this post. 

The one on the bike was clearly a bit grubby. 


I stripped it out and immersed it in a 25% solution of ammonia-based clock cleaner for about 4 hours.


After a few hours, the brass parts emerge without the tarnish and looking a lot more shiny and conductive!


Here it is again, reassembled.

Friday, 27 December 2024

FH - another tiny part, and a list...

 A tiny part that takes hours to make mainly because I made it twice to get it right - the linkage from the brake lever to the brake light switch, made from a piece of 1.5 mm thick stainless steel.

So what's next? There's a few things I can think of at the moment:

  1. There is a leak from the inlet side rocker box oil banjo, but other than that the engine is finished
  2. The primary chaincase has no oil
  3. There's a dummy secondary chain fitted, and the end of the FERC is not fitted (and nor are any of the grommets).
  4. There's nothing restricting oil flow to the FERC, but apart from that the oil system is finished
  5. The dynamo is not proven to charge; the instrument panel wiring needs reworking and the ammeter doesn't stay in it's hole but other than that the electrics are finished
  6. The 1/4" screws retaining the clutch dome are either too long or are supposed to be fitted with shakeproof washers. They are actually correct at 3/8" long 1/4" BSW, but it looks like they could have a bit more thread than they have...
  7. None of the frame greasing points have been attended to yet, including the one for the new swinging arm bushes. Actually, the two grease nipples for the steering head are missing - not that they will do a lot of good, because the felt washers around the steering column are also missing!
  8. The number plate has no numbers
  9. The rear section of the rear mudguard is missing a bolt, and the hole it goes through needs enlarging
  10. The front brake hasn't been adjusted
  11. None of the fasteners have been checked for tightness
  12. The wheels and tyres are still untouched
That's it for the moment.

Wednesday, 13 November 2024

FH - wiring the dashboard

 This will be the first time that I've wired up an Ariel with the separate instrument panel fitted to the swinging arm frame bikes with the headlamp nacelle. Looking at the wiring diagram it makes sense to wire up the panel separately from the rest of the bike, to be fitted later.

As you've seen, and in line with the wiring diagram, I have fitted a 5-way bullet connector between the main harness and the front end. Some of the cables from the instrument panel will go into this multiple connector, and others will stay on the panel whilst further connections will go into the headlamp. 

I made a start on the panel by fitting the ammeter and the light switch. I had the speedometer fitted as well, but found that the speedo lamp fitting was loose in the speedo body and the bulb holder could not be removed so I've sent this off for this to be repaired and the speedo overhauled.

Here's the initial layout. I've put all the wires in and crimped the ring terminals; the next step is to try this on the bike and see where the cable is going to route and how I can tie these cables together in sleeving.


This is the result. You can see I've terminated all the wires now, and added some sleeving and routed some of the wires around the top of the speedometer. I can't do much more until the speedo is back from Russell.

I need to clip the switch in and add the rubber ring around the switch and the ammeter, but it does work and I have both a rear lamp and a stop lamp. For some reason the horn doesn't work? 


It's alive!


Next stop on the wiring list is to add the combined horn button and dip switch. This is the original one and I have just removed the old wiring and clean the switch up with degreaser. More of that later.


Monday, 6 November 2023

Charlie’s Shed - Lucas U39 switch repairs

I’ve got a few Lucas U39 switches - in fact they are on most of the bikes. I have two on the bench at the moment, a civilian one from the FH and a military one destined for the W/NG, which has an extra position which illuminates the tail light only.

These notes are intended to record a few areas where these switches get damaged and to show ways they can be repaired. You’ll need a few simple tools and materials.


The first problem is the rotor - the part that fits in the knob is worn. It’s supposed to be a cylinder with two flats, but the flats are so worn & corroded that the knob wobbles about. What I’ve done here is make a fence around the shaft with sellotape and filled in the centre with JB Weld. It had previously been thoroughly cleaned with alcohol.


Here is a close up view of the finished rotor - I have used needle files to restore the shape of the flats fitting into the knob, being careful to ensure the pointer aligns with the text moulded into the top of the switch:


Next is a Bakelite repair, again with JB Weld. Someone has tried to prise the switch out of a panel with a screwdriver and broken the moulding in several places:


To fix these problems, the first thing to do is clean it all down with degreasers, brushes and scraping. I built a fence around the repair with some plastic card:


Removing the fence reveals hardened resin ready for shaping:


A short session with a flat file produces something we can paint:


Here we go. A little matt black U-Pol finished with a smear of silicone grease brings the Bakelite up nicely:


Next up, the contacts. Some of these switches have moving contacts operated by the rotor, which get corroded and full of muck. In this case, the spring had corroded away; to remove these contacts you have to withdraw a tiny split pin. I had to drill what remained of the split pin out with a 1 mm drill in a pin chuck. 


You can buy these torsion springs on eBay, but once you have made a few and perhaps have a few bits of piano wire lying around in various diameters it is easier to make your own.

The last job is to soak the brass parts in an ammonia based cleaner for a few hours. This removes all the tarnish:

Friday, 20 October 2023

FH - nacelle & handlebars

 I'm working on several fronts here, aiming to find problems and clear space so that I can start on the bottom end of the engine. Once that's in, there's polishing and plating, cables and wiring.

The nacelle went on relatively easily, though the trim on the front doesn't fit too well. That will need sorting out:


I planned to fit the instrument panel, mainly to avoid losing the trip reset cable but I found a few problems:
  • the speedo bracket only fits one way, basically because it's too wide. I fitted it by elongating the holes but it would be nicer if I made a new one.
  • the ammeter is one of those - - 0 - + ones, with no numbers. I'm not sure that's correct.
  • the Lucas U39 headlamp switch is damaged where the clip fits - people prise these out and the Bakelite breaks.
On the up side, both the light switch and the speedometer have PVC cables - maybe the whole bike was wired using that stuff.


Next - working through the little bags of screws, I find the grub screw for the steering lock, so that's fitted:


I treated the bike to a nice set of stainless steel handlebars from Draganfly - made in Bungay. The SQ4 has these too and they are very nice.

There's a lot of work to bring the levers up to scratch though!

Saturday, 12 January 2019

SQ4 Chainguard again

After months of messing about, I have attacked the Square Four's lower chainguard again - mainly after having seen the proper version.

The thing I realised is that in about 1951 the pillion footrest hanger, to which the chainguard is attached, moved below the frame tube - all previous years have them above the frame tube and of course the chainguard bracket has to suit this arrangement.

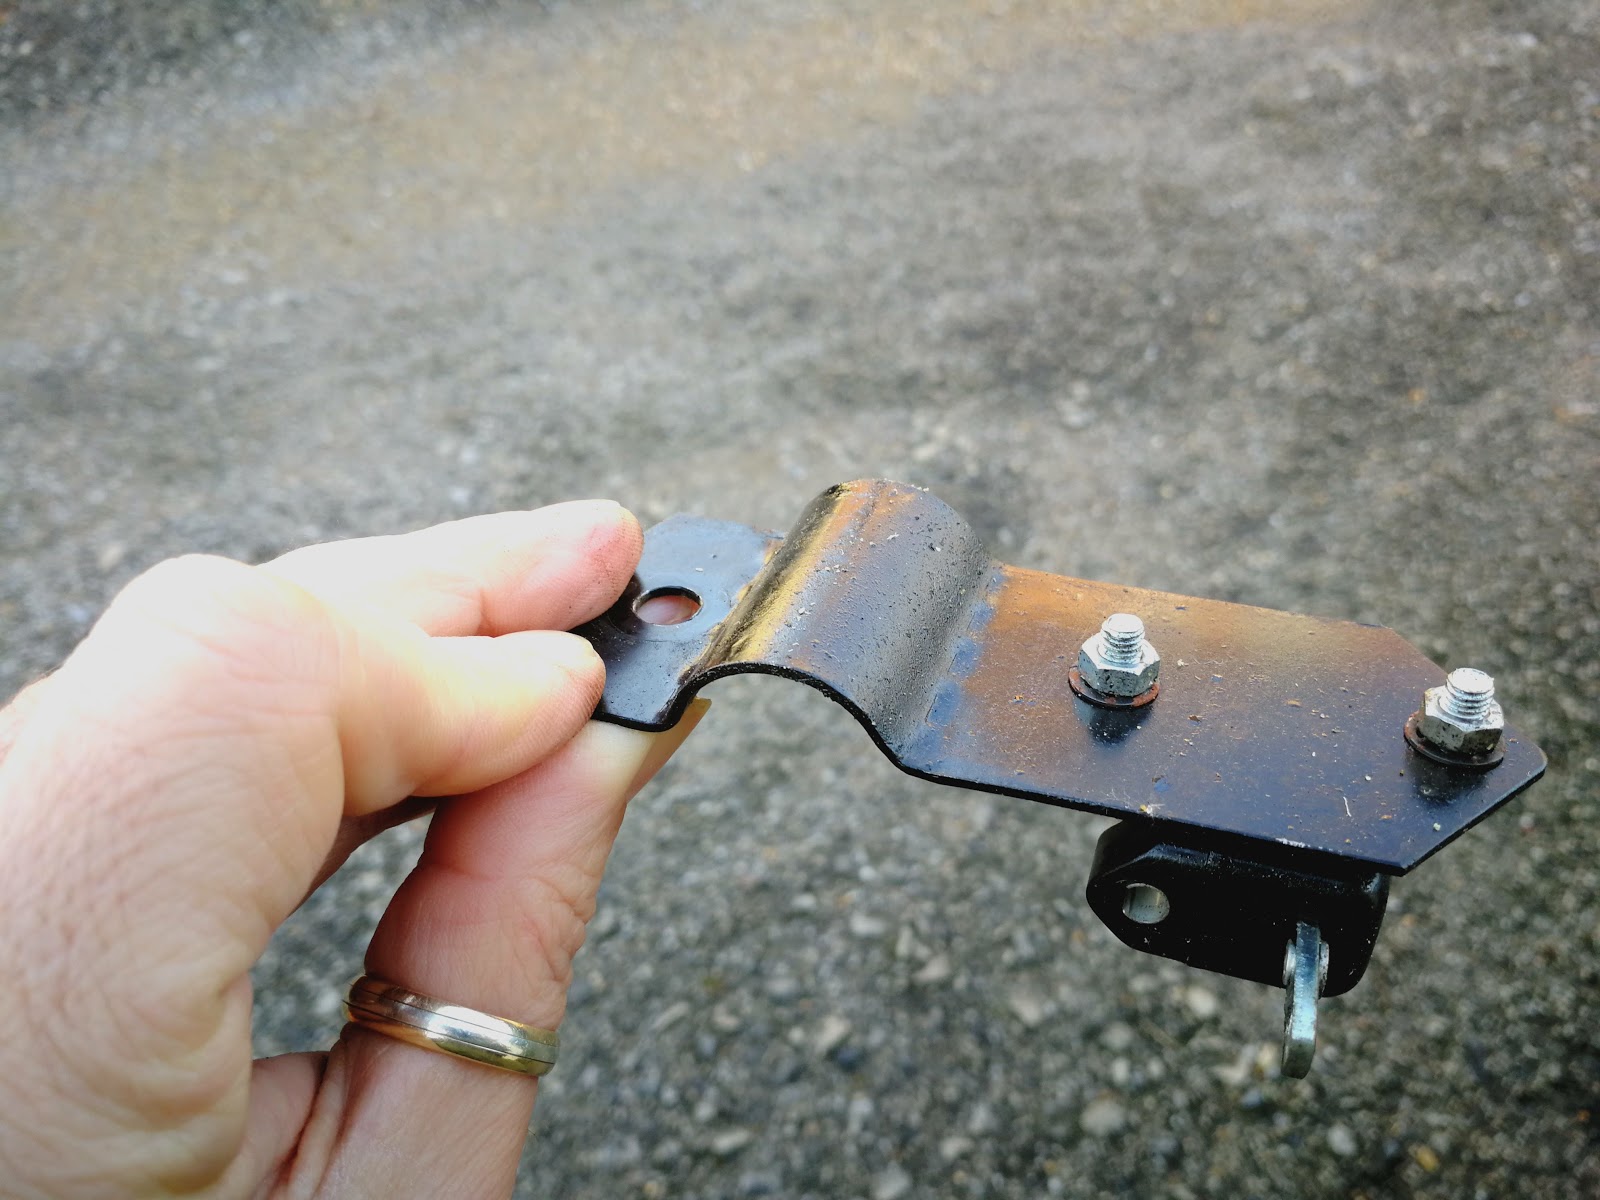
Also in 1951 came the stop switch, mounted on the chainguard. The chainguard now looks like this, and it was used from 1951 right through to the end:


It's also much shorter than I previously had it.

What I hadn't bargained with was the effect this has on the brake rod. With the brake light switch mounted in that position, clearance to the brake rod is minimal if indeed there is any clearance. I already had issues with the brake rod, which was running in as straight a path as possible; those of you with Square Fours (prior to the arrival of the brake cable) know that this area is not very satisfactory - there is little room between the stirrup and the brake plate, and the chain adjuster is on there too.

No, the only answer is to bend the brake rod more than desirable and a few hours with the mighty Rothenburger saw that happen. Some pictures:

Straight run past the chain adjuster

Kink around the adjuster and over the stirrup

Significant bend toward the lever


So there you have it - the grey primer shows you that this is not finalised yet and I am none too happy with the rear brake - of course the bend in the rod has introduced a lot more play in the pedal before the brake engages. I might try this again...

Wednesday, 6 March 2013

Brake Light Switch

The devil is in the detail, they say. Casting around for small jobs, I realised that I had nowhere to mount the brake light switch. I knew from studying the wiring diagrams that Ariel began fitting brake lights to Square Fours around 1953, so that early Mk 2s would have factory fitted switches.

A plea on the AOMCC forum yielded this picture, from Greg Snyder in Pennsylvania, USA:


Greg also posted this, of the bracket in situ on his bike:


So, with guidance like that it was easy to make a new one:


Here are some details. Sorry about the sawdust:


And some more views: