Showing posts with label thread. Show all posts

Wednesday, 3 December 2025

Model A - clutch spring screws

 Now that the primary chain guard is finished we'll start on some lathe jobs, finishing the clutch dome when it's screws are made. This will need a change from the three-jaw chuck to the ER25 collet which we will do in a while, but first we'll use the chuck to hold the hexagon stock we need to make the clutch spring screws and perhaps the battery strap nuts.

We have four screws but we need six, so here we go. First job is to turn down the bar stock to a 1/4" diameter for threading, copying one of the existing screws.


After a small problem with a blunt die, I was delighted to find that the torque upgrade that we did on the lathe some months ago enabled this 1/4" thread to be cut under power.


Once you're set up it's dead easy to knock these out. In 10 minutes or so I have two of these ready:

The next step, and for this I need the ER25 collet, is to shape the head to that low radius the original has; then we can think about cutting the screwdriver slot and making the washers.

The raised head is formed using a specially ground tool. It's important to keep this sharp and feed it slowly to avoid chatter marks in the work:


Nicely raised heads:

I used the compound slide adapted for vertical operation to put the slots in the screws. They are cut with a 1/16" slitting saw.


Here's the result, with some old screws for comparison:

A nice little job I think. Still need the washers - those standard ones are too small. The originals are special and are quite tight on the screw.

Thursday, 17 July 2025

Thread & hex data

 The following page provide descriptions of the threads in common use; the drill sizes, pitches and hex sizes associated with them, and a few interesting tit bits of information...

It's handy to have it in the blog - makes it easy to find when you are in the workshop.


Saturday, 25 January 2025

FH - it pays to choose the right thread

It looks like a detail, maybe even a sign of obsession, but choosing the right thread is actually really important.

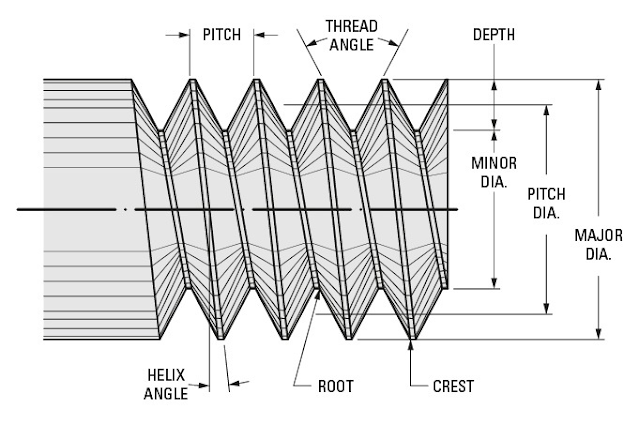
I've been working on the forks this week - you may have noticed - and one of the bolts I removed was conspicuously coarse - it was a 3/8" BSW bolt, 1 3/4" long: the front wheel spindle clamp bolt. British Standard Whitworth threads are coarse (20 threads per inch) and consequently strong for their size. What they are not good at is staying tight when subject to vibration. You use them in alloy, but you will find that virtually all the other threads on a bike of this vintage are British Standard Cycle, which in this size is 26 threads per inch. The helix angle in a 26 tpi thread is much smaller than that in a 20 tpi thread, and consequently the thread is much less likely to work loose under vibration.

It also pays to choose the right length - this application needs a 1 1/2" bolt, so that most of the threads are hidden in the nut and don't get filled up with debris from the road.


Thursday, 18 March 2021

Model A - repairing threads

It's a wet day here in Norfolk, and I have some domestic stuff to do in the workshop so while I'm at it I might get distracted...

I'm looking at the workshop layout with a view to getting a bike lift in there, so I have shuffled them around and the Model A happens to be accessible, so we will have a look at a couple of loose ends. The front mudguard has been hanging off for a while (and still is) because there are a couple of dubious threads in the forks - one, a broken bolt, and then two other threads that are just fouled.

Here's the broken one - I have put a 1/8" hole through this broken 1/4" bolt, to see if it will come out with an Easy-Out. They never do, but I have to drill the hole anyway!


Of course, it didn't come out and I moved through the drills until I was one size under tapping size for 1/4" CEI. I then applied the 1/4" CEI taper tap and used it to clear the thread - it moved the remains of the bolt:


Next stop, same problem at the back. I made the mudguard & rack fasteners a while ago and could only fit one side, because I found someone had broken one of the 3/8" bolts in the frame lug, drilled and tapped it something like 5/16" and put a new bolt in. Today, I removed the broken 3/8" stump using a diamond burr in the Dremel and chasing out with a 3/8" CEI taper tap, so this shot shows it all back together with the stand spring fitted at last:


I also took the opportunity to chase out the chain adjuster threads. Grovelling about on the floor makes me realise that a hydraulic lift would be a nice addition to the workshop!

Back at the front, I now have both sides of the mudguard stay fitted - to cut the mudguard, I need the centre bracket and the front stand fitting - unfortunately I have run out of 5/16" screws, so that's the next job.


Comparing the next picture with my picture above, you can see I have the mudguard stay too far forward:


Sunday, 19 April 2020

QR50 - Fuel Cap

The QR kit of parts came with a horrible green plastic filler cap that didn't fit properly and had a simple hole for a breather which would leak if the bike fell over. Contemplating how to fix this leakage problem, I looked at the availability of the original caps. They are available from EBay, but like the oil tank caps are not cheap at £22:


When I realised that the real filler cap was a rather nicely sculpted thing, I started to contemplate how to make one.


Of course, I had the tank and so I was able to design the internal parts of the cap, and the thread:


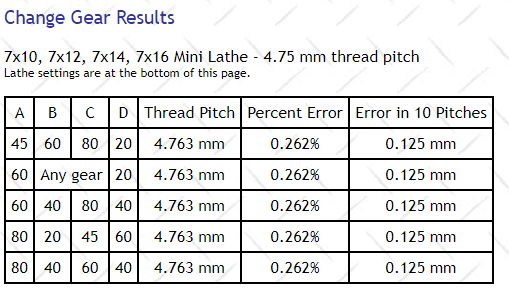
That's a very coarse thread, typical of what is used for plastic enclosures. For a lathe with a 16 tpi lead screw, you quickly realise that the lead screw runs at something like 2.85 x the speed of the chuck, which is supposedly outside the capability of the lathe - but we will see. Not being one to give up so easily, I found that LittleMachineShop has this handy calculator for change gears. You enter the pitch you want and it tells you what change gears to use. Click on the picture to go to the site:


The plan is to make the new cap out of this chunk of Acetal. Acetal has excellent resistance to gasoline, is strong, stiff and very good to machine:


Here's the inner cap ready. I machined this out of the scrap stub, left over from making the fork dust caps:


It's got a breather hole:


Next step is to start on the cap. I measured it up using masking tape to give the pencil something to draw on, and sawed the blank in half on the bandsaw. Then, having made sure it was square, I marked the centre:


I set it up in the 4 jaw chuck aligning the centre mark with the tailstock centre. I faced it off and turned the OD to the maximum the stock would allow using my new Glanze carbide tipped RH turning tool.


Next step was to bore the ID to clear the minor diameter of the male thread, to a depth which would swallow the male thread and provide sufficient clearance for the flange on the inner cap and a gasket.


There's no longer any excuse - I have to bite the bullet and cut the thread. I've set up the gearing according to the LittleMachineShop calculator, but since the lead screw will be turning at something 2 1/2 times the spindle speed we will be turning this by hand. It might be a good idea to get a handwheel that I can mount on an arbour to turn the spindle.


To test the settings, I set the carriage stop against the chip guard and turned the chuck one full turn. I was pleased to see the carriage had moved the required 4.75 mm.


I set the tool in place to have a look. In this picture, it's fouling the work - it doesn't have enough front clearance:


Cutting the thread:


I'm going to have to devise some way of toolpost mounting a light, for boring. I have a large LED floodlight over the lathe, but when boring it's often in shadow. I have this little torch in the workshop for these occasions - it's held on the toolpost with duct tape:


And that's the thread cut. What I have omitted to show in this sequence is the step I cut in the cap to clear a taper feature on the fuel tank. Part way through threading I realised that I was going to have to test the thread at some point, and if it was still in the four jaw chuck it would be very difficult to get it back on centre. I stopped the threading process to turn this step, which allowed me to change to the three jaw chuck, reverse the work and while holding it on the step I could machine the rest of the outside diameter. I could then resume threading in the three jaw, which would give me a better chance of getting the work back on centre after each trial fit.


It fits!


With the thread complete, I could turn my attention to the inner cap and make sure that would fit. That done, I turned this taper feature on the top; next I will mill some finger-slots.


The fuel cap needs a breather, which is made from a bit of 8 mm aluminium round bar:


Here's the fuel cap with the finger grips milled in. I held the cap in the 3-jaw chuck, on the rotary table and cut these slots with a 3/8" end mill.


Tuesday, 22 September 2015

Loctite 577

Remember the weep at the end of the rocker shafts? I've applied Loctite 577 thread sealer here, which should fix that problem.

Once we fix that leak, we can look for others...

Sunday, 6 September 2015

Retrieving broken studs & screws

I've been meaning to take a few hours to write up the removal of a couple of broken screws.

These two examples are both parts of my Huntmaster - One is a fork clamp bolt, in which the screw retaining the headlamp casquette has become seized in the past and broken by someone; the other is a engine mount spacer, which in these bikes is provided with a small 2 BA lug to retain a pressed metal cover, which enhances the appearance of the engine mount and prevents it getting full of road dirt. Of course, in this exposed position these little screws seize solid. I managed to get one out, aided by some prehistoric oil leak, but the other was dry as a bone and broke as I worked it.

So the process for fixing this kind of problem is this:

Put the part solidly in the vice, and file the broken bolt flat; then centre punch the broken fastener right in the centre.

File the broken screw flat

Using a small drill, make a pilot hole right through the broken fastener. As you start it, make sure it's still on-centre

Pilot hole in the old 2 BA engine mount screw

Using a larger drill, open the hole out until you are approaching the minor diameter of the thread
Small pilot drill hole in the old screw

Continue drilling out the old screw
Try an Easy-Out in the hole, selecting the largest one possible that will bite in the hole. Turn it gently with a tap wrench. Don't force it - if you break it in the hole you are in real trouble.

Small Easy-Out
If you don't have any success with an easy-out (and I can't remember when one worked for me), go to the next drill. You will be able to see if you are approaching the major diameter of the thread - if you have already cut into the thread, stop.

Using a small punch or a chisel, tap out as much of the old fastener as you can - you can often shift a lot of it from the top of the hole, tapping toward the centre. Removing a couple of threads from the top of the hole is sufficient to go to the next step:

Finished drilling - only the old thread remains

Peeling the top threads away

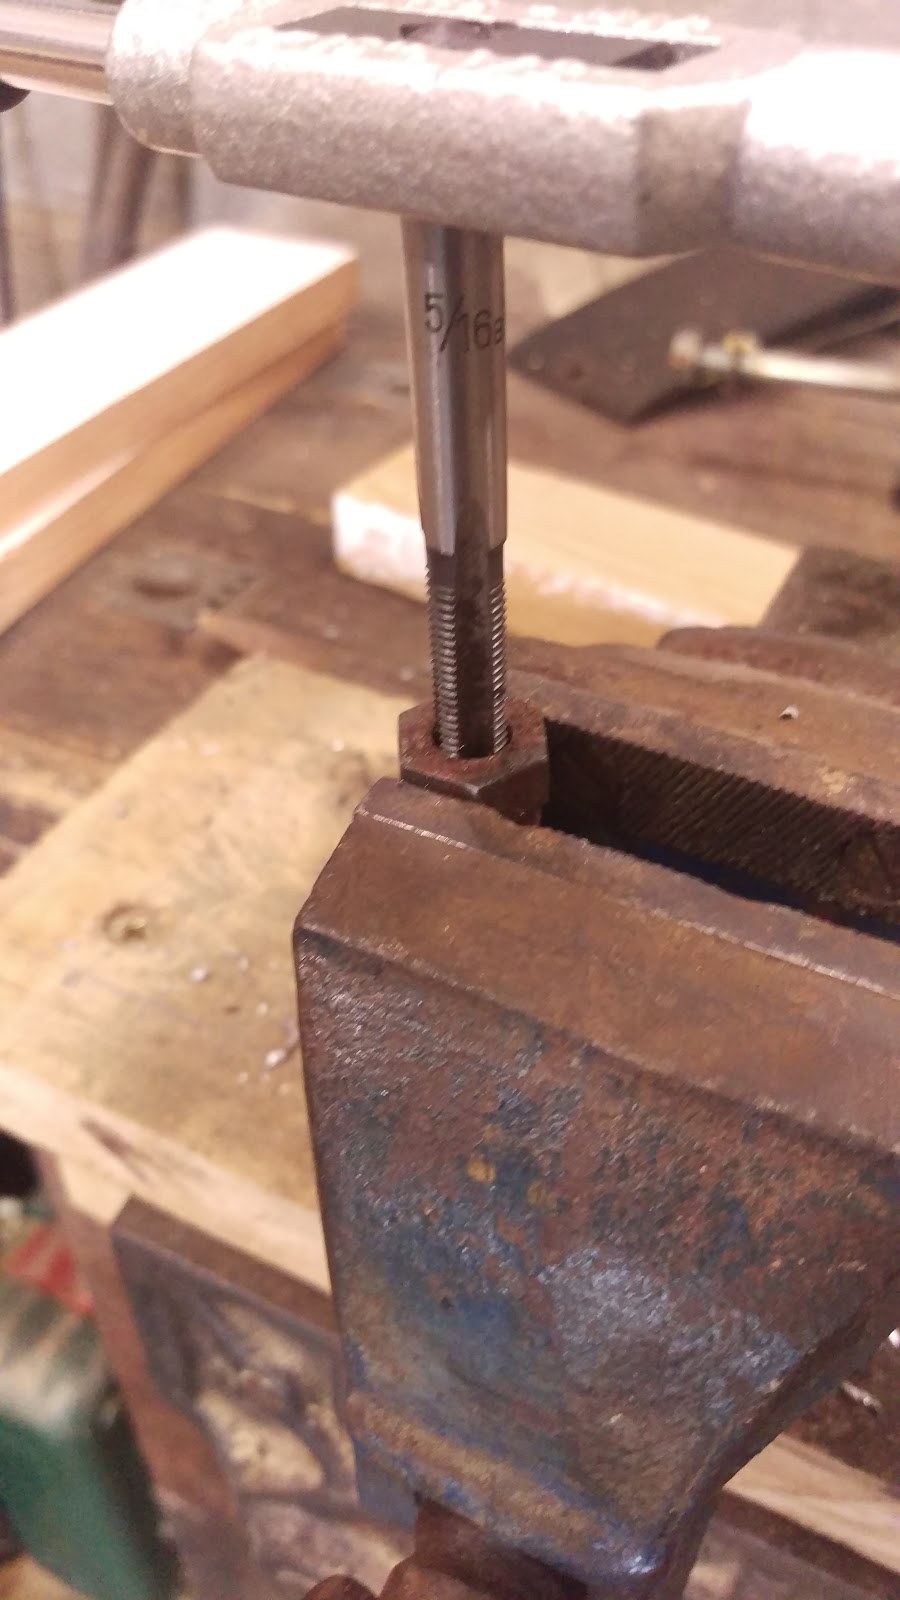
Using a taper tap of the appropriate size, start the tap in the hole and attempt to recut the thread. Give it a few turns, and then disassemble everything and knock all the debris out of the bottom of the hole.
Starting the thread with the taper tap
Clean it out will so there is room for the second and plug taps.

All that remains of a 5/16" BSC screw
Move on to the second or intermediate tap and then the bottoming or plug tap, and complete the recutting of the hole. There will be a lot more debris in the hole and you will have to clean it all out again.

5/16" BSC Plug tap

Ariel Huntmaster engine mount repaired
Test it with a new fastener and you are done.

Ariel fork bolt repaired