Showing posts with label chainguard. Show all posts

Monday, 27 July 2026

Model A - chainguard

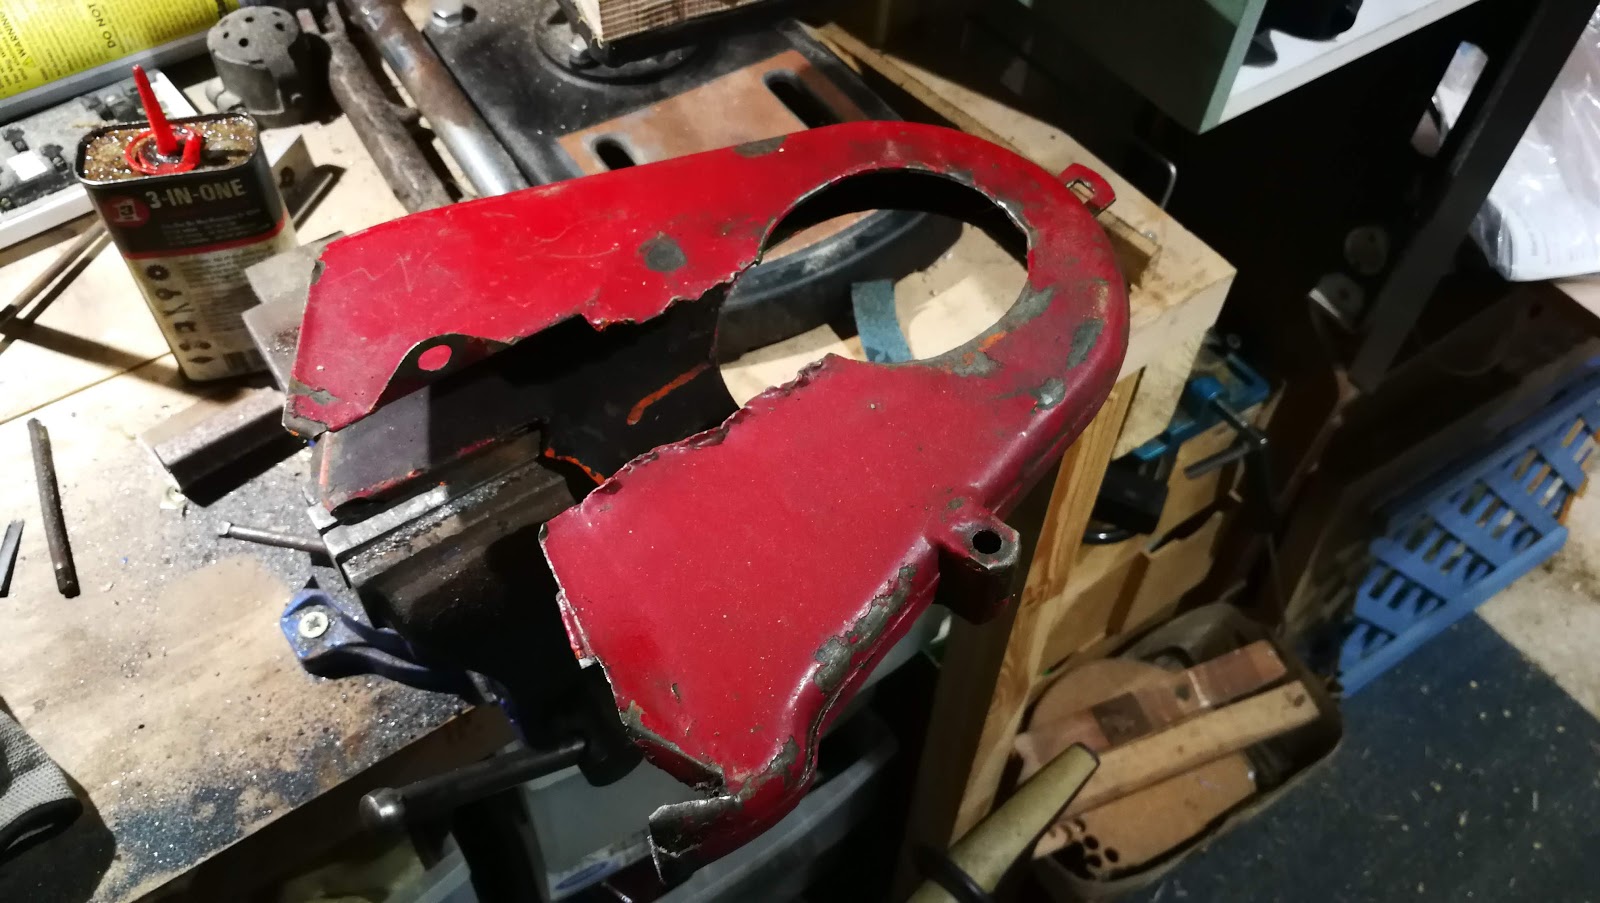
 The latest in a long line of broken bits waiting repair before they are painted is the chain guard. 

This is a pretty simple bit of welding. Initially the mounting nut is missing so I have replaced it with a new un-plated 1/4" CEI nut welded in underneath and I've filled in the worn hole as well:


The next bit is this gap which is a piece of material worn away as the chain rubs away at the chainguard. This is a bit more complicated.


First job is to chop it out with the Wiss snips and the Dremel. Next we can make a repair patch from a scrap of 18 gauge steel sheet cut to roughly the right shape, folded in the vice and refined with the linisher.
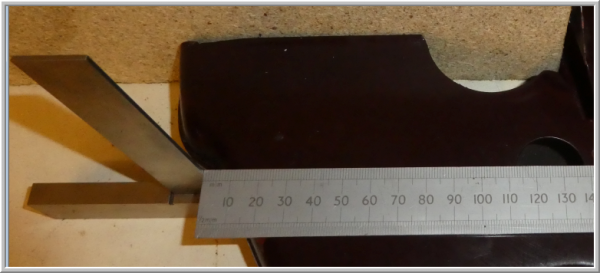

If you're careful, you can get it close enough to weld in without any filler rod which saves clean up time and reduces the heat (and hence distortion) going into the work. This wasn't one of those occasions, as I needed a bit of filler to close the gap at one end.

It's not too bad though.

Next is the other side - a bit that had been rubbing against the rear mudguard and worn a chunk away. That's it for the welding now.


With the paint finished it looks a lot better!


Monday, 6 July 2026

Model A - more painting

 This isn't very exciting post but it's important to make it to record when these items had their first coats of paint. This Tekaloid takes a long time to dry fully - about 5 weeks - and I want to know when I can assemble bits.

Today I have used the wheel to strip rust and old paint from the battery tray, the rear chain guard, the oil tank and the dynamo chain guard.


They have been degreased, had a coat of primer and their first top coat.


The second coat went on on the 9th of July.


Thursday, 12 March 2026

Charlie's shed - adjusting primary & rear chains

 The Huntmaster clicked over 400 miles on a run recently and is bedding down nicely. Checking it over in the workshop revealed a front chain that was rather loose, and of course one of the issues that you learn when dealing with these old bikes is that if the front chain is loose the rear chain will probably be tight as sometimes the gearbox will move. 

It's time to have a look at both chains, and for this we will use the on board toolkit:


First stop is under the oil tank where we find the gearbox top bolt and the chain adjuster. Loosen the nut on the right a little bit and then use the chain adjuster to draw the gearbox backwards or push it forwards.

Next you need to gain access to the primary case so that you can inspect the tension on the primary chain and later top up the oil. If this is tight use a big flat spanner to undo the inspection cover:


Now you can see the chain. This should have about 3/8" up and down movement and this should be slack movement - the chain should not be stretched tight and you should not be putting much effort into moving it. If the chain is too tight you will be putting undue pressure on the engine main and gearbox bearings, not to mention the chain itself and the clutch basket bearing. Typically the chain will get looser as it wears and you will use the gearbox adjuster to draw the gearbox backwards by a little bit to tighten the chain. When you are done, leave the gearbox adjuster where it is and tighten up the gearbox top bolt.


Turn the engine over on the kickstart and test the chain in a couple of places to ensure it's not over tight anywhere.

Once the front chain is done, we can look at the rear chain. The Huntmaster has a fully enclosed rear chain case and the inspection point is behind a grommet which itself is behind the left hand side silencer. It's easiest to remove the silencer to gain access to the chain:


This is much easier on bikes with only a simple chainguard, but on this one we can enjoy the fact that the rear chain oiler is doing it's thing in keeping the chain clean and lubricated.

Once you can access the chain, slacken off both the wheel nuts and the lock nuts on the chain adjusters shown by the spanner in this next picture. When you tighten the rear chain you must make sure that both adjusters are turned by the same amount - count the flats - to make sure that the rear wheel alignment is maintained. Be really careful with this because setting up the rear wheel alignment is a bit of a pain. Do the lock nuts up when you're done and tighten up the wheel nuts again.

When checking the rear chain it's best to turn the wheel and sit on the bike, because a swinging arm bike will always tighten the chain when the swinging arm deflects upwards. Ariel recommend 5/8" chain movement with the swinging arm deflected to normal riding position and 1 1/4" to 1 1/2" with the bike on the stand. That's quite a difference and comes from the frame geometry - the swinging arm pivot is a long way from the mainshaft centre.

Monday, 26 July 2021

FH Fully Enclosed Rear Chaincase

Ariel's fully enclosed chain case was an optional extra on Huntmasters, and I didn't have one - but this appeared on eBay. It's pretty rusty but it is solid, if a little bent. I spent a lot of time getting it to fit together like this:

The main problem was that the bottom half had been squashed at some point - it's on the right in the picture below


This illustrates the problem. The bottom half mates correctly with the top half to the left of the axle, but it is way out on the right - the area below the axle is much less dished than it should be. I put that dish back with some light beating and formers.


The front area is fine:


It moves over the front section nicely:


Friday, 5 April 2019

Welding Nuts

As you will know, the swinging arm Ariels make use of Spire fasteners and matching screws in various places, which look a lot like blunt self tappers. These appear in the rear mudguard and the seat base. Additionally, the bikes use captive nuts in sheet metal cages (I made one here) in the headlight and in the chainguard.

Of course, the captive nut in the chainguard was missing. I thought about making one, and having fiddled around for a while making a 5/16" one for the headlamp, I wasn't about to make a smaller (1/4") one for the chainguard that no-one would ever see, so I decided to weld a nut in.

Now the tab on the chainguard is not so large, and I wanted something larger than a conventional nut to weld to, and secondly I wanted to make sure the thread was in the centre of the square hole in the chainguard, so I came up with a special nut, designed to be welded in:


It's turned up from a piece of 3/4" round bar on the lathe:


It's got a 0.35" diameter journal to fit into the hole, and a lead in chamfer to a 1/4" BSCy thread:


The back is also chamfered, to allow me to make a fillet weld easily:


I'll make some 5/16" ones for the mudguard and seat.

Saturday, 2 February 2019

Dry Build - Repairing the Chain Guard

Moving on, we can start on the repair of the front section of the chain guard. This is a bit mangled:


Someone has modified it (with a tin opener) so that it can be removed without taking off the gearbox sprocket.


I don't understand this though:


This is what it is supposed to look like. These pictures are from the excellent members of the AOMCC:


You can see in this last picture, the position of the chain oiler. This is the bit that has been cut out of my mangled example, so we will need to re-create it. Mick D sent me these dimensions:


Mick says this is a 1" hole. I have the grommet from Drags:


Here's a view of the chainguard in situ - that's the chain oil pipe you can see there:


So, on to sorting it all out. Some heat and a hammer has this area flat again:


Heat and hammer again, but this activity only serves to reveal that we will have to cut this lot out:


Five minutes with a pair of aviation snips has cleaned this up. We can now find a bit of sheet to let in:


This bit will need cutting out:


Sanding off the paint allows us to measure the material thickness with the micrometer. It's 0.043", about 18 SWG or about 1 mm thick.


Now, we'll need a pattern to cut a bit of 18 SWG sheet. We can do that with a bit of paper and a pencil - we'll just draw around the other, good side to get the curve around the swinging arm, and we can use the geometry of the main shaft hole to construct the missing curve there.


The chain guard fits around the horizontal frame gusset, which is accommodated in two slots above the 'swinging arm curve'. Luckily, there is enough  metal from these slots to show us where they are.

In the end, we have this little sketch.


Now, we glue that to a sheet of 18 SWG and cut it out with snips and a file. It doesn't want to be too precise, as it needs to be 'fitted' to the job. Then, I put a 2 mm flange on the end of the repair section, around the main shaft hole to match the flange on the original part. That will make the face much more rigid.

In the next picture, the chainguard has a chunk of oak, 1" thick, stuck inside it so we can secure it in the vice. I've trued the lower edge of the cut out area with my hammer, and straightened the cut edge with a file. You'll notice the top edge is still quite bent - I will address that next. I've also messed up the flange at the bottom there, it needs to come in a bit more.


See the little blue and red crescents in the picture? For those that were wondering, they are magnets holding the repair section in place. Here's another magnet, showing the position of the grommet hole:


Ready for welding:


Butt welding with TIG in 18 swg. Set at 25 A with 5 l/min argon:


There are a few points where I need to fill holes I'd blown in it, but generally not too bad. Back side shows good penetration.


Before we go any further, we will do a trial fit and take some more pictures, to understand where the guard is near the frame and other components.


Next, we are going to mark out and cut the hole for the chain oiler grommet. The oiler pipe goes vertically down the triangular gap in the middle of this picture - the grommet position is quite critical:


Using Mick D's dimensions, we can mark out the hole. I thought I might chain drill it and file to shape, so I have used the old-fashioned witness marks around the diameter:


I've made two more repair sections for the rearmost lower edges. We will weld these in later.


I found these step drills on eBay somewhere and they seemed to get a good write up. I decided to use the biggest one to drill the grommet hole:


They make a much better job of drilling holes in sheet metal than a conventional twist drill.

A couple more hours in the workshop sees it fully welded, dressed and protected with a layer of primer.