Showing posts with label anneal. Show all posts

Thursday, 1 September 2016

Charlie's Shed - Curly copper fuel pipe

We'll need a new copper fuel pipe for the W/NG, like this fine example from Paul Slootheer:


It will need curls to give it some flexibility and it will need to be annealed after bending. We don't want a fracture out on the road, pouring fuel over the dynamo.


We'll use these soldered unions & nuts.


Here is another reference point:

Barn find NH, stored since 1960
Using Paul's guidance & some hints from Nev Hunter I've made a pattern from a thick piece of plumbers solder. You can see the fuel tap here as well, which is a re-sealed original but has a repro hexagon shaped reserve plunger:

Three tight curls
Two looser curls, more suited to 1/4" tube
Using some 1/4" copper pipe, we'll bend up the real thing. It's important to think this through, bend by bend and perhaps to buy enough pipe to have a second crack at it if it all goes horribly wrong!

Take it slowly; you have to realise that in bending the pipe you are aiming to stretch the copper on the outside of the bend. You can avoid flattening the pipe by filling the pipe with sand or solder, but if you are gentle and controlled this is not really necessary and was certainly not done by the factory. Use a hardwood former - I used a 1 3/4" oak dowel, that I used as part of a kitchen worktop project.

The first bend
The first bend is an easy right angle bend around the former. Make sure there is enough length to bend up the tail into the bottom of the float bowl later on.

First bend against the pattern
Start to form the curls by clamping the downward tail against the former in the vice This is probably the most difficult part of the whole operation.

Holding the first bend in the vice and starting the first curl around the former
The design of the vice usefully allows you to trap the downward tail in several positions as you form the first curl around the former.
Moving the downward tail around the vice and continuing bending the first curl

Moving the downward tail again, and complete bending the first curl

Moving the downward tail around the vice again and starting the first second around the former

The curls, finished
Once the curls are finished, have a good look at them against the pattern. This is where the pattern is most useful, as until you cut the copper pipe to length you cannot really fit it against the bike.

Add the upward bend toward the tap

You can now put in the last bend, which is the U bend beneath the float chamber. This is simply bent around the former, making sure that start of the bend is in the approriate position to allow the finish to land in the union beneath the float bowl.

Roughly trimmed to length
I'm currently waiting for the tank mounting rubbers to turn up. Until they do, I'm not sure of the final resting place of those ends...

So, with the tank bolted in the correct position we can try the new fuel line in place and trim it to fit. Attach the nipples with their nuts (but without the fuel line) to the petrol tap and carburetter and offer the fuel line up - I put the end of the line in the carburetter float bowl union first since this is least accessible. The most important thing here was to get the fuel line to avoid the dynamo and the advance retard cable:


This meant that I had to cut the carburetter end of the line as close as possible to the bottom bend, to get it as high as possible. This done, I could set the line in the carburetter end and see where the other end was going to fall. With a little trial and error, remembering not to cut too much off at once, I got pretty close:


I need about another 1/4" off the tap end. Cut with a tube cutter or a hacksaw, deburr properly and blow out the line:


Since you are cutting tiny lengths off at this stage, its easier to use a hacksaw. A tube cutter crushes the tube a little which is a problem when cutting short lengths. Another 1/4" should do it:


With the nuts in place, it is stiff enough to do some final tweaks on the bends, in my case to avoid the dynamo:


Ready for annealing & soldering up. Not looking too shabby:


Next step, before soldering the nipples on, is to anneal the pipe - in other words to remove the work hardening stresses that have built up during bending - I am sure you noticed it got stiffer after bending? You don't want to leave the pipe in that state, because it is going to bend a little in service, through vibration, and this will make it harder still eventually leading to a fatigue failure.

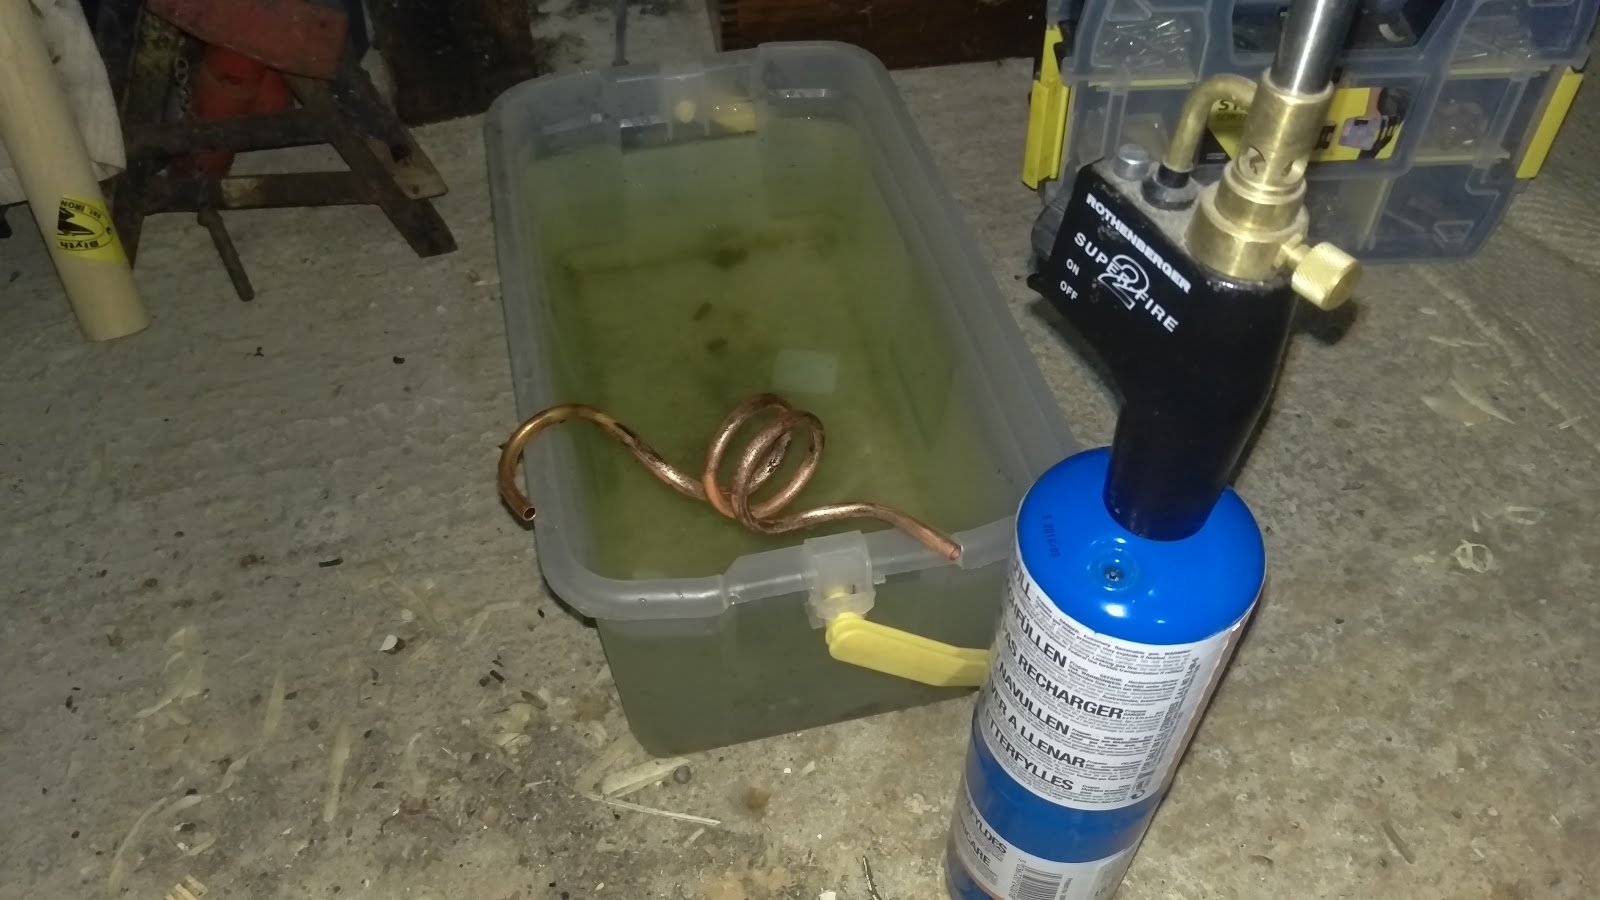
For copper, the annealing process involves heating the material to cherry red and quenching in water. No problem for the mighty Rothenburger torch, even with propane in the tank. You will want to clean the scale off with wire wool after annealing.

Be careful with the pipe from now on - it is very soft and will bend very easily.


Tin the ends with solder after fluxing; put the nuts on the right way round, and sweat the nipples on. I use a small butane torch for this - do not overheat the joint, or the solder will not take.


Finished.


Monday, 6 May 2013

Shrinking & pulling

After the gearbox was back in, I decided to have a bit of an interlude and sort out some of the fabrication jobs that had been knocking about.

Finding myself with a spare hour or two one day, I made a start on the dent in the oil tank. The tank has had a major league ding in it for some time. Some was on the AOMCC forum suggested it may have been a battery explosion - it looks more like someone has used it for target practice.

Taking inspiration from a good book 'Building Budget Brits' I decided to use a method involving brazing & pulling to remove the myriad of dents in the tank. Some of them were very deep & localised, clearly with a lot of stretching going on. Now I could have filled or lead loaded this tank and avoided all the work, but I'm keen to learn and try new things....

So the idea is, we pull the dent out without holing or cutting the tank by fixing a suitable stud, wire, piece of scrap to the bottom of the dent and pulling it outward. I'd hoped to be able to weld to the tank and to pull the dents out with the tank hot, much like I repaired the breather tower. However, I was a bit concerned that I might just end up holing the tank, weakening the area around the weld and pulling or tearing the material.

So I elected to braze plain steel nails into the bottoms of the dents and pull them out cold. This would be OK, because during multiple brazing operations the material would be annealed several times. Then, I put a steel bar across the panel being worked on, to act as a fulcrum for the pulling operation. I used a pair of combination pliers to grip the nail and pull the dent out.

So here is the first pass


Nails resited, here we go for the second time..

and a third attempt

and again - four times now...
So before the fourth attempt, we had created several 'peaks' to go with the considerable troughs already in the tank. Levelling the peaks gave us an opportunity to lose some of the stretched material, by locall heating (bright red) in the area of the peak and reducing the height with some light hammer blows.

This is almost at a stage where we could use some filler... Lead maybe...

But, reasoning that this was going well and I could get more of that dent out, I pushed on with a fifth go at shrinking & pulling. This was lower but more level until i cleaned the flux off and I realised the 50 year old steel had cried 'enough'! Take a close look at the picture and you'll see a lot of cracks have appeared:

I think that this is due to hardening. Of course, annealing or normalising steel has a time element to permit removal of stress and changes in the grain structure and of course cooling this thin material happens very quickly. Added to that, the material was obviously thin from 50 years of corrosion.

Max was very concerned:


Monday, 10 December 2012

Still Cold Outside


So we have to find another job that will  bring us indoors.

I don't have many of those left now, but one thing I haven't touched is the oil tank.

Its the right tank, but it has a number of problems:
  1. The filler neck is bent, and the thread damaged on one side. It looks as though some clumsy oaf has dropped it neck down on a hard floor.
  2. The breather connection is bent, caused by said oaf probably in the same floor-dropping activity. The picture above shows this one, and the filler neck, though I had started work on it when I took this shot (as witnessed by the 38 mm socket acting as a former)
  3. The filter is missing
  4. There is a hummungous dent in the side that is hidden by the battery
The first of these little gems that I tackled was the damage to the filler neck. The bend was on one side and had splintered the crests of some of the thread away from the base material. Looking closely at this I decided that the material must be relatively hard, so I elected to normalise the metal.

Normalizing is the heating of steel to above its critical temperature followed by cooling in air. The piece is usually left somewhere warm. Normalizing is a quick method of softening a piece to the point where you can harden and temper it for use for your chosen purpose.

I used the trusty Rothenberger Superfire 2 to heat the area to bright red, and played the flame at a distance to bring the temperature down as slowly as possible.

Then, using a large socket in the vice, I placed the neck over the socket to use the socket as an anvil. I used a 38 mm socket, which supports the neck nicely and is a close fit.

With the material cooled & annealed, I was able to push the bent neck back into shape with a variety of drifts & chisels. This went very well, which just left me with the thread to fix.

I did this in two stages, possible needlessly. I started by grinding out the damaged part with the Dremel, since it was confined to about 15 degrees of the full circumference and maybe 6-7 pitches. I cleaned it up using a 1/2" CEI plug tap as a chaser.

Looking backward, I could probably have saved more of the original material if I had started with the tap. Still, the cap will now happily go all the way down to the seal!

The next job I had to tackle was the breather tower. I had a very good picture of what this is supposed to look like from (The Ever Helpful) Brenton Roy of the AOMCC.

As you can see from the pictures, the delightful minaret shape of the breather was a pale shadow of it's former self after the short bungee-less jump onto the garage floor, and I was afraid that much grief provided by attempting to cold form it back into shape would:
  • Squash the tube flat
  • crack the material of the 'minaret'
So, I figured some hot work was called for, though at this point I hadn't decided if I might do this with the breather detached from the tank. Holding the tank by the lower mount (so I could pull up on the breather connection) I heated the breather bright red and held the little tube in a mole grip, with a suitable rod (actually a masonry nail).

I found that the tube would move from side to side quite easily once the material was hot enough, and this with some upward pressure was enought to roll the minaret up and out of it's inverted position. A couple of cycles of this and it was back to a very passable representation of it's former self.

Next job: the dent in the side.