Showing posts with label camshaft. Show all posts

Friday, 13 June 2025

SQ4 - changing the oil

 It's high time Square Four had an oil and filter change, so with the oil return line repair complete on the Huntmaster the Square Four is back on the bench after a 10-minute run to warm the engine oil up. 

As usual it's an absolute pig to get the oil tank out but it's very easy to drain the tank and the sump - I have a new sump plate (well, it was new 10 years ago) with a drain bolt and magnet in the middle of it. I had something like 300 ml of oil out of the sump - I'm not sure whether that's unusual or not. 

I was surprised to find the sump strainer damaged - I think I'll get a new one from Draganfly. 

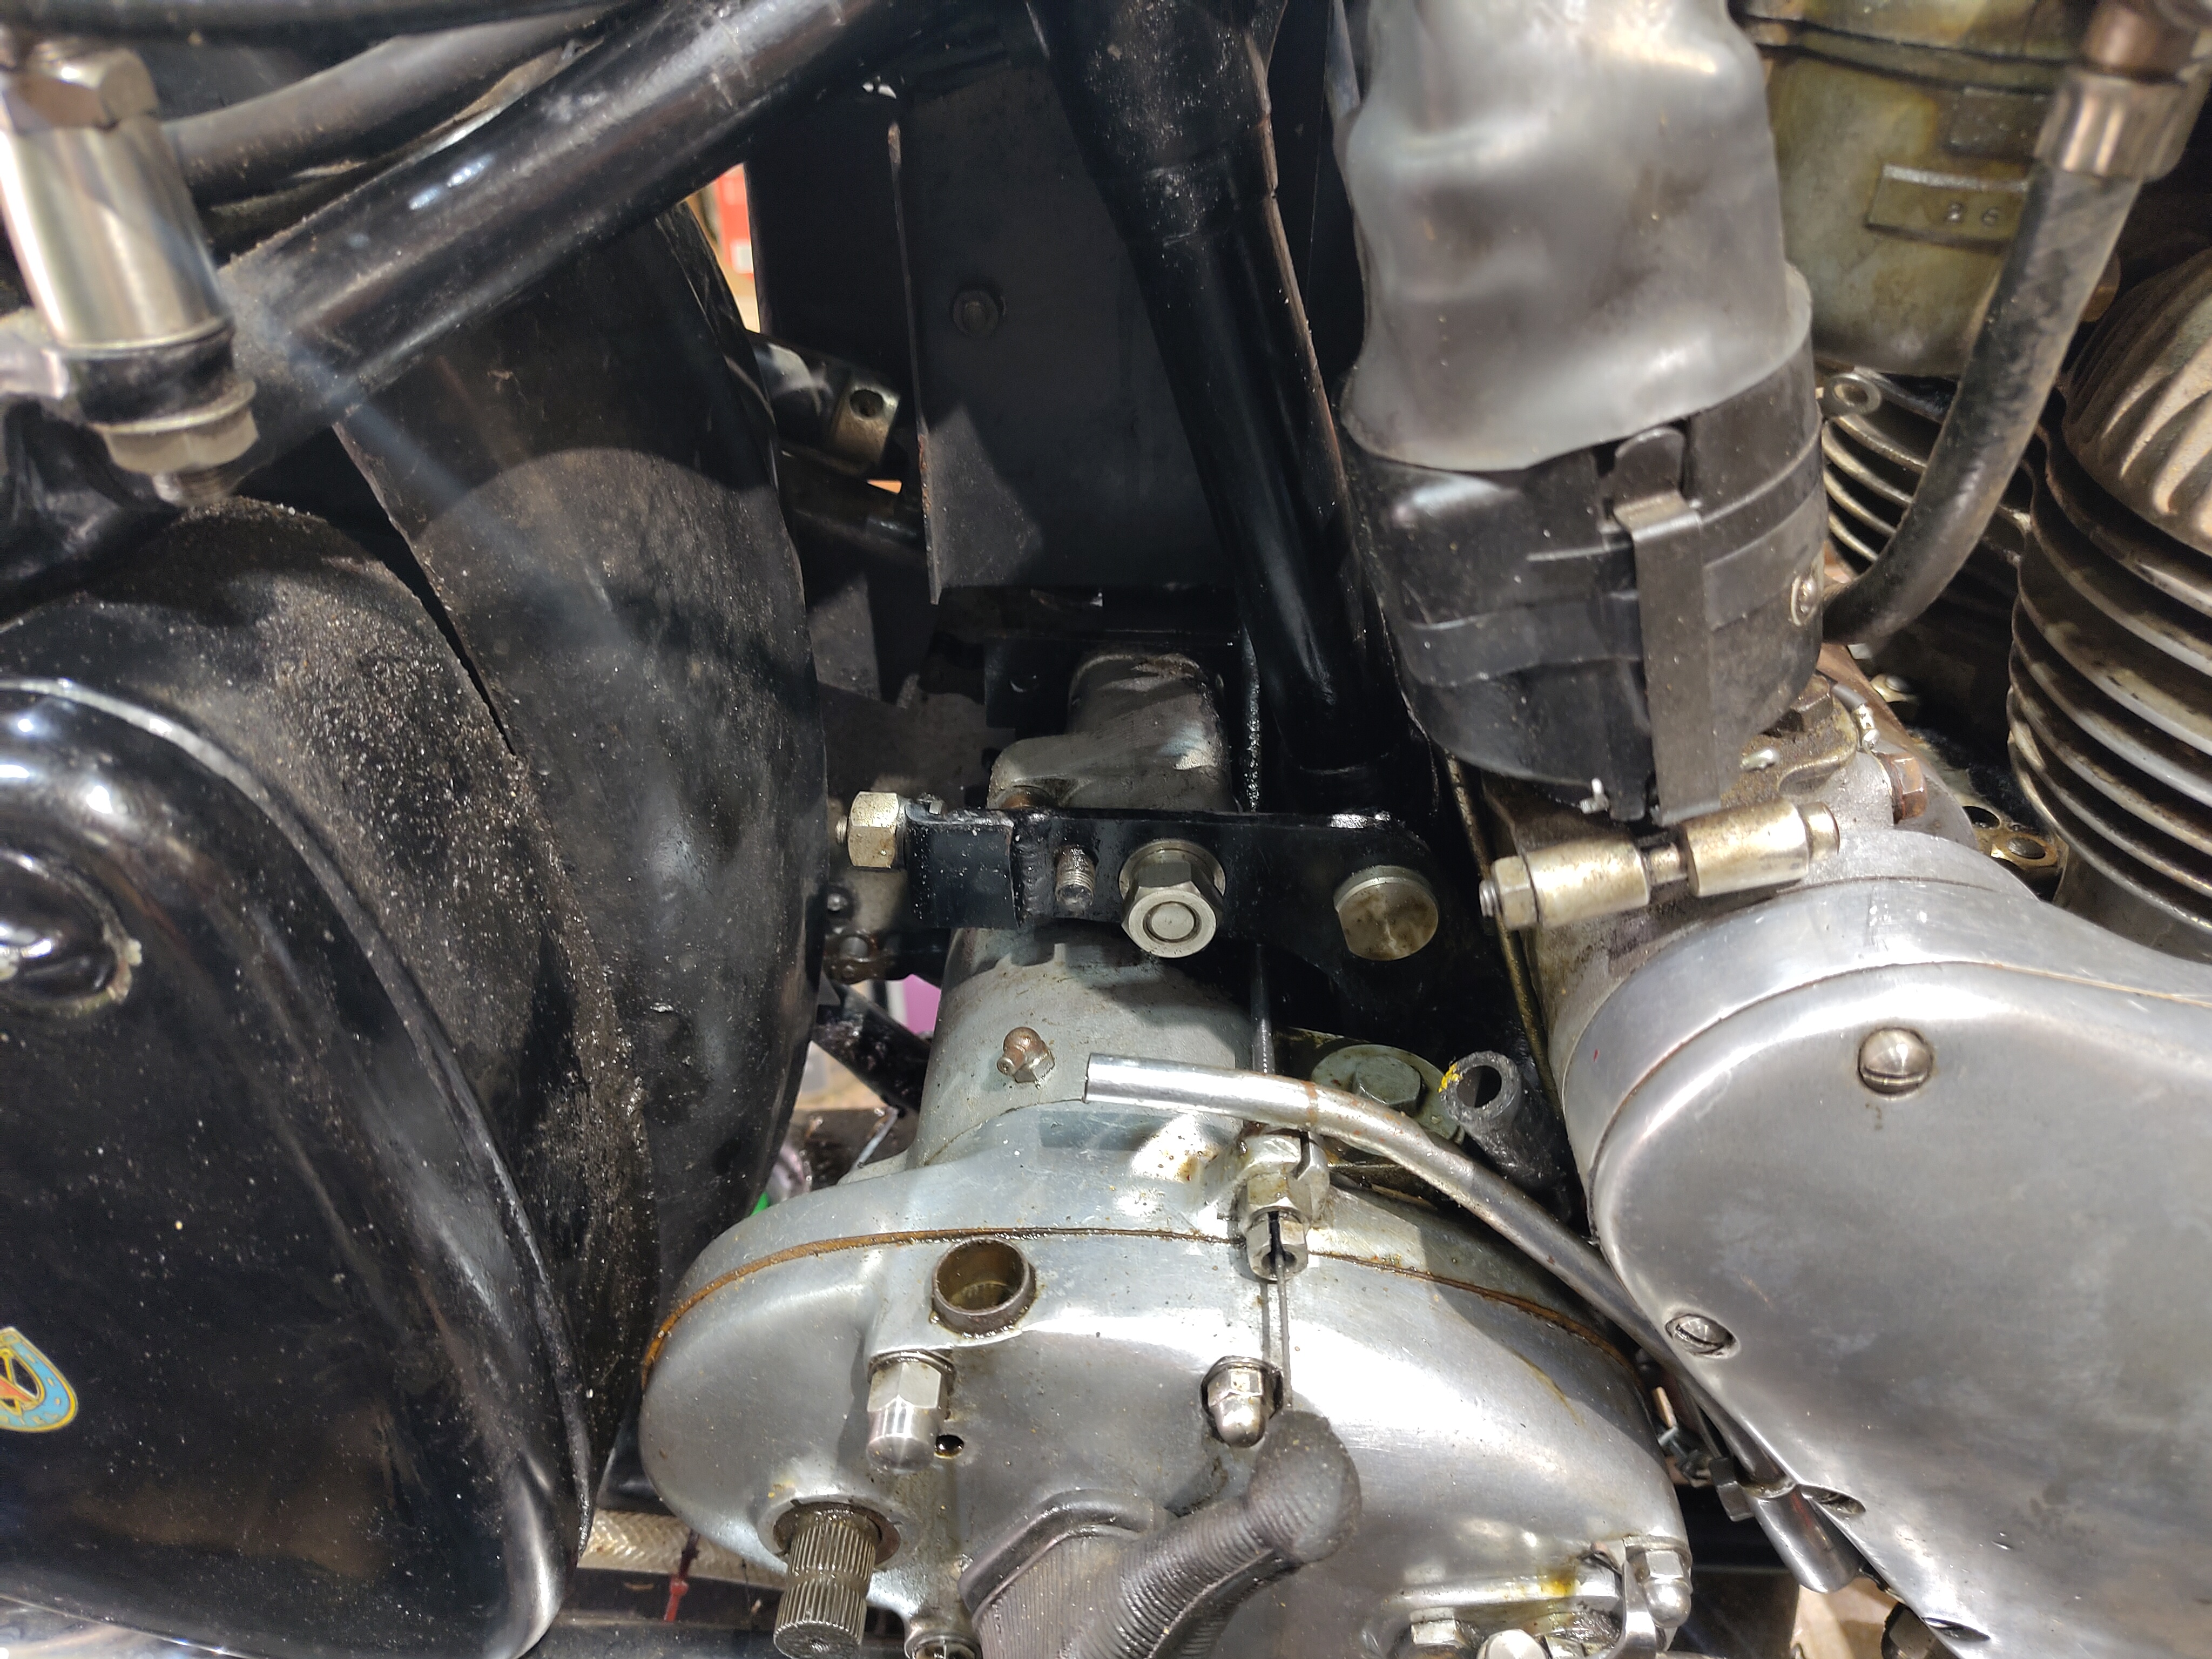
With the oil tank out I can degrease the area around the top of the box where the filler is - it's always quite mucky around here because it's very difficult to top the box up without getting grease everywhere.

The oil tank is also a very tight fit - it's always a struggle to get it out. I'm wondering if it's fouling the frame tube, perhaps stuck between the frame tube and the gearbox plates.

I had the tank in the parts washer for 15 minutes washing the outside and the inside and was pleased to find very little sludge and no debris in the tank at all. There's obviously been some further washing of the engine through the detergent oil that I'm currently using as the cases appear very clean and the goo in the bottom of the tank and on the sump of drain plug is just like the dark grey substance you would get from the crankshaft sludge traps.


You can see one of the cams in this picture - the wear ridge is quite clear. I have a new camshaft ready to go in when I decide that I'm bored enough to rebuild the engine!


I filled in my maintenance spreadsheet but for the record the mileage is 4089 miles.


Monday, 6 May 2024

FH - assembling the inner timing case

 Lots of work faces now, but an interim look at the cylinder head reveals that the valves and guides are beyond use - there is a couple of millimetres of rock at the edge of the valve head, with the valve half out of the guide. 

So, while I wait for a new set of guides, valves and springs let's start on the timing gear. Fitting the pinions is straightforward once I have deburred the Woodruff keys. The timing is set to the marks:

I've cleaned the dynamo straps since you have to have the inner timing case off to fit them. I'll plate these at some stage if I'm not too busy riding the bike:


The oil pressure release valve has been through the ultrasonic bath and has a new 5/16" ball. The old one was grooved and rusty:


Next, for the record, the pump drive washer is fitted:


I've made a small spacer from gasket paper for the end of the pump. Each of the stud threads has been cleaned up and fitted with blue Loctite thread lock:


I've used the original deep nuts - I've flattened these and recut the threads, adding a chamfer:


If you read my last post, you'll know that there is supposed to be a thrust washer in the nose of the pump, under the circlip. It needs to be 14.5 mm OD x 2 mm thick.


I had a bit of 3/4" EN11 in the lathe to make a late-pattern QD hub nut spanner, so I've used a bit to make the thrust washer:


I've left the pip in it to make it easier to get out. Next, the pump drive lock washer - the inner tang fits in a groove (like a keyway only less deep) in the end of the crankshaft. The tang on the new one is much wider than the remains of the one on the old washer  - time to get the needle files out:


With that in place, we can knock the tab washer down. On the crankshaft, I have bent the washer over both the lock nut and the pump drive sleeve:


For the record, the cam drive tab washer is knocked down too:


I've also finished polishing the timing cases:


I had to clean a lot of carbon off the timed breather sleeve before it would fit, and relieve a pip on the outside. It's fitted with the thickest cork washer available (5/32") and the gasket is coated with Wellseal. I've only done the inner face for the moment as I will want to take it off again.


Test fit:

That's it for now. Next I will probably fit the dynamo drive sprocket and it's seal, but then to do any more in here I need the dynamo and the Automatic Timing Device. Both of these bits need rebuilding.

Tuesday, 21 November 2023

Ariel Huntmaster vs. BSA A10

The purpose of this post is to look at the engine specifications, or the state of tune, for the various Huntmaster models and see how they compare with the closest BSA A10 models. We'll figure out which A10 is equivalent to the Huntmaster.


Here are the areas under consideration and the data I've found from reviewing the books:

Compression

  • 6.5:1 Golden Flash & Huntmasters 1954-1959 
  • 7.25:1 Optional for Huntmasters 1954-1959, standard for Cyclones
  • 8:1 Road Rocket, Optional for Cyclones
  • 8.3:1 Super Rocket
  • 9:1 Rocket Gold Star

Camshaft

  • 334 "standard" - fitted to the Golden Flash from 1950 - 1959 & Huntmasters 1954-1959 
  • 356 "sports" - Road Rocket, Super Rocket until 1959, Golden Flash from 1960 & Cyclone
  • 357 "race" - Super Flash, Spitfire Scrambler and Rocket Gold Star. Also fitted to the Super Rocket from 1960.
  • 358 "acceleration".

Valves

  • Inlet 1.406 Huntmaster 1954 -1959, Golden Flash 1950-1957, Super Flash / Rocket 1953-1960
  • Exhaust 1.375 Huntmaster 1954 -1959 Golden Flash 1950-1957
  • Exhaust 1.381 Super Flash / Rocket 1953-1960
No head changes for Cyclone

Carburettors

  • 76/276 (1 1/16" bore) - Rigid and plunger framed Golden Flash, also swinging arm Golden Flash & Huntmasters in 1954.
  • 10TT9 (1 1/16" bore) - Super Flash and Road Rocket, also Super Rocket until 1961.
  • 376 Monobloc (1 1/16" bore) - Golden Flash swinging arm frame, Huntmasters 1955 to 1959 and Spitfire Scrambler (1956 - 1959).
  • 389 Monobloc (1 1/8" bore) - Golden Flash 1960 on.
  • 389 Monobloc (1 5/32" bore) - Spitfire Scrambler (1960 on), Super Rocket (1962 on) and Rocket Gold Star.
No carburetter changes for Cyclone

Conclusion

So there you have it:
  • A standard Huntmaster is equivalent to a BSA Golden Flash, the most basic A10
  • A Cyclone is close to a BSA Road Rocket, though with a slightly lower compression ration unless it is fitted with the optional 8:1 pistons
  • My bike will be equivalent to a standard specification Ariel Cyclone.

FH - Finishing the crankshaft

In our last post, we determined that the big end clearances were good. At the same time, I checked the new gudgeon pins in the small ends and found those to be good too, so with the sludge trap cleaned and assembled some time ago we can commit to closing up the big ends with the proper big end nuts. These are £3 each, and can only be used once.

We torque them up to 22 lbf.ft, or about 29 Nm using the Draper 3/8" torque wrench.


I took the chance to clean the crankshaft down again with some brake & clutch cleaner and dropped it into the drive side crankcase half which I had laid out over the hole in my bench:


Here's another view, showing the new 356 camshaft as fitted to BSA A10 Road Rockets and early Super Rockets.


Tomorrow, I'll use some Threebond 1215 to seal the crankcase halves. Meanwhile, I need to sort out the bolts to hold the cases together. I have this lovely box of studs from Acme Stainless:


This sketch, from Draganfly's 'List 15' (a very useful document) shows where the studs go:


Saturday, 23 September 2023

FH - Engine bottom end

 While the painted parts are away, I've got the engine on the bench. Way back when, I established the state of the bores, mains and big ends and what I want to do now is to trial fit the new large bearing crank into the original cases.

A little while in the kitchen at home saw the main bearings fitted:


It's then no more than an hour's work to assemble the crankshaft and the timing gear; the good news is that the timing gear bushes already in this case are in very good condition with very little play. Shame I already bought a new set.

It was clear that the crankshaft was a bit tight. The setup with the DTI reveals no end float and the crankshaft was mildly stiff to turn, but then it does have a large plain bush at one end:


Investigation revealed that the drive side bearing wasn't fitted fully home against the crankshaft web. With that fixed, we have 0.34 mm end float:

That's about 0.013"; we want a maximum of 0.005", according to BSA Service Sheet 208 - Waller is silent on the subject. Since 0.005" is 0.13 mm, we need to shim 0.21 mm; I've bought 0.25 mm shims which should give us 0.09 mm end float, or 0.003".

More later when bits arrive.

Friday, 2 October 2020

W/NG - Assembling the bottom end - again...

So, a bit of spare time arrives and I have the camshaft, the cam bush, a 3/4" reamer and a gasket set. Let the bottom end rebuild commence!

First, it's back to the Rothenburger to remove and replace the bush, which I can do in one heat cycle. I'm careful to avoid the new bearing. I knock the new bush into the hot cases, driving the old bush out as I do it - a simple operation when you have enough heat.


Whilst that is cooling, let's look at the camshaft. The principle reason for replacing the camshaft is because the inner journal is badly worn. I reached out to the AOMCC Facebook community and came up with this camshaft, which is actually the profile used for the sidevalve machines. You can see it has a much longer duration than the Ariel F cam normally fitted (the one on the right), but it has the same base circle diameter. This means I will get more fuel in and and exhaust out again, and make more power but I won't have to change the followers or the pushrods.


Another problem solved by the AOMCC is the knackered half time pinion, the one at the front of the picture. A member kindly sent me the one behind, which looks unused.


Coming back to the crankcase camshaft bearings which I fitted earlier. When you buy a bush it is usually undersize, and this was no exception. It needed reaming to size, whilst aligned with the bearing in the timing chest - so I used the timing chest bearing as a guide whilst reaming the crankcase end bearing. In this next picture I have the timing chest bolted in place and a 3/4" round bar passed through both bearings to demonstrate their alignment - the bar turns smoothly and freely.


This next picture shows a block of wood I use to support the crankcase whilst working on it. The cam follower pin, crankcase nose etc. fits in the hole.


Before I assembled the engine, I fitted the camshaft so that I could prove the bearings. The camshaft turned smoothly and with no wobble, so I proceeded to dismantle it all again and to assemble the crankshaft into the cases, and to bolt the cases together.


I replaced the assembled cases in the frame and assembled the engine plates. Now that I had the crankcase held securely, I refitted the oil purifier with some Loctite 243, as suggested by Chris Williams at Alpha Bearings. A lot of folks really struggle to get these out and they often come out in pieces; I have had this one out before (and cleaned it before), so it was quite easy, but I was surprised to find it had quite a bit of sludge in it. Chris's point was that they might be difficult to get out, but if they come out when the engine is running the crankcases will be scrap.


Once that was back in, I took the opportunity to use the oil can to pump some oil into the end of the crankshaft, and eventually I saw it emerge around the big end proving that the oil ways were aligned.

Now, I could fit the new half time pinion & camshaft and set the valve timing.


I had a look at the cam followers and selected the best two. The inlet one is quite worn and I should really replace it.


Before I put the timing cover in place I need to fit the magdyno. Before I did that, I cleaned up the slip ring which was a bit mucky.


Here's a new felt seal for the magneto drive:


Next, I fitted the timing gear case with it's small gasket, and added the large gasket with Threebond 1215:


I fitted the timing gear cover and rotated the engine several times to ensure the new gears were quiet and free, adding the camshaft magneto sprocket and the magneto chain, nominally tensioned at this point. I'll finalise that when the barrel is on and I can set the timing.


Since we are nearing the end of activity from this side of the bike, I'll refit the mudguard bracket to the engine plate. The original bolt fitted here looked like it had had an M8 nut forced over a BSC thread, and both were scrap. This is a new stainless 5/16" bolt & nut.


With that done, I can fit the oil tank, hook up the oil lines and fit the oil pump.


Next, I need to clean and paint the barrel, fit the barrel & piston and set the ignition timing. Then I will close up the magneto drive having set the chain tension; I'll then inspect the clutch before I finish building the head. I know that I have to make a valve guide drift and paint the head, and possibly give the valve seats some attention - I'll do that while I wait for the clutch tab washers, nut and any other components I find damaged.

Friday, 18 September 2020

W/NG - Assembling the bottom end

I said the next step was to sort out the camshaft, and it was. The reason for that was that I wanted to replace the camshaft bush in the timing side crankcase before the crankcase halves went together and I have done that, because I have found the camshaft and I know what diameter the journal is - I'm confident that the bush can go in as-is, and not need reaming.

So without further ado I can clean the bearing journals and use the Rothenburger MAPP torch to warm up the cases and drop the bearings in, with their spacer and circlip on the drive side.


The crankshaft has been away at Alpha Bearings in Dudley, the UK's premier supplier of big ends for classic motorcycles who have replaced the big end and realigned the crankshaft at what would have been a very good price (and with a one-week turnaround) had the small end eye not turned out to be oval. I was aware that it was very worn and for some reason had no oil hole. The crank came back from Alpha true to less than 0.001" and looking excellent:


The small end eye now has it's lubrication slot. I had a small worry when I thought the mainshaft was not correctly pressed in - though Alpha's had not touched the shafts:


I spoke to Alpha and several people in the club about this suspecting that I knew the answer - it is a taper fit. Alpha explained that if this gap were absent, you could not be sure the taper was pulled up correctly - so that's another one for the memory bank. The AOMCC audience all concurred, so I am happy again.

So next, we are into shimming the crankshaft for the prescribed 0.008-0.012" endfloat. This is the set up I used - the DTI is actually attached to a magnetic stand on the vice anvil, and the heavy crankcase assembly is just sitting on the bench. Not ideal, but I found that if I move the crankshaft against the case using a twisting motion with a screwdriver (flywheel to inner case wall), that cases will not move at all.

In this way, I found that I had a total of 1.4 mm endfloat with no shims. That's about 0.055".


That's a start, but we need the correct endfloat with the rod in the centre of the crankcases. To do that, I used a bore gauge to establish a position where the rod to crankcase measurement was equal on both sides and measured the end float from this position.


I have some 0.3 mm (0.012") and some 0.5 mm (0.020") shims, of 26 mm ID. Time for some calculations:


That leaves me with 0.22 mm end float, or 0.0086". Perfect.


I bolted up the crankcase halves sealing the joint with Threebond 1215 and assembled the cases into the frame, fixing the front engine plates loosely onto the crankcases and then dropping the lot into the frame, retaining it with the single 1/2" stud at the bottom of the down tube. 

When you start on the rear engine plates, you do the drive side first, with two studs into the engine and hold the plate to the frame on the gearbox top stud, then pass the footrest bar in. If you don't do it this way you will never get the spacer in.


When that is done you can put the rest of the bolts and studs in with the timing side plate and the magneto platform. If you look closely you will see the bash plate fitted, though you cannot finally bolt this in place if you have not put the sump plate on.


You can see why the magneto platform needs those extra studs and bolts to stop it flapping about.


I made an earth wire for the magneto:


With it all tightened up, I did some trials with the timing case. Turning the engine over with the camshaft, rockers and half time pinion in place sounded awful, so I had to investigate.


That pinion is knackered. I also realised that the camshaft bush that measured up OK was actually oval - I should have looked for that before. It was OK in one direction but when I looked at 90° to the original measurement I could see it was quite worn.

The next step is to pull the engine out again, replace the camshaft bush and reassemble with a new half time pinion.