Showing posts with label tool roll. Show all posts

Sunday, 17 April 2022

Huntmaster Toolkit

Updated: First published April 2018

As you know, I have a bit of a passion for getting the tool kits right on my bikes. Some while ago, I started a post on the tool roll for the FH, which took a while materialise but the secret to finding these bits is to do your research and start looking, in the knowledge that it might be a while before you find everything...

Here is the toolkit list from the 1956 parts list. Added to this for 1957 is a 'single ended box spanner for rear wheel nuts', number 6601-57, probably when the fully enclosed rear chain case was introduced:


Here's a list I made to collate what I had. Decimal dimensions come from the factory drawings in Ray Tolman's list.:

Item
Ariel PN
Old PN
Function
End 1
End 2
1
6600-32
G1/110
Spanner for brake fulcrum adjustment
2
6600-36
G1/125
Double Ended Spanner
3/16
1/4
3
6603-28
G1/59
Double Ended Spanner
5/16
3/8
4
6603-56
Double Ended Spanner (rear wheel spindle nut)
5
6604-55
Tappet Spanner
6
6605-28
G1/66
Double Ended Spanner
7/16
½
7
6606-27
G1/55
Double Ended Spanner, steering head nuts
1.01"
9/16" BSW
1.1"
5/8" BSW
8
6608-56
Spanner for sparking plug
9
6611-55
Box Spanner for rear wheel
10
6611-31
G1/99
Tube Spanner for hub spindle nut
0.825"
7/16" BSW
0.925"
1/2" BSW
11
6616-26
G1/33
Screwdriver
12
6616-29
G1/86
Screwdriver for clutch spring nuts
13
6617-56
Magneto Spanner
14
6625-26
Tyre Lever
15
6625-55
Tyre Lever and tommy bar
16
6636-54
Tyre Inflator
17
6601-57

Single Ended Box Spanner for rear wheel nuts


6640-54
Tool roll only

My FH tool kit started off looking like this:

A tool box full of spanners
So we need to set to and find the tools. Item 1 is easy, and I already have one for the FH:

Item 1, Brake Fulcrum Spanner
Item 2 is also easy, once you remember that these spanners were bought in by Ariel, the makers names ground off and 'Ariel' stamped in their place. They are also notable for the fact that they are marked with BSW sizes unlike most Ariel spanners, which are marked with BSF or BSC sizes:

Item 2 Double Ended Spanner
Item 3 is another common Ariel spanner, the G1/59. This one is the later oval shank style:

Item 3, Double Ended Spanner
Item 3 is a bit tired and will need some material adding.

Item 4 is a complete guess, supported by Ray Tolman's opinion:

Item 4, Double Ended Spanner
Is this BSA spanner similar to item 5, given the provenance of the FH engine?


Giving it some thought I decided this later BSA spanner would be more appropriate.


Item 6 is one of the most common Ariel spanners. This one is pre-war (rectangular shank style):

Item 6, Double Ended Spanner
Item 7 is also very common, though this one has been filed out...

Item 7, Double Ended Spanner
This one fits the spark plug, but other than that is a complete guess:

Item 8, Spark Plug Spanner
Since item 9 has a 1955 part number, I assume it must be the wheel spindle spanner: 

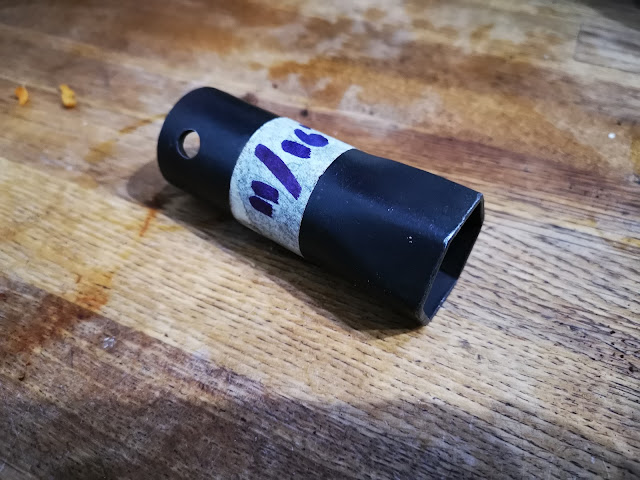
Item 9, Box spanner for rear wheel

Here's a modern equivalent for item 10:

Item 10, Modern Version
Item 11 is just the usual wire formed screwdriver:

Item 11, Screwdriver
The clutch screwdriver is also easy:

Item 12, Clutch Screwdriver
Item 13 is a standard Lucas magneto spanner:

Item 13, magneto spanner

Item 14 is a tyre lever, which I assume is similar to either to the 'third hand' type included in the military tool kits, or more probably the Dunlop spoon type. Since I have a spare cranked one, we'll add that for now:

Item 14, Tyre lever

Would item 15 be something like this, used by Triumph?


Here's my attempt, almost there:

Item 15, Tyre Lever and tommy bar

The tyre inflator:

Item 16, Thapex Tyre Pump

Here's the last item, which I guess was added when the FERC was introduced in 1956, making it difficult to get to the QD hub nuts:

Item 17, A single ended 3/8 BSW spanner suitable for the hub nuts

So now I have this, and a bit more searching to do.


In addition to the standard tool kit, we'll need this 10 thou feeler gauge and a 1/8" hex key for the Triumph socket head tappet adjusting screws I fitted in this post:


Here's the repro tool roll I made in this post:


The little pile of tools fits the bag nicely:


And the bag fits in the tool box:


Here are a few links to my other toolkit pages:

Sunday, 13 January 2019

On the Bike: Spares & Special Tools

Inspired by a letter in the VMCC magazine, listing the special tools and spare bits the writer carried on his machine, I was inspired to take a look at my own on-bike spares. You all know, from various blog posts that my tool kits align with Ariel's parts books:
However, there are a few items in the kits which are my own additions. The VMCC letter writer listed these items:
  1. Wire Cutters
  2. Foot pump
  3. Plugs plus HT lead
  4. Solderless nipples
  5. Adjustable spanner
  6. Cable ties
  7. Spare bulbs
  8. Feeler gauges
  9. Torch
  10. Spare links
  11. Plug spanner
  12. Cables
  13. Small mole grips
  14. Various spanners
  15. Emery cloth
  16. Screwdrivers
  17. Engine oil
Now, I have a comprehensive tool kit on both bikes (including a tyre pump), but I keep a little tin box with extra things as well. I have a torch in my jacket pocket at all times. As a civilian bike, the SQ4 has a Colman's mustard tin:


The SQ4 has a set of combination pliers  and a full set of spark plugs in addition to the standard tool kit.

The W/NG has it's Romac puncture repair kit supplemented with a few extra bits:


Monday, 26 February 2018

Tecalemit Grease Guns

I've seen a few posts recently on Tecalemit grease guns which were often supplied in the toolkits of our bikes. People have problems with them, complaining that they don't work and consequently changing all the grease nipples to more modern types to work with modern snap on grease guns. There's no need for this - these guns work perfectly well if you know what you are doing...

Tecalemit type 7MC toolkit grease gun
There are several different types of grease nipple in the pages of history, but here's the type these guns are used for - The Tecalemit 'Tecazerk' nipple.


Here's one on the girder forks of my Ariel W/NG. Note the cylindrical shape with the rounded end & the tiny ball valve:


These guns are simple to use, but there are a couple of tricks you need to pay attention to to make them work - and keep working. The gun consists of a brass cylinder with spring loaded plunger - the end of the plunger is spun over into a machined recess in the cylinder, so it won't come off; the plunger is attached to the piston which pushes greases into a bore (A) in the cap. Grease is contained in the cylinder (B) above a cork seal. The nose of the gun is is retained into the cap using a fine thread and a hemi-spherical shape is formed in one end to accept the nipple.


Grease gun anatomy


To fill the gun, the end cap is removed and the volume B is packed with grease, pushing the cork seal down to the bottom of the cylinder. The trick here is to avoid leaving any air bubbles in the body of the gun. Do this with a straw inserted right to the bottom (before filling) and withdraw it carefully, filling as you go and by warming the grease before you start. You can pack the cap with grease before you put it on to prevent air bubbles forming in there too.

Filled with grease
To use the gun, start by cleaning the nipple and making sure you can see the tiny ball valve. You might have noticed there is a check valve in the grease gun and another one in the nipple - they are critical to the operation of the gun. If the ball is stuck and you operate the gun with no nipple on the end, you will get air in the gun and it will only work once. Place the gun over the nipple squarely - it helps to put a cotton rag between the nipple and the gun (old tee-shirts are good for this). This improves the seal between the gun and the nipple and the grease will happily go through the fabric. You can then push the plunger as many times as you want, keeping the gun aligned with the nipple.
Operating the gun
Here's how the gun refills itself. When you release the plunger, the springs close the ball valves and the piston, as it moves back, generates a small vacuum in volume A shown by the white space in the drawing.
Back stroke produces vacuum in Volume A
As the piston emerges from volume A, grease moves forward to fill the void, pulled forward by the vacuum. At the same time, the cork washer moves forward, effectively reducing the volume B until all the grease is used up.
Grease from volume B fills void in volume A

This demonstrates the criticality of the ball valves and the use of the cotton rag - the absence of either prevents formation of the vacuum in the cylinder, which prevents recharging of the gun. Without the vacuum, an air pocket will be left in the cylinder and volume A will not refill and the next stroke will not pump any grease out of the gun.

So the moral of the tale is, carefully fill your gun and take a rag with you in your toolbox!

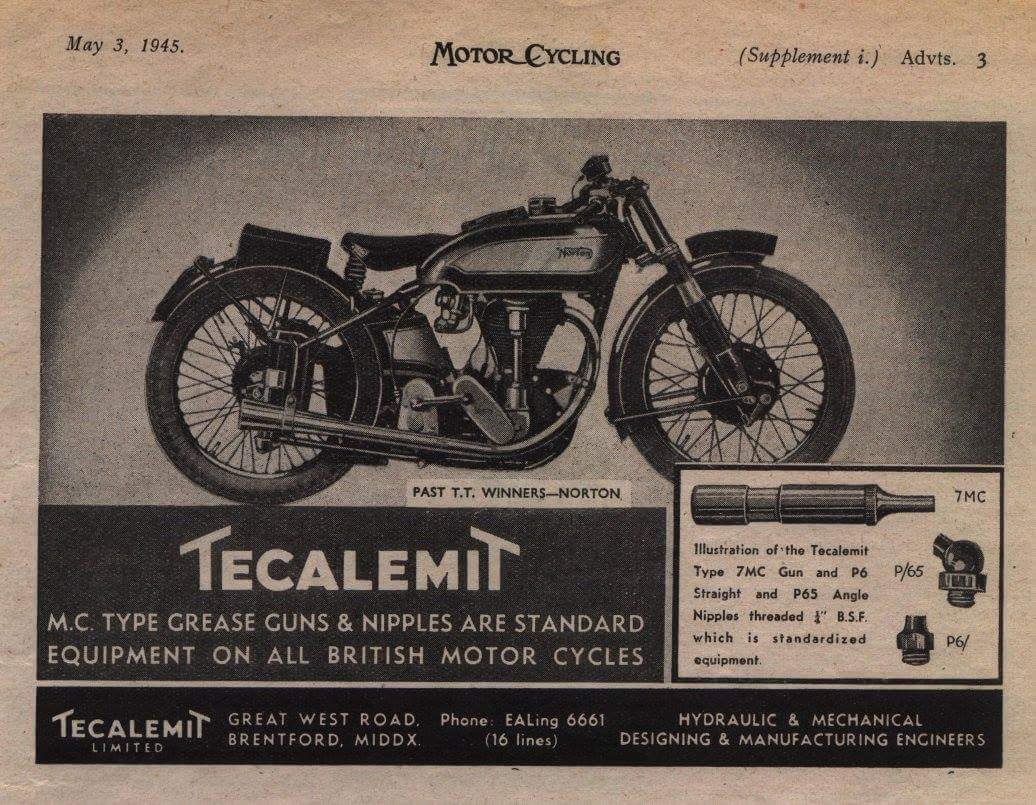
Lovely period advertisement - courtesy Richard Payne

Monday, 21 November 2016

FH Tool Roll

Eventually, I will buy some material and make a tool roll for my FH.

Until then, here are some pictures of the 6640-54 tool roll supplied by John Sullivan, AOMCC member from Austin, Texas who did a lot of research into the later tool rolls which was written up into an article which appears in Cheval, July 2007:


Here's his description:

Material 

The tool roll appears to be black Vynide (same material as the original Ariel seat cover). It is a simulated leather material of small pebble grain and texture with a black cloth lining for its offside, which becomes the inside lining. The main assembly consists of three Vynide pieces, the main body section and two end pieces. The body section is a rectangle 13" (330mm) long by 8 1/2" (216mm) wide. The top two corners are rounded, with a radius of about 1" (25mm), and the bottom two corners have a radius of 3/8" (9.5mm). Binding is applied completely around. Side pieces are rectangles 4" (102mm) by 2 1/2" (64mm) with binding completely around; all four corners are rounded with a radius of 3/8" (9.5mm). There is a black binding of the same material (Vynide) around each body piece, of approximately 1/4" (6mm) on each side; ie 1/2" (13mm) binding wrapped around from front to back side and sewn. Stitching is a medium-size black thread, probably cotton. Stitch length is approximately 6 1/2 stitches per inch (1/6"; 4mm) long. The tie is a black, flat, woven cloth ribbon (twill tape), 1/2" (13mm) wide and 24" (70cm). long. It is sewn to the tool roll in the pattern of an X within a rectangular box, 1 1/2" (38mm) long by 3/8" (9.5mm) wide, starting 5" (127mm) from the top of the open section of the roll and centered between left and right sides. 

Construction 

Sew binding around all three body pieces. Sew tie to main section at location indicated. Sew side pieces to main section after aligning edge of each side piece with edge of main body piece and with the stitches on the outside. Body stitching is approximately 1/4" (6mm) from edge, typically right at the edge of the binding (only through two layers of material) and only occasionally extending over the binding.

Here is the toolkit list from the 1956 parts list. Added to this for 1957 is a 'single ended box spanner for rear wheel nuts', number 6601-57:


Currently my FH tool kit looks like this:

A tool box full of spanners
And I found this:


So here we go. Here's the material marked out with a Sharpie. Very simple compared to the old canvas tool rolls:


Cut out and ready for stitching:


Binding the opening:


Opening bound and ready to start on the main section. I've skipped the stitching in two places, to allow the main section binding to fit under the opening binding:


I've hemmed the ends of the tie:


And here's the tie in place:


Stitched to the main tool roll as described in Cheval:


Stitching around the corners, binding as you go is not easy - the material is quite sticky under the pressure foot, and the binding is quite thick. The pressure foot slides sideways off the binding and this drags the stitching out of line:


Top edge of the flap. Unfortunately it's white inside:


Completed the prototype. You can see that I've allowed the binding to slip along that top edge:

Open

Closed & tied up
A bit untidy, but it will do for the moment. We'll fill it up and see how it goes in the toolbox.

And again

Here are a few links to my other toolkit pages: