Showing posts with label tool. Show all posts

Friday, 12 July 2024

Charlie's Shed - clutch holding tool

 One of the problems that you can have when you're working on a bike is trying to undo nuts from components that spin around such as the clutch or the engine sprocket. 

Today I'm going to show you how I make a tool out of two clutch plates to hold the clutch in place while we undo the centre nut or conversely do it up again. 

Regular readers will know that I've built several clutches over the last few years and have a number of old clutch plates knocking about. To start with I've taken a friction plate and removed all the old worn cork inserts. Then I've added a plain plate and placed the two over the top of each other in the way they would appear in the clutch using the TIG welder to fasten them together.


Once you've got your two clutch plates together you'll need a handle - there's no point having the clutch basket and centre fixed together if it's still going to spin. In my case the handle is made from a piece of old door threshold - effectively a rough piece of 20 mm by 5 mm flat bar. I've used the TIG to place a fillet weld around the base of the flat bar and attach it to the clutch plate assembly.


I used the TIG torch to heat the handle and form a local bend as an experiment. The problem I have with forming hot bends by my usual approach - a MAPP torch - is that the heated area is so big, the bend is anything but sharp; OK if you want it like that, but this one needs to be in just the right place.

It's worked rather well I think. Here you can see it in action, helping put the FH clutch together.

Sunday, 17 April 2022

Huntmaster Toolkit

Updated: First published April 2018

As you know, I have a bit of a passion for getting the tool kits right on my bikes. Some while ago, I started a post on the tool roll for the FH, which took a while materialise but the secret to finding these bits is to do your research and start looking, in the knowledge that it might be a while before you find everything...

Here is the toolkit list from the 1956 parts list. Added to this for 1957 is a 'single ended box spanner for rear wheel nuts', number 6601-57, probably when the fully enclosed rear chain case was introduced:


Here's a list I made to collate what I had. Decimal dimensions come from the factory drawings in Ray Tolman's list.:

Item
Ariel PN
Old PN
Function
End 1
End 2
1
6600-32
G1/110
Spanner for brake fulcrum adjustment
2
6600-36
G1/125
Double Ended Spanner
3/16
1/4
3
6603-28
G1/59
Double Ended Spanner
5/16
3/8
4
6603-56
Double Ended Spanner (rear wheel spindle nut)
5
6604-55
Tappet Spanner
6
6605-28
G1/66
Double Ended Spanner
7/16
½
7
6606-27
G1/55
Double Ended Spanner, steering head nuts
1.01"
9/16" BSW
1.1"
5/8" BSW
8
6608-56
Spanner for sparking plug
9
6611-55
Box Spanner for rear wheel
10
6611-31
G1/99
Tube Spanner for hub spindle nut
0.825"
7/16" BSW
0.925"
1/2" BSW
11
6616-26
G1/33
Screwdriver
12
6616-29
G1/86
Screwdriver for clutch spring nuts
13
6617-56
Magneto Spanner
14
6625-26
Tyre Lever
15
6625-55
Tyre Lever and tommy bar
16
6636-54
Tyre Inflator
17
6601-57

Single Ended Box Spanner for rear wheel nuts


6640-54
Tool roll only

My FH tool kit started off looking like this:

A tool box full of spanners
So we need to set to and find the tools. Item 1 is easy, and I already have one for the FH:

Item 1, Brake Fulcrum Spanner
Item 2 is also easy, once you remember that these spanners were bought in by Ariel, the makers names ground off and 'Ariel' stamped in their place. They are also notable for the fact that they are marked with BSW sizes unlike most Ariel spanners, which are marked with BSF or BSC sizes:

Item 2 Double Ended Spanner
Item 3 is another common Ariel spanner, the G1/59. This one is the later oval shank style:

Item 3, Double Ended Spanner
Item 3 is a bit tired and will need some material adding.

Item 4 is a complete guess, supported by Ray Tolman's opinion:

Item 4, Double Ended Spanner
Is this BSA spanner similar to item 5, given the provenance of the FH engine?


Giving it some thought I decided this later BSA spanner would be more appropriate.


Item 6 is one of the most common Ariel spanners. This one is pre-war (rectangular shank style):

Item 6, Double Ended Spanner
Item 7 is also very common, though this one has been filed out...

Item 7, Double Ended Spanner
This one fits the spark plug, but other than that is a complete guess:

Item 8, Spark Plug Spanner
Since item 9 has a 1955 part number, I assume it must be the wheel spindle spanner: 

Item 9, Box spanner for rear wheel

Here's a modern equivalent for item 10:

Item 10, Modern Version
Item 11 is just the usual wire formed screwdriver:

Item 11, Screwdriver
The clutch screwdriver is also easy:

Item 12, Clutch Screwdriver
Item 13 is a standard Lucas magneto spanner:

Item 13, magneto spanner

Item 14 is a tyre lever, which I assume is similar to either to the 'third hand' type included in the military tool kits, or more probably the Dunlop spoon type. Since I have a spare cranked one, we'll add that for now:

Item 14, Tyre lever

Would item 15 be something like this, used by Triumph?


Here's my attempt, almost there:

Item 15, Tyre Lever and tommy bar

The tyre inflator:

Item 16, Thapex Tyre Pump

Here's the last item, which I guess was added when the FERC was introduced in 1956, making it difficult to get to the QD hub nuts:

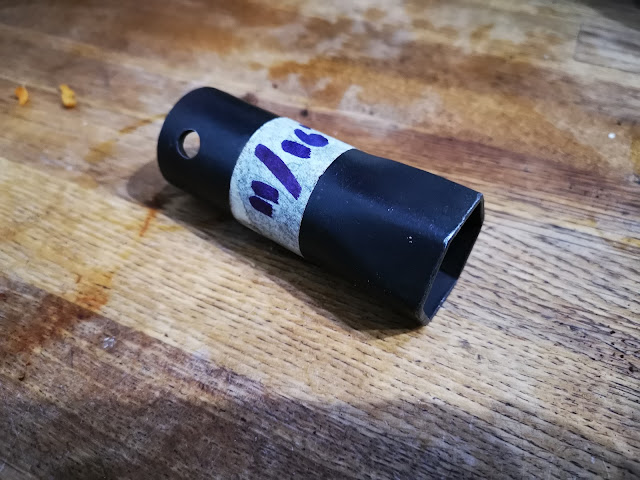
Item 17, A single ended 3/8 BSW spanner suitable for the hub nuts

So now I have this, and a bit more searching to do.


In addition to the standard tool kit, we'll need this 10 thou feeler gauge and a 1/8" hex key for the Triumph socket head tappet adjusting screws I fitted in this post:


Here's the repro tool roll I made in this post:


The little pile of tools fits the bag nicely:


And the bag fits in the tool box:


Here are a few links to my other toolkit pages:

Monday, 31 January 2022

Tools - new connector for the FH tyre inflator

 Some of you might have seen my post on Thapex tyre pumps - click here, and the post on making pump washers. As I said before, pumps bought from eBay, autojumbles and car boot sales arrive in unpredictable condition, cracked, with missing or tired washers and almost invariably without their connectors.

This article is about making those connectors, but first a word on terminology.

While researching these things, and looking for a longer pump hose that I could buy, I came to realise that the cycling world doesn't recognise the word 'hose' in connection with cycle pumps - indeed, cycle pumps are a bit passé these days having disappeared in favour of CO2 powered inflators. No - the cycling world seems to use the word 'connector'.

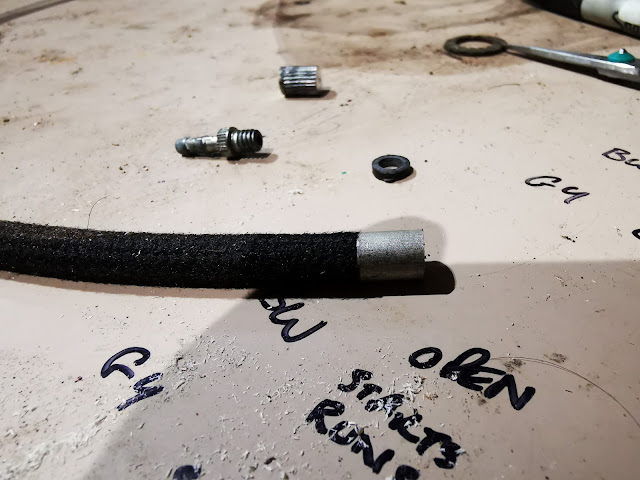
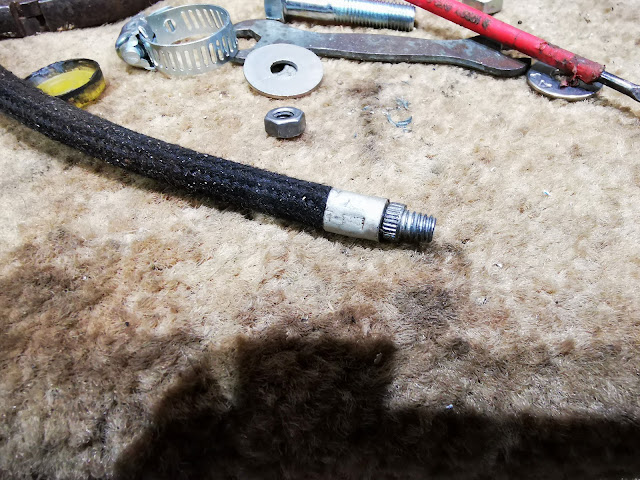
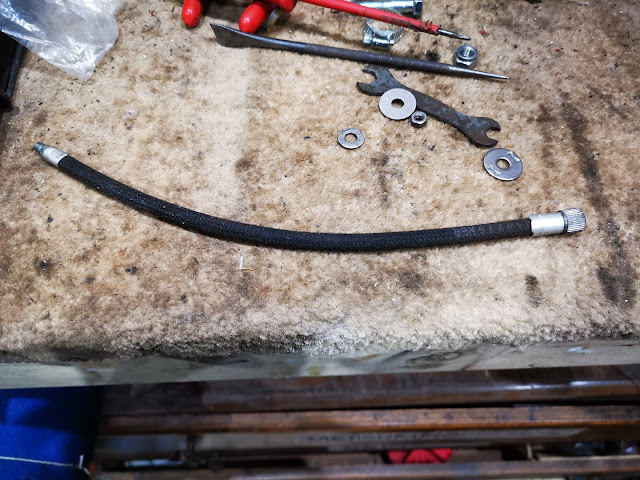
So, here we go. First we need a bit of hose - not too difficult, you can buy 1/4" braided fuel hose on eBay in various sizes - I bought 500 mm of 6.5 x 3mm black cotton braided hose for the princely sum of £2.68.

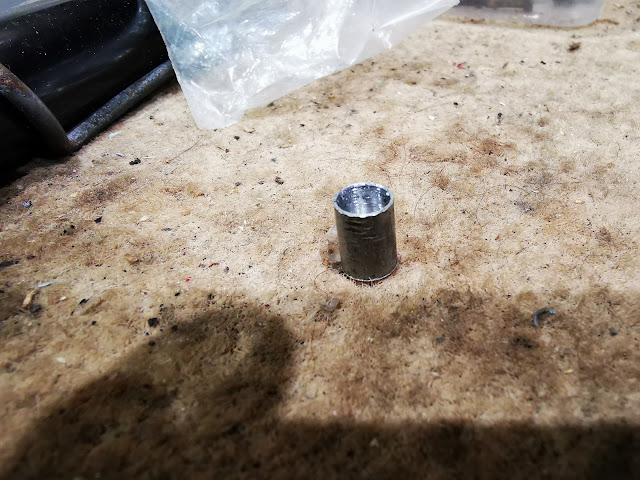
The difficult thing is always the ferrules, whether it is for a push bike or a motorcycle fuel line. They are either hideously expensive or just not available, so along comes another skip raid. Some time in the past I had acquired an aluminium cycle rack, the kind you put your shopping on and cycle home from town. It was full of weld but I had cut it up and stored it in my metal stock bin. It was 8mm OD. It machined well enough to make a couple of ferrules very easily - that is a 7 mm hole in the middle, they are 10 mm long and the 7 mm bore stops 1 mm short of the end. The end is drilled through 4 mm.


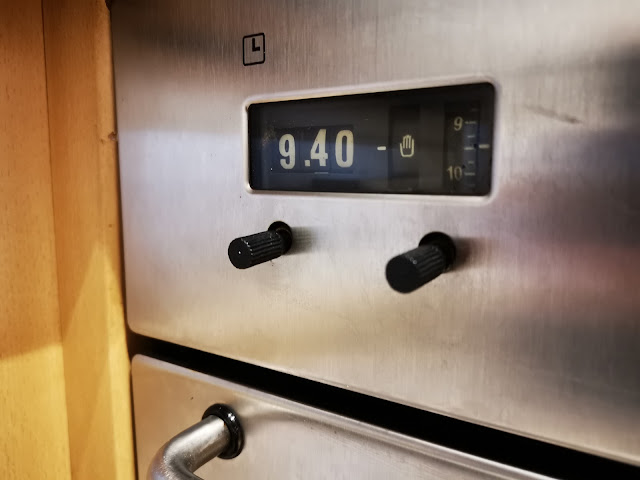
The aluminium bar gave me two replacement cooker knobs as well:


The ferrules fit nicely over the braiding:


The crimping was done in the three jaw chuck on the lathe:


And the completed article. The length wants to be as long as possible but is defined by how much you can store in the pump:


Here's the complete thing on the bike:


Sunday, 30 January 2022

Tools again - New washer for the FH tyre inflator

Some of you might have seen my post on Thapex tyre pumps - click here. As you might expect, pumps bought from eBay, autojumbles and car boot sales arrive in unpredictable condition, cracked, missing or tired washers and almost invariably without their connectors.

Some while back, I bought a nice new washer purporting to fit one of my pumps and it sat on my desk for a number of years until I came to fit it - which of course it didn't. It's about 1 mm too small.


So, time to roll out a lost art shown to me by my grandfather Leslie, who was a serious cyclist - he worked at the docks during the war, and having relocated from West Ham to Ewell had a 18 mile commute to work, which he did twice each day on his bicycle. What you do is this:

Start with a piece of leather, in my case the cuff from an old Jalatte safety boot. For a 7/8" pump, you will want a disc of about 30 mm diameter which you can cut with scissors, or however you want.


Next, punch a hole in the middle. The washer screw in a Thapex pump is 2BA, so a 5 mm punch will do. Next, we are going to form the leather into a cup; before we do that we are going to reduce the thickness of the leather around the edge, a process called 'skiving'. You use a very sharp - no, very, very sharp knife to slice a layer off the surface, reducing the thickness at the edge to perhaps half what it was (the boot was about 2.4 mm thick).


Fix the retaining washer in place with the screw and add a second washer on the back - I used an M5 repair washer on the back and an M8 washer under the screw head, to support the flat part of the washer at the right diameter - all clamped tight with a 2BA nut. Drop the whole lot in a cup of water for a few hours until it is soaked through.


This is a 22mm Jubilee clip - the inside diameter is set to match the inside diameter of the pump. I have pushed the wet washer into the clip to form the cupped shape. Make sure it is square and leave it to dry out.


And that's it - next day, we have one perfect cup washer. I smear the washer in neat's foot oil and assemble it straight away, before it has a chance to return to it's original shape.

Here it is installed:


Sunday, 13 January 2019

On the Bike: Spares & Special Tools

Inspired by a letter in the VMCC magazine, listing the special tools and spare bits the writer carried on his machine, I was inspired to take a look at my own on-bike spares. You all know, from various blog posts that my tool kits align with Ariel's parts books:
However, there are a few items in the kits which are my own additions. The VMCC letter writer listed these items:
  1. Wire Cutters
  2. Foot pump
  3. Plugs plus HT lead
  4. Solderless nipples
  5. Adjustable spanner
  6. Cable ties
  7. Spare bulbs
  8. Feeler gauges
  9. Torch
  10. Spare links
  11. Plug spanner
  12. Cables
  13. Small mole grips
  14. Various spanners
  15. Emery cloth
  16. Screwdrivers
  17. Engine oil
Now, I have a comprehensive tool kit on both bikes (including a tyre pump), but I keep a little tin box with extra things as well. I have a torch in my jacket pocket at all times. As a civilian bike, the SQ4 has a Colman's mustard tin:


The SQ4 has a set of combination pliers  and a full set of spark plugs in addition to the standard tool kit.

The W/NG has it's Romac puncture repair kit supplemented with a few extra bits:


Tuesday, 31 July 2018

Tyre Pumps

None of my bikes have tyre pumps. I need three tyre pumps. I don't know anything about tyre pumps, and of course I want original pumps that work really well, fit, and look the part. Not much huh?

I don't know who made tyre pumps back in the day, I don't know how to size them, where to buy them, or whether they had tubes or stirrups fitted. Having had a few bicycles I know how they work and could get one working, but beyond that...

So, where did the various motorcycle manufacturers buy them, and who made them? What types of pumps did they use? The ones I have seen are all variations on the bicycle pump theme; no stirrup pumps. Variations are around the materials used; brass pre-war and plastics post-war; and then the air hose connection which takes two forms:
  • end of the pump on smaller bikes and the 
  • side of the pump, with the folding wire 'stirrup' on larger bikes
What size did they use? Bore sizes:
  • 3/4"
  • 7/8"
Lengths
  • 12"
  • 13 1/2"
  • 15" - closed length 14 1/4"
  • 16 1/2"
  • 18"
The pump mounts, and the parts books for my bikes tell me something.
  • Bantam: Inflator PN 40-9026; illustration shows what appears to be an Apex inflator with no stirrup
  • Ariel SQ4: Inflator PN 6636-29, Tyre Inflator 14in. x 7/8in - the inflator does not appear in the illustrations.
  • Ariel FH: Inflator PN 6636-54, Tyre Inflator - again the later parts lists are not illustrated
  • Ariel W/NG: The inflator does not appear in the parts list nor in the tool kit list in the owners manual. However the earlier owners manuals picture the bike with a stirrup-type inflator in the usual position on the top chainguard. Chainguard is 14" between the points of the inflator mounts

Pump Manufacturers

Here are a few that I've come up with:

Bluemels

The English company Bluemel was founded in 1860 in East London by Charles William Bluemel, Ernest Adolphus Bluemel and their brother, as yet unnamed. The Bluemel products quickly gained an excellent reputation in cycling and CW Bluemel & Brothers Ltd. expanded rapidly. In 1902, the company purchased an artificial silk factory from Mr. Joseph Cash in Wolston at Coventry, and in 1904 relocated production there from Stepney. The brothers were rather frightened by the size of their new factory, but the wisdom of their choice was shown when additions had to be made to the premises to accommodate their production.

The company’s portfolio quickly expanded to include parts for motorcycles and automobiles. In 1913, the company became incorporated. 1914 Cycle and Motor Accessories Manufacturer. Specialties: celluloid cycle pumps, handles, mudguards, gear gases, dress guards, sparking plugs and accumulators for motors. Employees 550.

In 1938, Mr. Ernest Adolphus Bluemel, the last of the three brothers, passed away. By this time, the company had expanded from an initial 150 employees to over 600: described as a modern factory, its chief products were plastic mouldings in bakelite, steering wheels (to MG for example), and pumps, and to a lesser degree, bicycle mudguards and gear cases. A second generation of Bluemels, Frank William & Roland Edward, continued to expand the company after the death of the original founders.

In 1948, the company began to manufacture car parts for Jaguar and Austin Martin. By 1961, the portfolio included auto, bicycle, and motorcycle accessories, plastic mouldings, dials, and nameplates. In 1983, the company faced insolvency. British Cycling wholesaler, Chicken, recommended to SKS owner Willi Blome to look at Bluemel’s pump and mudguard company in Coventry.

Models:
  • 'Motorbike' 

Apex Inflator Co. Ltd.

I'm struggling to find any company history for Apex, but I have these adverts:

Apex advertisement from 1927


Apex advertisement from 1931
Advertising tells us Apex manufactured a range of bicycle pumps
  • 'Bailey Super', a 15" pump with a celluloid covered steel liner, 'solid drawn' (seamless) brass plunger tube. The most expensive Apex pump
  • 'Superlite', a 15" celluloid pump with a seamless brass plunger - the lightest Apex bicycle pump
  • 'Lastwell', a cheaper 15" bicycle pump with a celluloid tube and a split steel plunger
Apex also made brass pumps, with seamless brass or split steel plungers. You will notice that none of these pumps have stirrups, and one conspicuously absent from the advertisements is the 'Thapex', which appears to be the one favoured by the motorcycle manufacturers...

Here are a few more bicycle adverts, which are important to this story. You will see why in a minute.
Apex advertisement from 1945

Apex advertisement from 1946

Apex advertisement from 1949

Apex 'Thapex' pumps were widely used by Brtish motorcycle manufactureers; an Advertisement in a 1931 copy of Pitman's 'Book of the Mathcless' by the ubiqutous WC Haycraft advises that Thapex pumps had been used by Matchless for over 10 years.

Charles Britton

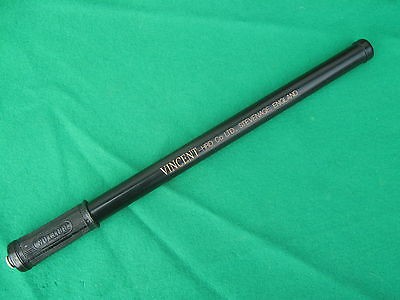
I don't know much about these. Charles Britton was apparently Great Grandfather to TV's Fern Britton; Vincent famously used a 13 x 7/8" Britton pump


Dunlop

Dunlop produced its first tyre for a motor car in 1906. The first rubber estates in Malaysia were acquired, in order to ensure a supply of raw material, in 1910. Construction began on the 400 acre Fort Dunlop headquarters and production site in Birmingham in 1916. Dunlop was the fourteenth largest manufacturing company in Britain by 1918, and its only large-scale tyre manufacturer. It had a market value of £8.9 million in 1919.

Dunlop began to diversify from tyres from 1924. It entered the sports market in earnest when it acquired the tennis racket manufacturer F A Davis. Charles Macintosh, the raincoat manufacturer, was acquired in 1926. The Malaysian estates were expanded over time, and Dunlop was the largest single landowner in the British Empire by 1926.

By 1930, Dunlop was the eighth largest public company in Britain, with a market value of £28.2 million. The company was a major industrial supplier for Britain during the Second World War, producing the bulk of rubber tyres and boots for the war effort.

By 1946, Dunlop had 70,000 employees, and sales outlets in nearly every country in the world. By 1948 Dunlop was the tenth largest British company, with a market value of £55.9 million.

Dunlop’s fortunes were closely interlinked with the British car industry. In 1950 Britain was the world’s second largest car manufacturer, and the world’s largest exporter of cars. Many of these cars were fitted with Dunlop tyres. In the 1950s Dunlop accounted for almost half of all tyre sales by value in Britain.

By 1955 Dunlop employed 100,000 people, and was the second largest private employer in Britain after ICI. In 1959 Dunlop was the twelfth largest company in the world outside the US.

Dunlop began to decline from the early 1960s as it was slow to adapt to the new market for steel-belted radial tyres. Performance was also undermined by the decline of the British car industry.


Pumps from Around the Internet

Internet research, using various keywords and spellings reveals a number of pumps, designs and manufacturers:

Unknown Brass Pump


BSA PN 27-8958, Inflator for WM20


Bluemels 'Motorbike'


Dunlop Inflator

An EBay sale, this inflator was fitted to a 1956 Triumph T110. The design of this pump suggest it was made by Apex.


Similar handle style to a Thapex?


Similar end cap to a Thapex?


Similar engraving to a Thapex?

Pumps and Ariels

Apex Pump on Ray Tolman's 1937 RH

Handle from Ray's pump

Original APEX from David Andersen's 1949 RH

Original APEX from David Andersen's 1949 RH

My Pumps

I've bought two Apex pumps for two of my Ariels, both speculatively, both from eBay. Here we go:
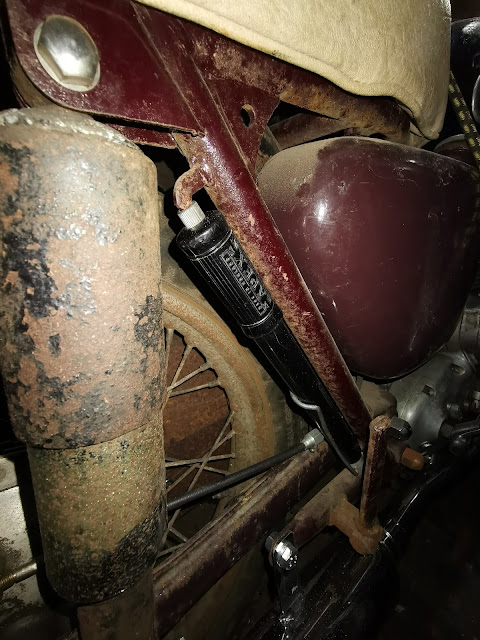
Early Thapex

This is a pre-1949 15" x 7/8" Thapex, that will go on the SQ4 - Its pretending to be old stock, sitting on a shelf at Selly Oak until it was fitted to my SQ4 in 1951.


It's got a black painted stirrup with no evidence of plating


It's got the early style handle, shown in the 1927 advert and also in the 1949 advert as the 'old style'


It's go the early logo on the body sleeve


It's got 'Made in England' moulded into the end of the handle.


It's got a steel end connection and a plated brass gland with a relatively light internal buffer spring.

Later Thapex

This one is post 1949 - there is a later style, but this is not it...


Very similar design, with some detail differences. Celluloid coated steel body again...


Post 1949 handle with 'Made in England' moulded in - very similar to the Dunlop pump, do you think?


New body logo, engraved and filled with gold paint


Alloy end cap, with cadmium plated stirrup


This one has it's washer and fittings. Notice the buffer spring is heavier, and the gland nut is Bakelite; that round head screw is 2BA and fits in a square nut pressed in to the plunger tube.

This one is fitted to my 1958 Ariel Huntmaster.

Pump Repairs


There are a couple of posts on repairing these pumps: