Showing posts with label 275. Show all posts

Monday, 29 September 2025

W/NG - on the bench

 With the Square Four away it's time for the Huntmaster to step up and become go-to bike. The W/NG is going on the bench for a bit of a look around and some little jobs .

It's quite oily and I know that the decompressor is still leaking. What I didn't expect was to see that the leak appears to come from the main decompressor body and not from the spindle - it appears that the Dowty washer isn't doing its job and perhaps that is because the mating surface isn't as flat as it might be. I've cleaned up the nut and mating surface and replaced the Dowty washer with a new one, as I don't have a fibre washer of the correct size.

I've also replaced the (missing) gasket in the exhaust inspection cap - see that drip?


On a club run a couple of years ago, the horn fell off and it's retaining bolt was replaced by a 5/16 screw from the spares kit. I've replaced this with the proper 3/8 screw and I've also moved the horn bracket a little bit so that the terminals don't touch the engine plates and the horn body doesn't press the cable against the frame. The horn is now free to vibrate properly.


I've taken the opportunity to reroute the cable as well.


There are always tiny little things that bug you about a bike, particularly one which is in patinated condition like this. The washers under the headlamp bolts were very large and unsightly, being chromed. I've replaced these with some rough old washers of the right size which look a lot better.


I've stripped the carburetter and cleaned the idle ports, but I didn't really find anything.

In other news, the Huntmaster has most definitely wet-sumped. There's probably a pint of oil here in this pan which I drained from the sump, being unable to start the bike. You could feel the oil in the crankcase being churned up when you kicked it over.


Thursday, 1 September 2022

W/NG - fixing the dribbling

 Over the past couple of weeks, I've noticed the W/NG float bowl has been overflowing - but only before I start the engine. When it's running, the leak stops - presumably the needle seats a bit better with the movement, or perhaps the engine uses what little fuel is leaking. This probably contributed to the starting problems my son was having a few weeks back.

Anyhow, I resolved to sort this out, initially by having a look and cleaning any debris from the bowl or from the fuel pipe, but this had no effect. The bike has a new fuel filter so there wasn't much in there anyway.

At the suggestion of a couple of guys in the AOMCC, I lapped the needle into it's seat usng Brasso. I dropped a slug of Brasso down the fuel connection:


Followed by the needle, which looked like new:

I held the needle in the chuck of my pillar drill and ran it for a few seconds, allowing the weight of the float bowl to hang on the needle.

The needle now has a thin, continuous ring around it, showing where the Brasso has worn the seat a little. It now seals perfectly, and reseats when I operate the tickler.

Friday, 5 March 2021

W/NG: finally fixed?

Since the last time I wrote about the W/NG, we have been locked down again and are only now seeing the light at the end of the tunnel. We've had snow, freezing winds, and Christmas, if only for a day or two. It's had very few outings since the COVID crisis is a very bad time to be needing the services of A&E in a hurry should the worst happen so I have been painting (a house), making an airbox for the QR50 and turning parts for the Model A. 

However, painting a city centre house means you need to get there and park, which is much easier on a bike so I have used it a couple of times. You might recall I put an old Lodge HN in it, to see how a traditional plug would behave - well, it failed after 200 yards and a new W8AC went in. This was fine for the rest of the commute, testing the new main jet, but the high speed thrash along the main road had us arrive back coughing, spluttering and sooting up.

Back to square one. I decided to replace the float needle, which was an old one:


Can't see what's wrong with it? No, that's because it's hardly worn. The fuel level was quite high:


Messing about with the float bowl got the level down a lot:


It ticks over nicely:


I wasn't convinced that it would make the difference, and looked back over some old pictures only to realise that the throttle needle was not, in fact new... I bought another and made a comparison:


Here, I've marked the old needle (bottom) and the new needle (top) every 10 mm. The chart below shows the diameter at each position in thousandths of an inch, with the difference in the 'wear' column on the right.


When you consider that the needle jets are sold in increments of one thousandth of an inch, wear of up to six thou' in the needle is very significant.

It has to be said, this is a schoolboy error if ever there was one - I should have bought a new needle at the outset, I would have saved a fortune in spark plugs.

A 50 mph thrash down to Weybourne produced this colour in an old B5HS.


And the fuel level? I'd set the float so low that the valve could hardly open. I could ride a couple of hundred yards and then it would splutter to a halt, and I would have to wait while the float bowl filled up again!


Monday, 28 December 2020

W/NG - getting rid of the fouling problem

A week before Christmas I needed a haircut, so I took the opportunity of a sunny day to take the W/NG on its first decent run since the engine rebuild, having replaced the 0.107 needle jet with a (correct) 0.106. It took me 30 miles to foul a new W8AC, instead of 3; for the trip back I changed to a used B5HS which took me another 30 miles until it too showed signs of fouling.

It was all my fault. When it arrived from Italy, the W/NG had a 276 fitted and I renewed the needle jet for the 276 because the one in it was knackered, and all was well. Then I found a really good 275 body, marked for a W/NG and I swapped the needle jet and main jet into it with a new slide and needle. Of course, the 276 uses a 107 needle jet and the 275 needs a 106 so I had unwittingly installed the wrong one, so finding that improved the situation.


Back to the present, and with hair trimmed, I rode back to the coast and it was surprisingly dark when I got home. On the way, I pondered other elements that I had swapped from the old carburetter and realised I had no way of knowing whether my main jet was indeed a 120 (it is stamped 120) or had been tampered with. I ordered a new main jet when I got back. I suspected someone had attacked the 120 since it was smoking when I took this picture and had fouled the Bosch plug on the way down. 


It was a good run though and she was humming along getting to 50 easily on the flat, though of course I am being very careful not to stress the newly rebuilt engine.

A few days later, a package from Hitchcock's arrived - I have taken to buying Amal spares from Hitchcock's, since their postage and packing costs, a flat fee, are more reasonable than Burlen's. 


It's a matter of a few minutes work to change a main jet, and have a look at what I found. The question we have to ask ourselves is when is a 120 main jet not a 120 main jet? And, as you can see from the picture, when someone has stuck a drill through it!

Afterwards, I took the old W/NG on a short run to Cromer and it has now stopped smoking and is much more sprightly. I'm hoping the fuel consumption might be better, and it will stop eating spark plugs! I've done about 35 miles on the old B5HS so far, so it's definitely improving but I've installed an old Lodge HN out of the Huntmaster to see what happens. The B5HS is certainly not as light as I would expect it to be when you consider that it is too hot a plug for this engine.

Wednesday, 7 August 2019

More Egg

I was parked outside my barber's earlier. He asked me where I was going, and I was heading off for an hours ride or so. He asked whether it would get all that way without breaking down. I told him that in my experience most roadside breakdowns were instigated by the rider messing something up or not paying attention when in the workshop.

Forty minutes later, I spluttered to a halt thinking the carb was flooding. This is what I found: 


I've wiped a lot of egg off my face since I've had old bikes!

Tuesday, 30 July 2019

New carburetter for the W/NG

Updated from March 2019

I put a bid on this carburetter body (and won the auction!) thinking that I would have a go at sleeving a carburetter back to size, having some fun with my lathe and getting an original carburetter for the W/NG in the process. I know I can more easily go and buy a new 276 from Amal, jetted to suit my bike but where's the fun in that?

This 275B/1J came up on eBay at a good price, and is perfect for my W/NG:


For less than £20, I have a body, a slide, the jet block and the big union nut. There's a needle and a bent air intake bellmouth. It's all a bit fluffy, but we can attack it like we did the Solex.

It's actually in better shape than the 3HW 276 fitted to my bike, so I will get it up and running and see how it goes. Maybe I'll save the tired 276 for a bit of mini-lathe practice.

It will need an air valve, a mixing chamber top and a top ring, but most of the rest will transfer from the 276. The 5/045 air valves are available from Drags - the top and the ring might be more difficult...

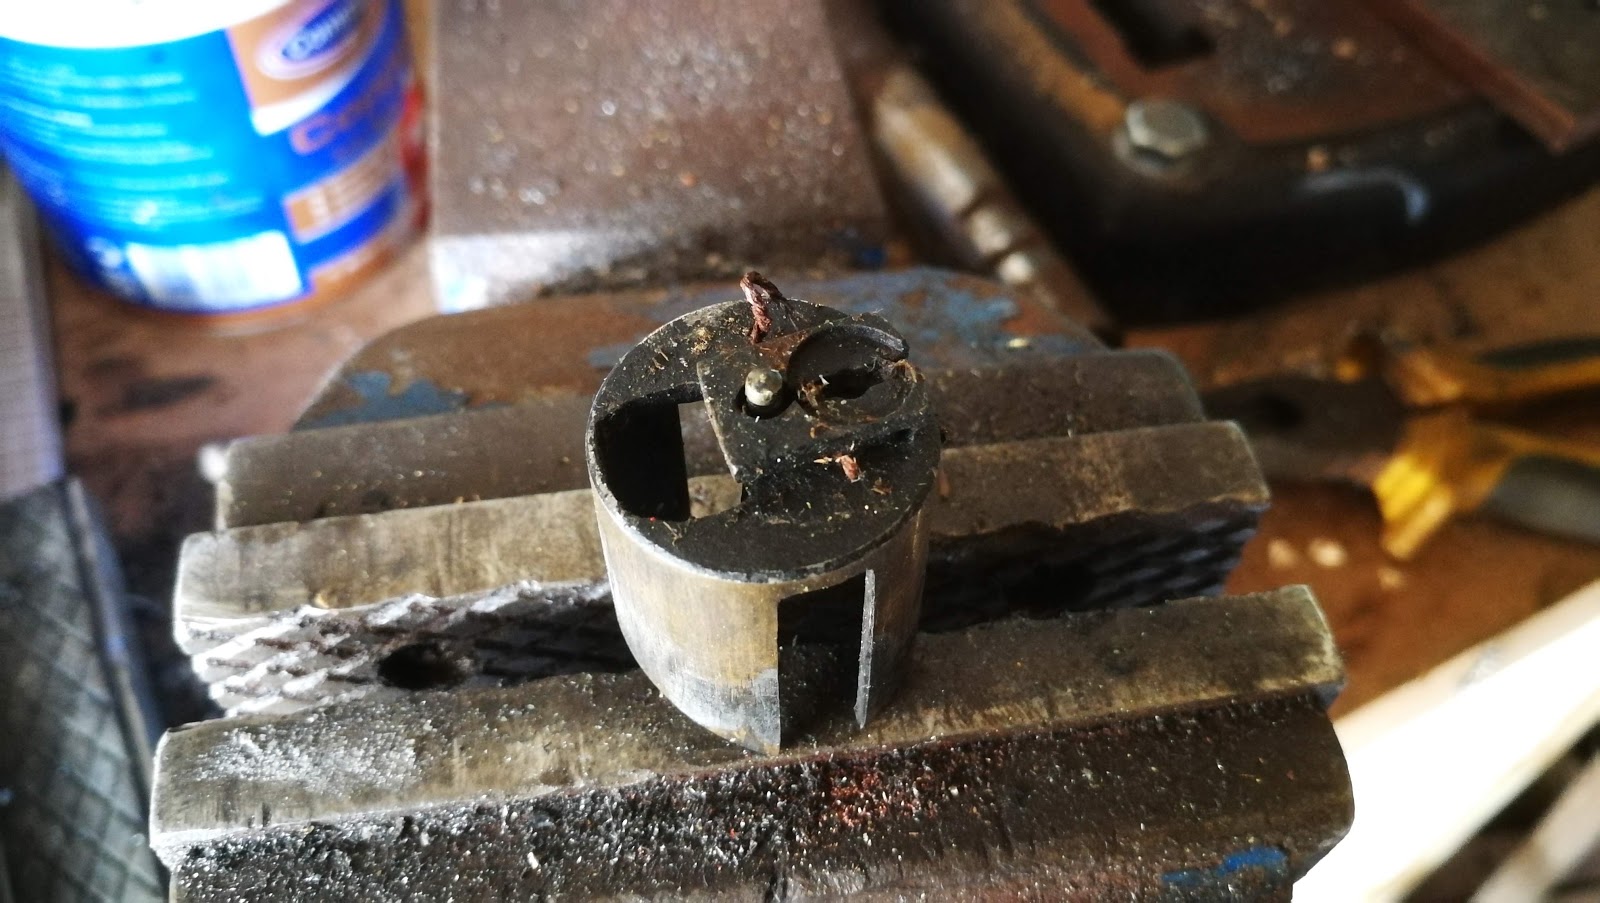
Now to clean it up. With the bottom cap in the vice, we can use a large tube through the bore to provide some gentle leverage after the Plus-Gas has done it's job:


This is the first time I have seen the needle held in place with a bit of wire...


It's interesting how these things wear. That slide is nominally 1" OD; at the bottom, it's close to that:


It's very worn at the top, where the differential pressure pushes the slide against the body. It's about 0.965" here:


The top of the carburetter body is close to nominal:


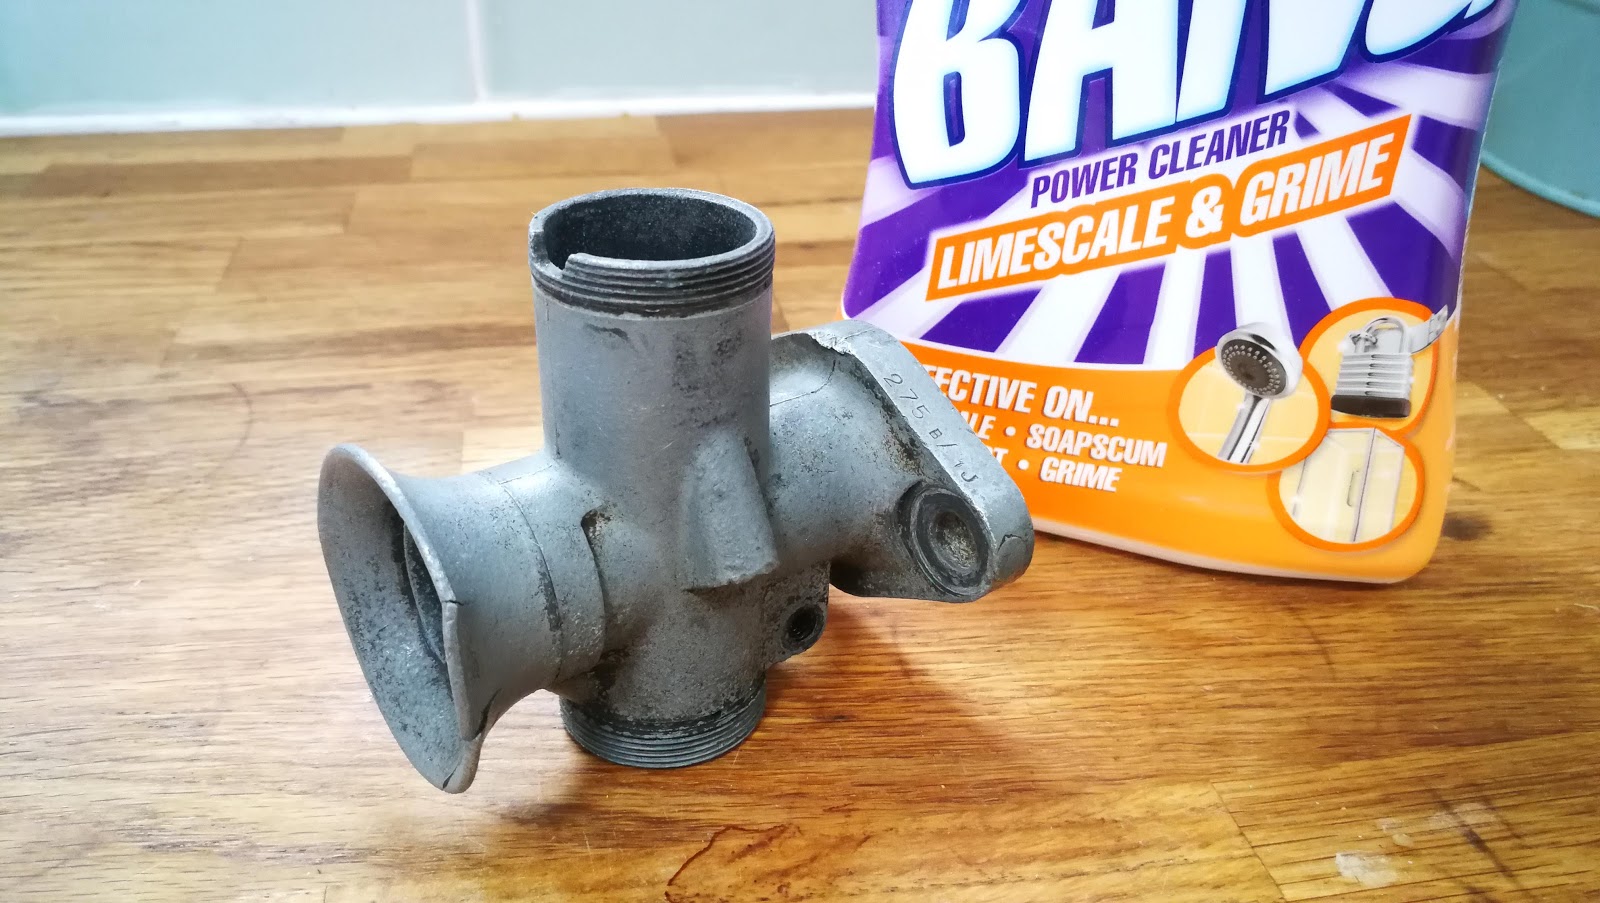
The nations favourite carburetter cleaner. It's the fact that you are not supposed to use it on aluminium which makes it attractive - it's good at removing zinc oxides too, as well as old petrol deposits.


The brush on the right is called a 'file card' - it's for cleaning debris out of file teeth. It's also very good at cleaning threads in soft carburetter bodies:


Talking of threads, the throttle stop and air screw threads are 2 BA and are easily cleaned with a suitable plug tap. Don't force a taper tap into the air screw port though, or you will destroy the needle seat.

All the bits I have:


Rubbing the flange joint on some 120 grit sandpaper on a glass plate shows it is in pretty good shape:


Eventually I got a top and a threaded ring from eBay and I have just ordered a slide and an air valve from Drags, at vast cost. Here's the top ring and the top, of which both cable adjuster threads are intact. I'm happy about that; but not so much about the ding in the choke adjuster thread, which means the adjuster won't go in.


These threads are a little unusual - they are 7/32" x 40 tpi, which is a ME (Model Engineer's) series thread. These are a fine Whitworth form, and fortunately the taps and dies are readily available fromt the excellent Tracy Tools:


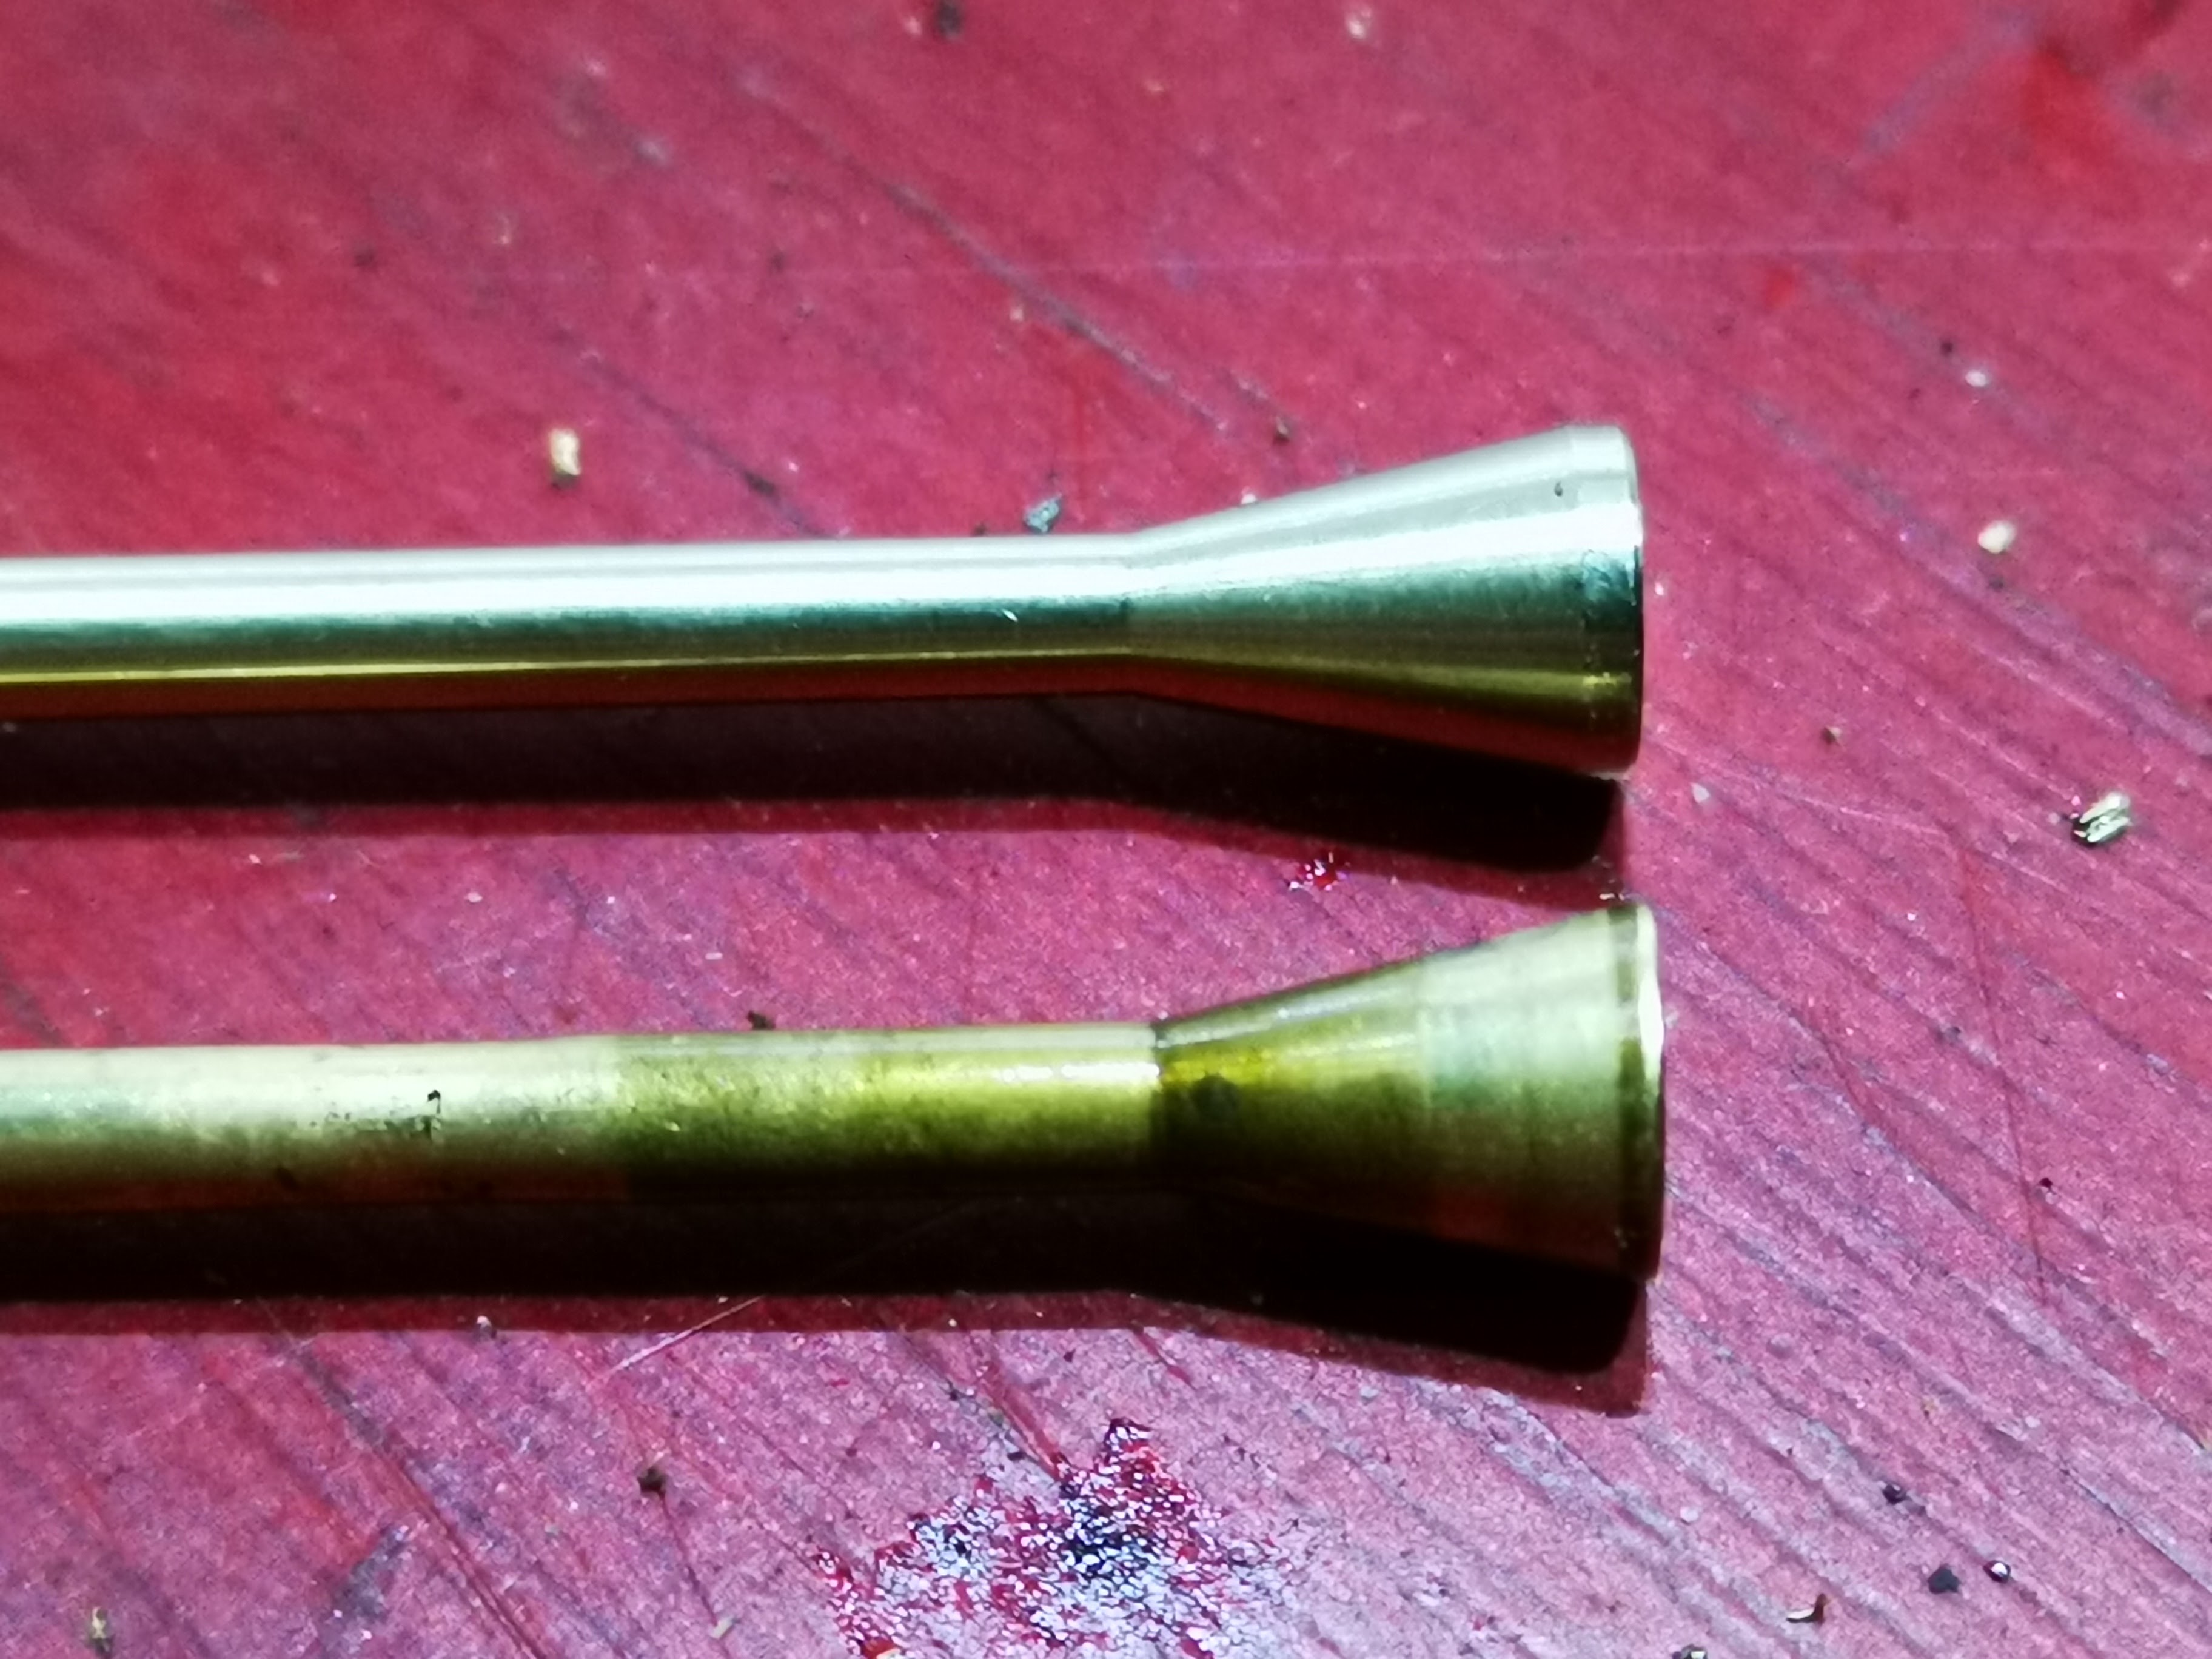
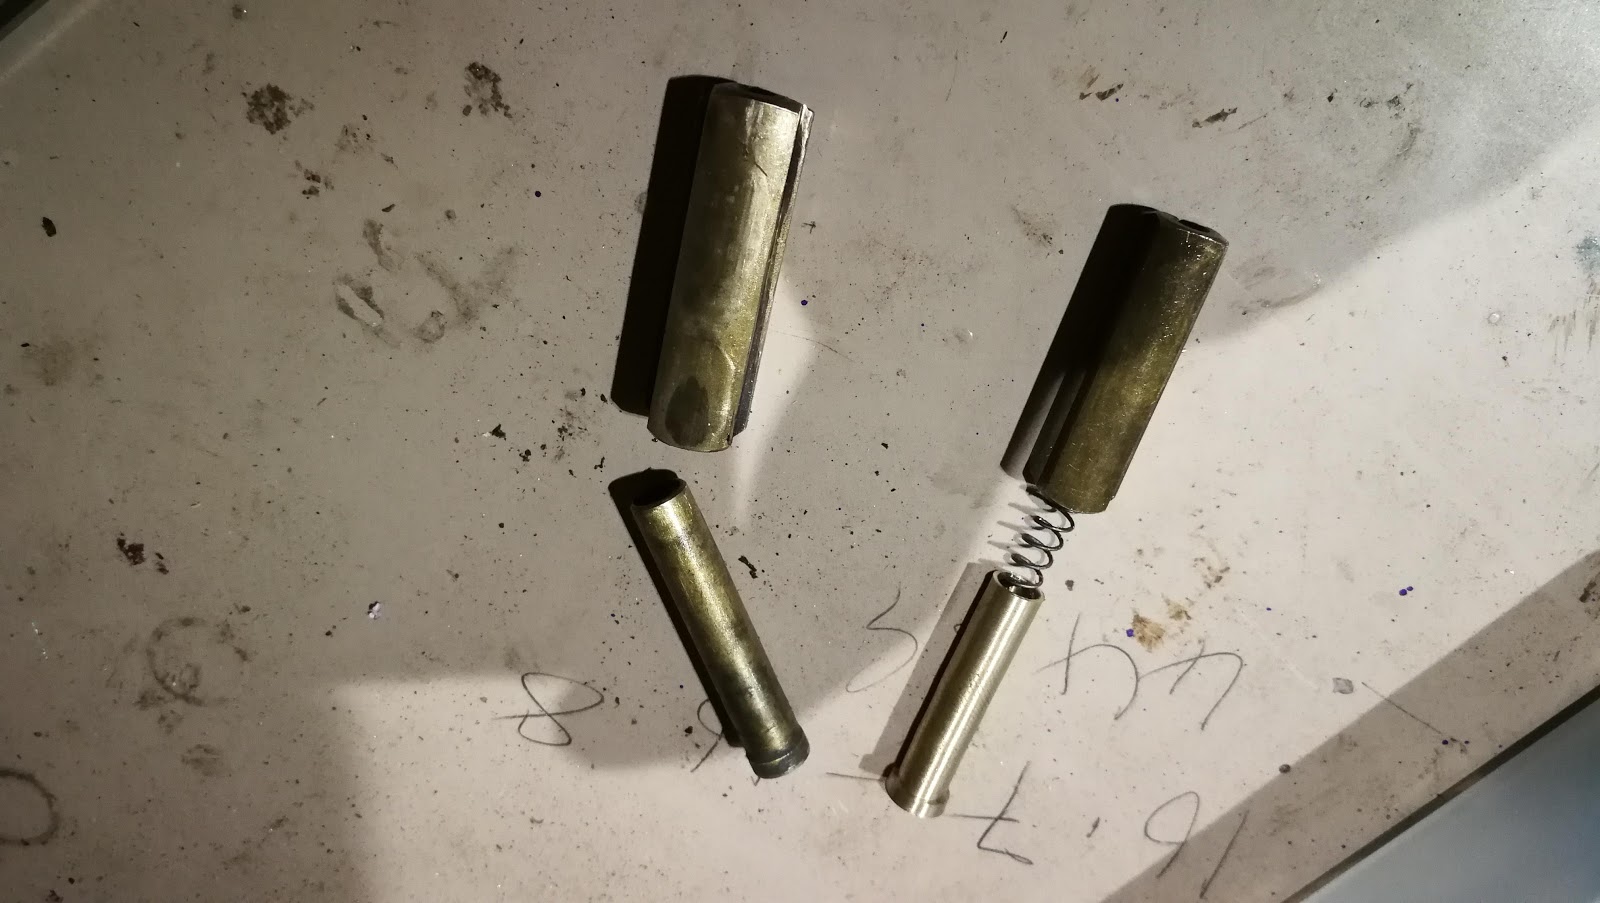
Next, while assembling the slide and choke into the carburetter top, I realise that the air valve guide is missing. I can turn that up from a bit of 10 mm brass round bar I have in stock - it's 6 mm on the OD, 7.6 mm where it goes into the top, and the spring is 4 mm OD. I drilled the ID 4.5 mm and then decided to open that up to 5 mm to ensure the spring does not bind.


Here's the air valve and guide from a 276, alongside the air valve for the 275 and the new guide I made:


Works beautifully, so it is on to reassembly.

Close observation of the parts diagram showed that the throttle slide has a split pin fitted to retain the cable. I've never seen that before:


I needed to shorten the cables by about 1/4", but other than that it's all back together. The fuel tap has a solid but old filter, and I have replaced the corks in both plungers; the return plunger has a new screw as well. Fuel tap repairs are shown in the first half of this post.


Saturday, 21 April 2018

Another lathe job

I made a trip out the other day, with a mate on an MT350, to look at the Dome Trainer at RAF Langham. Great run out, lovely weather and all that, some shots from me but most taken and tweaked by John Harris. Find John at https://www.facebook.com/JohnHarrisPhotographyandTours/.


Back home I found the clamp screw from my float bowl had disappeared - mainly because I had changed the cap for a better one, with a tickler of the correct length to reach the float (!) and hadn't screwed the clamp up at all...

So, unable to find one on eBay and too mean to buy one from Amal (they are over a tenner!), I checked the thread and found it to be 1/4" BSF. Rooting about in the 1/4" screw box, I found an Ariel clutch centre screw which has the correct thread AND the reduced hex head, or something like it, that the real Amal screw has. Adding a small sleeve out of a bit of round bar yielded something that will do the job:


Here it is in place, with the new float chamber lid:


It will do the job until I can find a real one at a reasonable price.

Tuesday, 5 December 2017

Carburetter Rebuild

Regular readers will know that there have been a few challenges around the carburetter recently, and that I've started poking around in it.

The first sign of trouble was on the overrun, heading downhill into town with what felt like fuel starvation. A couple of days before, I had run out of petrol on the SQ4, through my own fault (the SQ4 has no reserve tap, a long story) so I was congratulating myself for my inattention again. Pulling on the reserve tap made no difference and limping to my destination saw the tools out and a chunk of debris removed from the main jet. I went home with the jubilation that only a roadside repair can provide.

I started wondering why the bike was quite so slow. Investigating the carburetter slide revealed it wasn't opening fully as previously reported:


The investigation also revealed an uncomfortable tendency for the slide to stick caused by a non-standard throttle return spring, something that showed up in the shop but not thankfully on the road. The carburetter would need some investigation soon.

And remember that blocked jet? That came back to haunt me while coasting downhill into a village near here, when everything started popping and banging, spitting neat fuel back out the carburetter. I limped along for a while with a wet knee, eight-stroking (I thought only Bantams did that?) eventually realising that going home was not really an option, because after all what would I have done if I had been hundreds of miles away?

Pulling the tool roll out, I took the Amal carburetter spanner and removed the jet cover or 'Float Chamber Holding Bolt' to check the main jet - which wasn't there. It was sitting, loose, in a puddle in the bottom of the jet cover.

Perhaps someone didn't tighten it properly? And while you're at it, that fuel leak you have been complaining about, that you thought was the float valve not sealing? Perhaps you ought to tighten the big nut on the bottom of the mixing chamber?

So anyway, the carburetter is back together, not leaking and the bike is running happily with the needle in the right notch. However, we definitely need a new throttle spring, so we better get on to Burlen Services. Investigation of their website reveals there is a short spring and a long spring, but which one?

Tuesday, 28 November 2017

A little maintenance

The W/NG, since I'm shaking down and it is at the front of the garage, is my go-to bike at the minute. Since I made this list I've done a few jobs:
  1. Grease the forks & replace the missing nipple - done
  2. Maybe replace the fork bushes - not done
  3. Tighten the brake torque arm anchor or weld it in - done
  4. Make a T-bolt for the exhaust clamp - done
  5. Adjust and lubricate the primary chain - done
  6. Have a look at the clutch - not done
  7. Change the regulator to a V-Reg - done
  8. Fit a couple of transfers - done one...
I had a nice little trip out a couple of days ago to test the exhaust, which was great but the bike is not very fast and I'm not satisfied that I've got it running as well as it could.


I noticed that the carburetter slide was not reaching full travel for some reason, and that the plug was pretty dark. It's also had a bit of an oil leak from the inlet rocker shaft, which as you can see has heavy flat washers fitted over the banjos and the fibre washers. Not surprisingly, the oil leaks down the threads and comes out under the nut.


So what to do? What we always do in these situations - ask an expert, which always means someone in the AOMCC. In this case, a post to the forum yielded lots of useful information including this from Paul Jameson:

The correct assembly is as follows:
  1. Slacken off the screw on the opposite end of the rocker shaft from the banjo.
  2. Fit copper washer, then banjo then copper washer then acorn nut.
  3. Tighten acorn nut.
  4. Tighten screw on the opposite end of the rocker shaft from the banjo.
And this is why. Paul Jameson again:

The rocker shaft has a shoulder which goes against the inside of the rocker box so with the method above you tighten the nut, banjo and washers against the shoulder. The rocker shaft is sealed so that oil cannot emerge under pressure at the screw end. Hence the screw only seals against oil running along the outside of the rocker shaft.

So, undo this screw on the opposite side:


And you can see the end of the rocker shaft. Grip this with a very large screwdriver or a washer in the slot, and tighten down the acorn nut on the other end, against the fibre washers, then replace the large screw and snug it down into the milled recess to seal the rocker box.


Next, have a look up the inlet tract with the throttle fully open. Yes, I know I can see the carb slide:


Something odd here!

Let's have a look at the slide and spring. First off, the needle shouldn't be in that position, which is why my plug is sooty - it should be in the middle slot; secondly, that doesn't look like an Amal spring and fiddling around with it allows the slide to move up fully. Shame it doesn't return properly... It looks like it has its original brass slides though.


We'll have to get a new spring at least.

Turning to the back end, the chain has loosened off a lot. The primary chain is fine, and the chain is easily tightened up using Ariel's handy adjusters; odd spanner size though, the hex appears to be 3BA.


So that is that for today - we need a couple of seals for the rocker shafts, a new carburettor slide return spring and some front wheel bearings for the SQ4.