Showing posts with label oil. Show all posts

Monday, 19 January 2026

FH - test ride

 I took the Huntmaster out on a nice little test ride today, 25 miles around North Norfolk to buy samosas from a nice family run department store in Holt.


It went beautifully - no problems other than the usual sweating from the base gasket! I think we also have to admit that the number two exhaust guide is probably leaking - probably too much clearance. There's wet oil at the silencer.

It's idling very nicely - I stopped to reduce the speed at one point, and to take a few pictures, and the idle is certainly more reliable than it was.

Sunday, 22 June 2025

FH - looking for problems

 I snatched a few minutes in the workshop today to look at the cylinder head leak and the oily exhaust on the Huntmaster. It passes a little bit of smoke from both cylinders but nothing persistent and only when pulling away. To start the investigation and to try to eliminate the valves and valve guides and further home on the problem I thought I would do a compression test. 

I started with the drive side, which is the side that is showing oil in the exhaust pipe. This revealed a figure of something like 65 psi with the cylinder dry. Perfect compression at 7.25 to 1 should be giving us something a little over 90 psi.

This didn't improve after several kicks.


The timing side shows us something like 95 psi. The exhaust on this side is dry.


I ran a bit of oil around the top of the drive side piston in an attempt to improve the sealing and to reveal either a head gasket problem or perhaps a valve problem.


This wet test brought the compression up to 75 psi - still a bit down on where we should be. The rings have only done around 145 miles but given that the timing side is working well there is obviously a problem here, and combined with the oil leak around the top of the cylinder we are looking at a head gasket leak.


Looking at the plugs I wasn't surprised to find that they were both dark and wet. The last journey the bike had made finished with a few minutes riding at very slow speed through town - on the pilot jet. We will lean this out next time.

Riding back from the railway yesterday along the main road revealed that the bike will maintain 45 miles an hour at just under a quarter throttle - so until we are properly run-in we are not going to be able to do anything other than look at the carburettor slide cut away at the very most. We can adjust the pilot air again but we won't be able to examine the mixture from the main jet.

Friday, 13 June 2025

SQ4 - changing the oil

 It's high time Square Four had an oil and filter change, so with the oil return line repair complete on the Huntmaster the Square Four is back on the bench after a 10-minute run to warm the engine oil up. 

As usual it's an absolute pig to get the oil tank out but it's very easy to drain the tank and the sump - I have a new sump plate (well, it was new 10 years ago) with a drain bolt and magnet in the middle of it. I had something like 300 ml of oil out of the sump - I'm not sure whether that's unusual or not. 

I was surprised to find the sump strainer damaged - I think I'll get a new one from Draganfly. 

With the oil tank out I can degrease the area around the top of the box where the filler is - it's always quite mucky around here because it's very difficult to top the box up without getting grease everywhere.

The oil tank is also a very tight fit - it's always a struggle to get it out. I'm wondering if it's fouling the frame tube, perhaps stuck between the frame tube and the gearbox plates.

I had the tank in the parts washer for 15 minutes washing the outside and the inside and was pleased to find very little sludge and no debris in the tank at all. There's obviously been some further washing of the engine through the detergent oil that I'm currently using as the cases appear very clean and the goo in the bottom of the tank and on the sump of drain plug is just like the dark grey substance you would get from the crankshaft sludge traps.


You can see one of the cams in this picture - the wear ridge is quite clear. I have a new camshaft ready to go in when I decide that I'm bored enough to rebuild the engine!


I filled in my maintenance spreadsheet but for the record the mileage is 4089 miles.


Friday, 23 May 2025

SQ4 - a bit of maintenance and a good clean

 Now that I've finished installing the electronic ignition and the FH is doing sterling service as the daily rider, it's time for the grubby old Mk1 to get some attention. Looking at the maintenance schedule shown here, there's a few bits that need attention not least an oil & filter change with a tank washout.

My U-Pol degreaser works wonders on the back wheel:

The next step is to lift the fuel tank and clean the cylinder head.

Saturday, 29 March 2025

FH - running in

 Another sunny day dawns and after more faffing about trying to get the chainsaw to run adequately I went out for some more circuits on the FH. Before I started though, I wanted to check the oil level and top it up - it was virtually full though, so perhaps it had wet sumped since it last ran and emptied the sump back into the tank in the couple of miles I did yesterday.

I also remembered to remove a large magnet I had used to stick a cable clip under the rear mudguard:

The bike ran beautifully, starting easily. The clutch seems a little notchy but the brakes certainly work, though the front is very spongy. There's a lot of flexibility in the lever which we will have to sort out.

It sat here happily burbling away while I took this picture:

On return, I went round the bike with the spanners. After my third circuit, I had noticed the front had started to clonk on braking and I was surprised to find the brake torque arm nut had loosened off.

This brings us to running in. This is what the Ariel instruction book has to say about running in:


It also tells you to change the oil at 1500 miles and decarbonise at 2000 miles. Pitman tells you to change the oil at 200, 500 and 1000 miles.

I'll be checking bolts, chains, cables and brake adjustment very frequently, especially at the beginning, but what of the head gasket? Shall I retorque at some point? I think not, at least not as a matter of priority since it has an annealed solid copper gasket.

The other thing that will be worth checking is the magnetic sump plug, to see if that picks up any nasty debris!

Monday, 21 October 2024

FH - we have oil! And where we want it!

 Today I applied a bit more elbow grease to the ratchet spanner I was using to turn the mainshaft and attempt to get some oil circulating in the engine. I realised that if I put the machine in fourth gear I could achieve the same thing turning from the rear wheel, perhaps with a bit less effort because I'd have the full diameter of the wheel as leverage to turn the engine. 

This worked really well and I was able to get the engine moving quite quickly by pulling on the tyre. I persisted with this routine each time I visited the workshop during the day.


Suddenly, it all started to get easier. This happened with the Square Four - the oil reaches the major bearing areas and they start to slide much more freely. I decided to give the big drill another try.

Even turning the wheel I had started to see a lot of oil around the pump. This would be emerging from the cam and idler bearings I think. With more engine speed derived from the drill, this area became a lot wetter but I still wasn't getting anything at the tank.


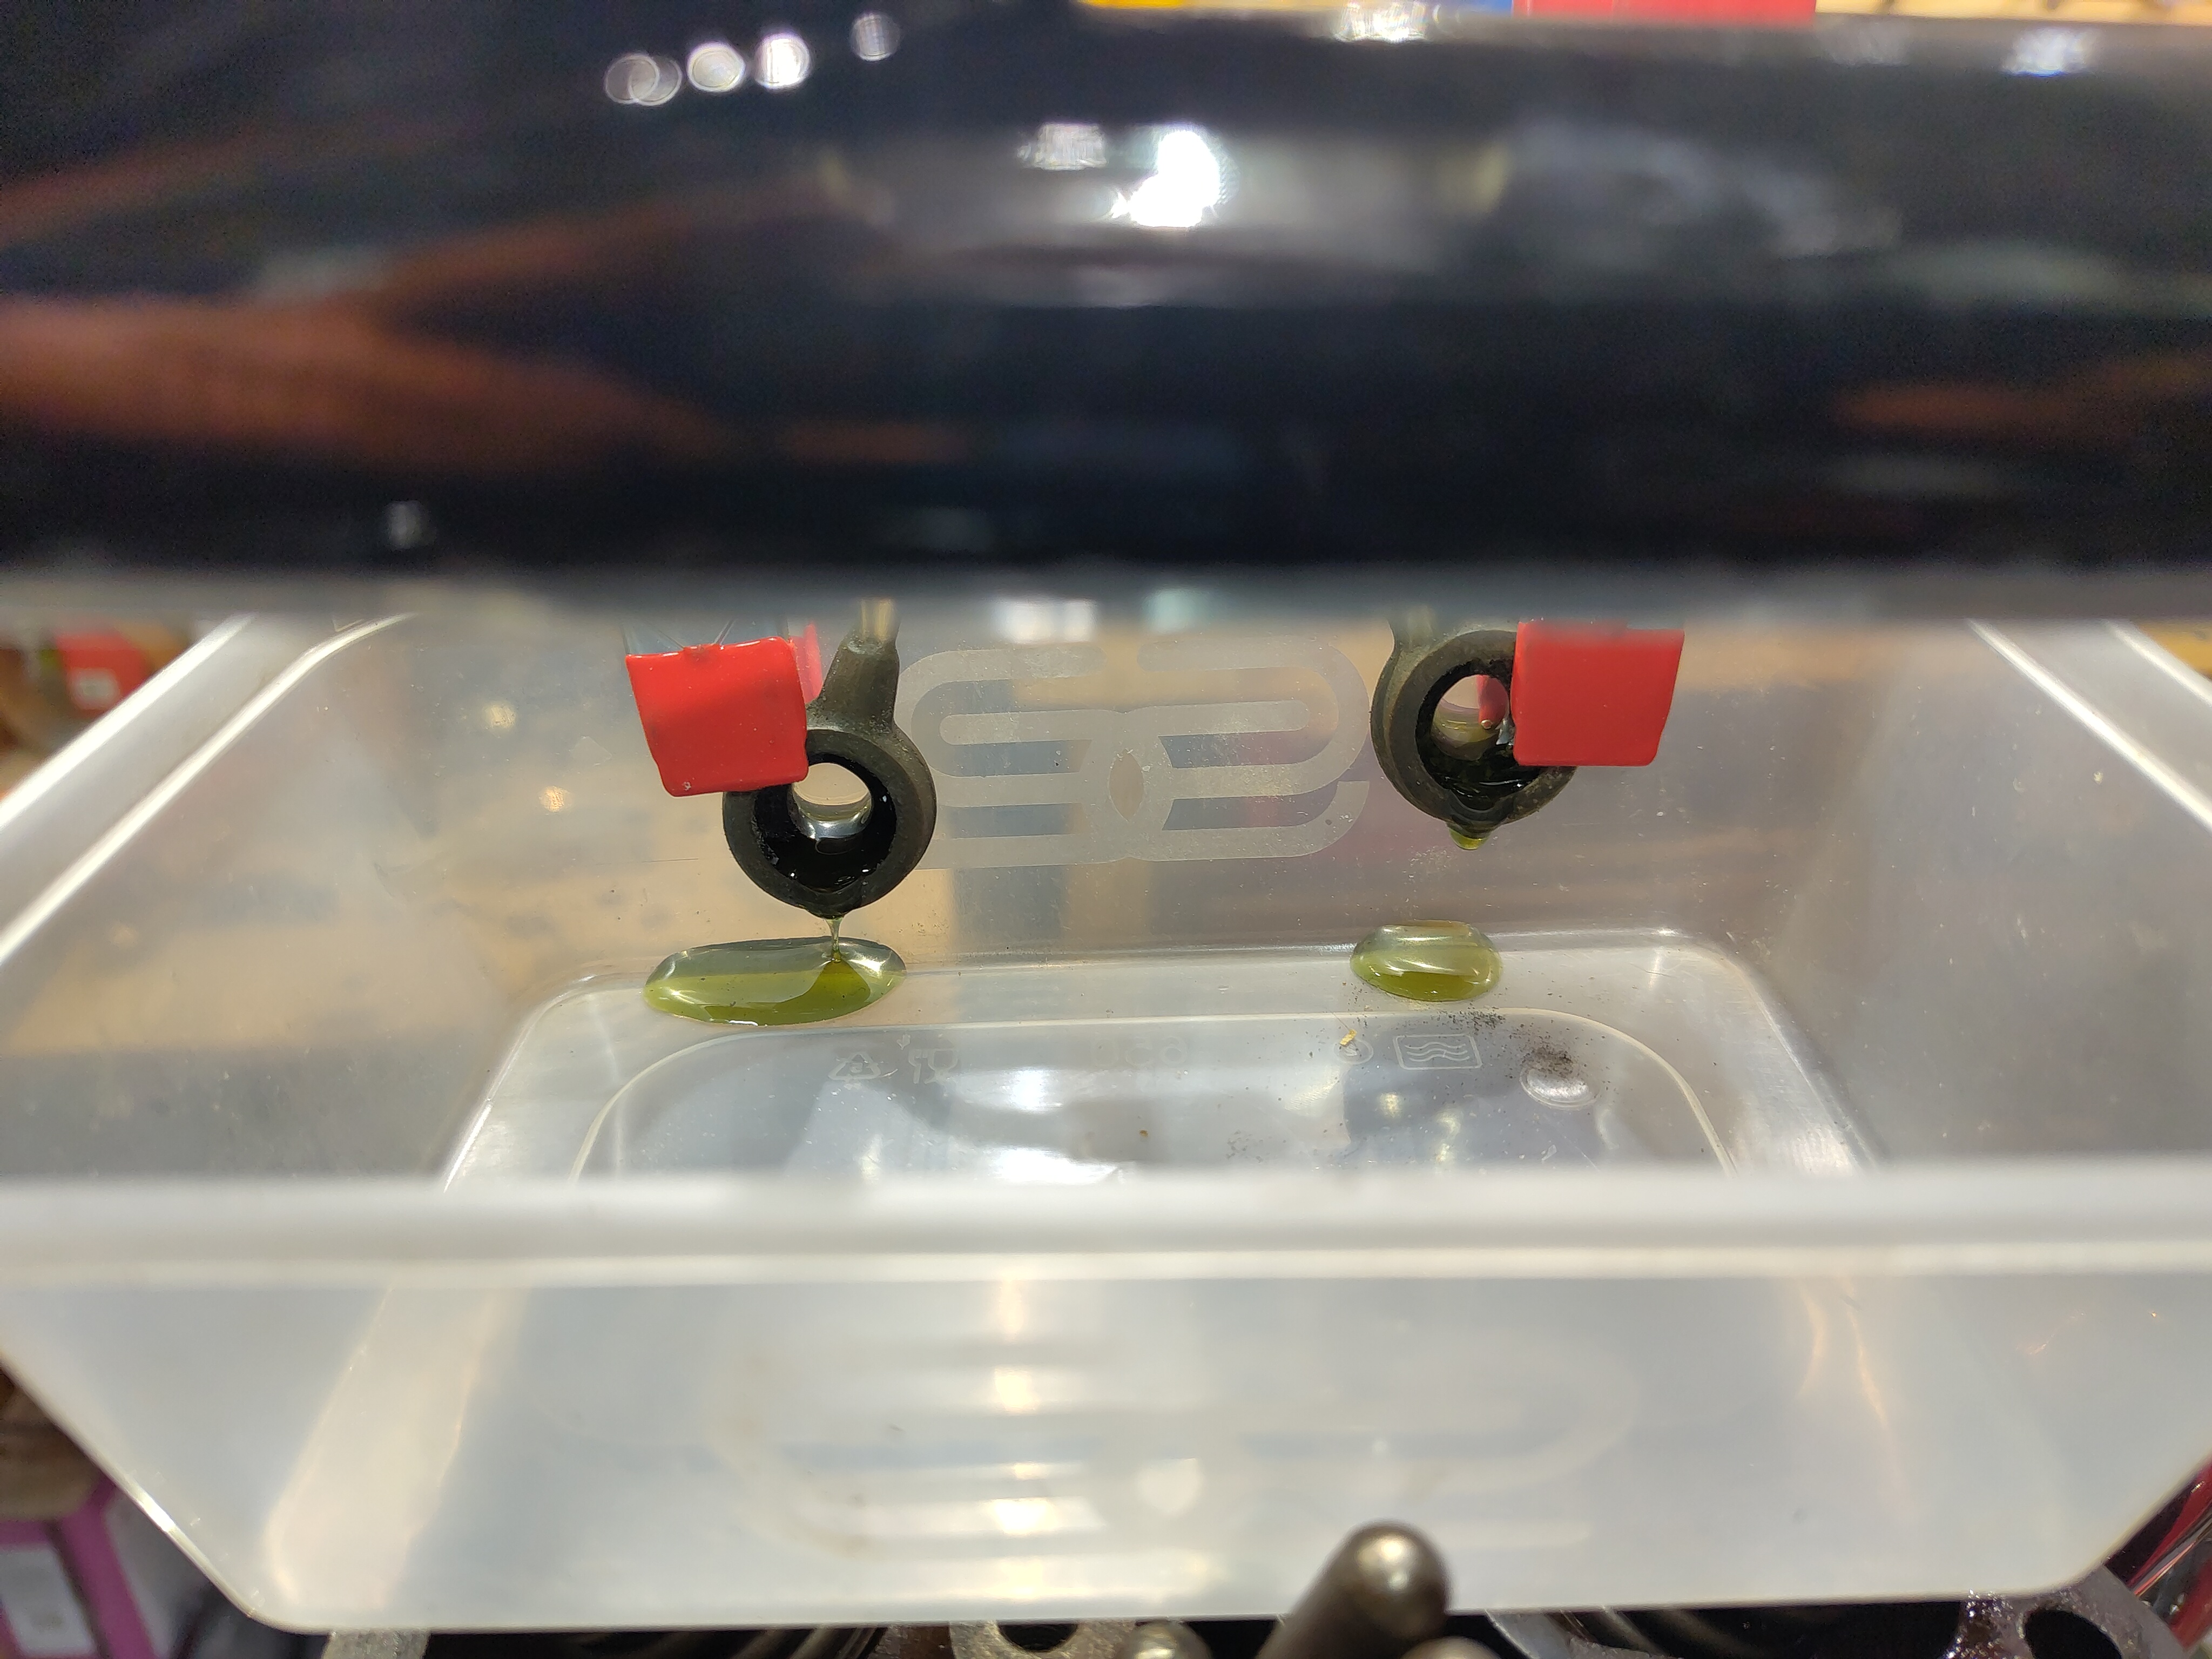
I was on the verge of giving up for the day and heading home for some tea, when oil appeared at the tank return. It takes a while to get up here when you have a filter, because of course the filter has quite a significant volume to fill:


A couple more minutes on the big drill had oil appearing at the rocker feed banjos.

So that's that - very pleasing. The next step is to close it all up and get it running. Oh, and by the way - this is Morris SAE 30 Running-in Oil. I'll be using Morris SAE 40 generally.

Sounds so easy when you say it like that!

Monday, 24 October 2022

W/NG - fixing oil leaks

 Blatting about at the weekend used a bit of oil, some of it coming from the top end.

I suspect some is coming down the exhaust guide, but some is coming from the rocker shaft end covers. 

I've only recently learnt how to tighten these properly, and I'd damaged one of the fibre washers.

It's all done properly now, with a special screwdriver I made. I've added a small dose of Threebond to the fibre washers as well. 

Sunday, 7 August 2022

W/NG - a bit of routine maintenance

I spent a bit of the afternoon doing some routine maintenance on the W/NG, using the excellent on board tool kit:

I was surprised to find the tappets had a bit of movement in them, though it was tea time before I could attend to them.

The clutch was a bit oily, but only in the cover, reflecting the fact that the chaincase was over-full. The pressure plate lifts level though, and the new plates have settled into the basket nicely. There is about an inch of oil in the chain case

All the chains tensions are good, including the magneto chain: 


I put a cup full of oil, and many pumps of the grease gun in the gearbox. The lead light is very useful:


Oh, and I fixed the horn by squashing the adjuster lock nut slightly. It has an odd thread, 0.209" x 36 tpi which I found by luck on eBay - it's a bicycle tyre valve core thread!

Tuesday, 12 January 2021

QR50 - Oiling System

The little QR50, as a two stroke, has an oil injection system consisting of an engine driven pump supplying metered oil direct to the carburetter float chamber from a reservoir in the frame spine. Keen readers might recall the stopper I made for the oil filler behind the headstock.

As we near the end of the project we need to think about hooking up the system; the pump has been ready for a while and is a replacement for the original which had a smashed casing. I’ve got a twist grip with the two into one cable which operates both the throttle and the oil pump, so we just have to pull it all together.

The first step is the banjo which takes the oil from the frame tube to the pump, and to a tube leading back to the headstock as a visual indicator of oil level:


Typical of Honda, this couldn’t be anything easy could it - like a standard banjo that I could buy. No! The fitting in the frame is M9 x 1.0, so I have to make the banjo bolt from scratch. For me that is the tricky bit as I don’t have much experience cutting threads on the lathe and I am certainly not going to buy an M9 die that I will never use again.

Next, we need a banjo to go with it. Tricky again, because the banjo needs an internal annular groove for the oil to run around. We need a tiny boring bar, like this one:


This is ground from a blunt 5 mm twist drill and mounted in a bit of 1/2” bar, retained with an M4 grub screw.

Using the new tool, the interior is bored to give an annular space:


When the internal features are ready, I put the banjo in the tail stock v-block to drill the holes for the oil line connections:


With the banjo parted off I can do a trial fit on the bike to think about where the lines will route:


I’d planned to use 3/16” hydraulic tubing, which I had knocking about:


Whilst this was functionally a sound idea, it transpired that the feed to pump and the connection to the filler neck were going to need 5 mm bore line, so these 3/16” stubs were too small. I went home for tea, as it was below zero outside and I couldn’t feel my fingers.

Next day, I made some 6 mm stubs from some brass round bar and sweated them into the banjo:


That looks much better.

Regular readers might wonder why this takes so long. Look closely - with the oil pump in place, the dummy swinging arm doesn’t fit properly:


Inching closer, I made this brass fitting to hold the cable adjuster. I'll slim that nut down for appearances sake.

Thursday, 29 October 2020

W/NG - last bits before she goes back on the road

I mentioned in the last post that there were a couple of things I wanted to sort out before the W/NG goes back on the road. When I refitted the clutch cable I found it was mysteriously too long - strange in that apart from replacing the missing thrust bearing everything is the same as when it came apart. Investigating, I found the clutch adjuster was missing, having been replaced by this homemade one:


AOMCC member Lee Mallabone saved the day and sent me this one, with it's adjustment bolt and ball, which incidentally is peened in place:


That was an easy fix. I took the opportunity to lubricate the cables, and the ones on the SQ4, with WD40 and my favourite cable oiler:


Saturday, 7 December 2019

Multigrade Oil

Old instruction books frequently tell you which oil to use in the summer and which oil to use in the winter, so that when our engines are hot, we can still retain sufficient viscosity in summer heat, and that when the weather is cold we can still get the oil moving quickly enough to avoid engine or ankle damage from reluctant kickstarters from oil that refuses to flow. Summer weight oils are of a higher viscosity grade than winter weight oils, for a given engine, and yo change the when the weather starts to get cold.

This is obviously not ideal, and in 1948 an American called Bob Lancaster looked to improve the performance of oils in the Ariel Square Four raced by Gus Johnson. 


Gus Johnson

Bob took a polymer from a company called Enjay Chemical, and blended it with SAE 20 oil to boost the viscosity when hot to near that of SAE 50, while retaining the SAE 20 properties when cold. It was so successful that Bob started a company to manufacture and market the oil, and Torco is still trading today.

So we know that the temperature range the oil is exposed to in many vehicles can be wide and that the difference in viscosities for most single-grade oil is too large between the extremes of temperature to provide the lubrication performance we need. To bring the difference in viscosities closer together, as Bob Lancaster showed us, special polymer additives called viscosity index improvers (VIIs) are added to the oil.

These additives are used to make the base oil a multi-grade motor oil. The idea is to cause the multi-grade oil to have the viscosity of the base grade when cold and the viscosity of the second grade when hot, enabling one type of oil to be used all year. The viscosity of a multi-grade oil varies logarithmically with temperature as does a straight oil, but the slope representing the change is less steep. This slope representing the change with temperature depends on the nature and amount of the additives to the base oil.


The SAE designation for multi-grade oils includes two viscosity grades; for example, 10W-30 designates multi-grade oil. The first number '10W' is the viscosity of the oil at cold temperature and the second number is the viscosity at 100 °C. The two numbers used are individually defined by SAE J300 for single-grade oils. Therefore, an oil labelled as 10W-30 must pass the SAE J300 viscosity grade requirement for both 10W and 30, and all limitations placed on the viscosity grades.

Breakdown of VIIs is a concern in modern motorcycle applications, where the transmission may share lubricating oil with the motor - though obviously that doesn't concern those of us with separate gearboxes. For this reason, synthetic oil or motorcycle-specific oil is sometimes recommended.

Additives

In addition to the viscosity index improvers, oil manufacturers include other additives such as detergents and dispersants to help keep the engine clean by minimizing sludge build-up, corrosion inhibitors, anti-wear additives and alkaline additives to neutralize acidic oxidation products of the oil. Today, we are very concerned with old Square Four engines that have not had their sludge traps properly cleaned - we don't want modern detergents loosening particles and blocking oilways, so we clean them out on rebuild and use a detergent oil with a filter, to keep the sludge in suspension and trap it in the filter..

It is these additives which start to make owners of classic motorcycles think carefully about their oil. For example, most oils produced today are for modern vehicles and have a minimal amount of zinc dialkyldithiophosphate (called ZDDP, so you don’t have try and pronounce dialkyldithiophosphate) which is an anti-wear additive designed to protect metal surfaces with zinc should they come into contact, which is obviously desirable for our camshafts and followers and you might think that you want a lot of zinc in you oil. The problem is, engineering is full of compromises and one is that the quantity of ZDDP is limited because it damages catalytic converters; other extreme pressure additives can limit the performance of wet clutches (clutches running in engine oil) so we have ‘classic’ oils, manufactured to older specifications which contain the additives we need and reflect that not many classic motorcycles have catalytic converters – but a lot of us, Bantam owners included, have wet clutches. Another win for Ariel separate clutches though!

Other EP additives, like calcium sulfonates, are available for additional protection under extreme-pressure conditions or in heavy duty performance situations. Calcium sulfonate additives are also added to protect motor oil from oxidative breakdown and to prevent the formation of sludge and varnish deposits.

Some additives contain molybdenum disulfide which reduces friction, bond to metal, or have anti-wear properties. MoS2 particles can adhere to steel surfaces and some Trabant engine liners were even treated with MoS2 coatings during manufacture to reduce friction.

Standards 

Now you might be thinking this is all a bit bewildering. OK, I understand viscosity, but how do I know which additives are good and which are bad, and how do I know whether the supermarket 20w/50 I just bought has them in?

Engineers to the rescue!

The American Petroleum Institute (API) governs most of the activity in the industry which has paid my wages for the last 25 years. In addition to the SAE classifications for viscosity, we have API specifications for oil performance

The API standard includes alphabetical ‘service classes’ for lubricants, which really refer to the ability of the oil to perform a given task (like lubricating a sliding tappet against a camshaft, for example). These have two general classifications: S for "spark ignition" and C for "commercial/compression ignition" (diesel engines to you and me). Engine oil which has been tested and meets the API standards may display the API Service Symbol (also known as the "Donut") with the service designation on containers sold to oil users.

This started in the 1930’s with the SA classification; today we are up to the ‘SN’ standard. The SN standard refers to a group of laboratory and engine tests, including the latest series for control of high-temperature deposits. Current API service categories include SN, SM, SL and SJ for petrol engines. All previous service designations are obsolete, although motorcycle oils commonly still use the SF/SG standard reflecting the need to control EP additives to protect our clutches and our camshafts.


Since the SG standard, all categories for petrol engine lubricants have placed limitations on the ZDDP content due to the effect ZDDP has on catalytic converters. In API SG rated oils, this was at the 1200-1300 ppm level for zinc and phosphorus, where the current SM is under 600 ppm. This reduction in anti-wear chemicals in oil has caused premature failures of camshafts and other high pressure bearings in many older automobiles and has been blamed for pre-mature failure of the oil pump drive/cam position sensor gear that is meshed with camshaft gear in some modern engines.

Synthetic oils


Synthetic lubricants were first synthesized, or man-made, in significant quantities as replacements for mineral lubricants (and fuels) by German scientists in the late 1930s and early 1940s because of their lack of sufficient quantities of crude for their (primarily military) needs. A significant factor in its gain in popularity was the ability of synthetic-based lubricants to remain fluid in the sub-zero temperatures of the Eastern front in wintertime, temperatures which caused petroleum-based lubricants to solidify owing to their higher wax content. The use of synthetic lubricants widened through the 1950s and 1960s owing to a property at the other end of the temperature spectrum, the ability to lubricate aviation engines at temperatures that caused mineral-based lubricants to break down. In the mid-1970s, synthetic motor oils were formulated and commercially applied for the first time in automotive applications. The same SAE system for designating motor oil viscosity also applies to synthetic oils.

Higher purity and therefore better property control theoretically means synthetic oil has better mechanical properties at extremes of high and low temperatures. The molecules are made large and "soft" enough to retain good viscosity at higher temperatures, yet branched molecular structures interfere with solidification and therefore allow flow at lower temperatures. Thus, although the viscosity still decreases as temperature increases, these synthetic motor oils have a higher viscosity index over the traditional petroleum base. They're specially designed properties allow a wider temperature range at higher and lower temperatures and often include a lower pour point. With their improved viscosity index, synthetic oils need lower levels of viscosity index improvers, which are the oil components most vulnerable to thermal and mechanical degradation as the oil ages, and thus they do not degrade as quickly as traditional motor oils. However, they still fill up with particulate matter, although the matter better suspends within the oil and the oil filter still fills and clogs up over time. So, periodic oil and filter changes should still be done with synthetic oil; but some synthetic oil suppliers suggest that the intervals between oil changes can be longer, sometimes as long as 16,000-24,000 km (10,000–15,000 mi) primarily due to reduced degradation by oxidation.

Saturday, 24 November 2018

Cake Run

Overcast and chilly but dry, and recovering from a couple of days with the grandchildren, today came another opportunity to give the SQ4 another test run after the summer oil leaks and HT problems which were eventually traced to be the cause of a persistent and long term misfire. Although the cold weather might be masking a hot weather running problem, the bike is running better than it ever has.

Preparing for the trip, I noticed the oil level was lower than expected, though a few minutes idling had it a little closer to normal. I topped it up, and resolved to look at it again when I got back.


A 27 mile around North Norfolk had me grinning from ear to ear as usual, though I thought the handling was a little uncertain; the brakes appear to be bedding in, the chain needs adjusting and the lower chain guard is clanking as usual.


Back in the workshop (after collecting the pear & ginger cake from the excellent Picnic Fayre in Cley), I set about adjusting the chain and rear brake. Since I was adjusting the chain, I removed the wheel to take off the chainguard - more on that in another post. I moved the chain back half a turn and lubricated it; I adjusted the brake up 3/8 of a turn and put an 1/8 of a turn on the front as well. The primary chain looked OK, and the oil level was good. I checked and nipped up all the spokes on the rear wheel.

Turning my attention to the engine, I had a good look around underneath. There was quite a leak coming from somewhere judging by the clean oil 'trails', possibly:

  • the engine breather, which had a drip on the outlet pipe
  • the sump plate or plug
  • the front offside main bearing
  • the oil filter
  • the oil feed to the engine or to the top end
  • a combination of several things

Essentially, there were too many possibilities to narrow it down. I tightened the oil feeds, the sump plate and plug, the crankshaft bearing cover and the timing cover but essentially none of them needed attention.

The front main bearing cover has a peculiar copper/asbestos gasket which looks more like an exhaust ring gasket and I suspect is wrongly installed. It's not the gasket I would have chosen for that application.

More later.

Monday, 7 May 2018

Shaking Down the SQ4

A beautiful day and a bunch of spare time - the opportunity I have been waiting for to sort out the remaining SQ4 jobs and shake it down ready for the summer.

First off, check the oil in the primary case, which is all OK; the primary chain is suitably tight as well. Next, add 200 cc of SAE 30 to the fork leg we repaired, then tyre pressures, fuel and oil levels and then finally get out on it to warm it up for the oil change. A trip along the coast road on a hot day reveals that the rear chain is still rubbing on the lower guard, and after six miles of caravans & Bank Holiday tootlers the rear brake starts to feel unusual - a kind of vibration through the pedal. I was approaching Salthouse at the time, and I decided that this was only a shakedown run and that I ought to turn back. On a hot day, I reasoned, the oil will be hot enough to change after 12-13 miles.

Salthouse Village Green
That was when it all started to go wrong. I managed to follow a bus and two caravans out of Salthouse, and by the time I had put another mile under the wheels the misfire had appeared. Power was really down and I had to drop to third on all the hills. Forgetting what the Four can be like in hot weather I was worrying about the ignition system, but managed to crack on home - I was overtaken by a military M20 at one point, as I could only manage 20 mph. At least my newly refurbished speedo was working perfectly, as was the charging system. Oil pressure was over 50 psi all through the trip - dropping to 25 psi on tickover which I was very pleased with, but remember it is still running Penrite Shelsley Heavy 40W-70.

Back home, I put the bike back in the workshop and drained the oil tank, the sump and removed the filter. Sitting by the oil tank, I could hear the fuel boiling in the float chamber, and my Infra Red thermometer revealed that the float chamber was at 80°C and the carburetter body, near the cylinder head flange was over 100°C - and remember, I had already spent 15 minutes draining the oil at this point.

So, I must fit that Phenolic spacer and maybe a carburetter heat shield. There is probably enough room for about 4-6 mm of phenolic - I have some 3 mm Phenolic sheet at the minute. I may have to change the carburetter mounting studs but I think I will test out the spacer with half-nuts before I go to the bother of making new studs.


Looking briefly at the brakes, I probably have the rear nipped up too tight; the drum was smoking hot. The front had a bit more play when I got back and was working normally showing no signs of overheating. I will remove the rear wheel in a day or two.

So, after cleaning up the mess, I proceeded to remove the oil tank to exchange it for one with a good filler neck thread. I'll repair the old one in due course. All nice and tidy in there:

Look no oil tank
Fitting the new tank reminded me what a tight fit they are. My old tank had a relieved area under the frame tube, so I recreated this with a panel beater:


Next, having spent an hour winkling it into place, I remembered that the gearbox top nut has to be removed to get enough clearance to allow the bottom mount back into place. All fixed and back together now.

This year I will be mostly using... Penrite Shelsley Medium 25W/70:


Sunday, 14 January 2018

SQ4 Chainguard

A while back, I made a post in which I converted a Anstey-frame single cylinder lower chain guard into a rigid frame one for my W/NG - and I also spoke about making one for the SQ4.

I had a rigid frame chain guard for a SQ4, which I was planning to convert but I have since been approach by someone who needs just that, so I plan to make a Anstey Frame chain guard from scratch.

I have the rear bracket spare from the one I used for the W/NG, so I just have to make the front bracket and the guard itself which I will copy from the rigid frame version... Simples!


Here's a 'patinated' sheet of 18 SWG cold rolled sheet, just like the original was made from all those years ago.


Using a tape on the original guard, we find that it is 13 cm wide, so we mark a suitable strip on the sheet and draw around the original with a spirit marker:


The old jig saw makes short work of cutting it out:


Next up, bending up. I'm using a piece of timber as a bending 'iron' here, it has a radius planed into the edge to mimic that of the original chain guard, and the flat side of the guard is clamped securely to the board:


You can bend a piece of 18 SWG this size by hand, and the fact that the board is more narrow than the chain guard's final width means you can over-bend it a little, to finish at the required 90 degree angle:


With the first bend done, we can swap sides and make the second bend in the same way. This is possible, but more difficult to bend by hand because of course we have much less length to lever with. Turns out OK though, but there are a few adjustments needed to align the ends:


Here's a view from underneath of the guard and the front mounting point looking up at the chain oiler channel. At this point in time, the guard needed some adjustment to the width:


Here's the other end:


And the point where the rear mount will go:


And the front mount, from the outside:


Tacked up and trial fitted:


Clearance looks adequate, though some adjustment might be required at the front:


With welding complete, I've used my favourite U-Pol etch primer on the chainguard:


And U-Pol gloss black:


And fitted:


As a small post script to this, the chain guard came off again a few weeks later as the chain was rubbing on it. 70 odd miles did this:


I recreated the unsightly bends (that I had taken to be damage) from the original, adjusted the rear bracket so it sat a little higher and it no longer rubs.


For the record, the chainguard now looks like this: