Showing posts with label seat. Show all posts

Thursday, 16 January 2025

FH - revising the plan

 Today I learned that my chosen front tyre was out of stock and wouldn't be delivered for six weeks - I needed a new plan.

Instead of building the wheels and leaving the bike rolling but tyreless, I'll rebuild both brakes and test them before I touch the rims. That way, I'll be able to get the brakes sorted and still be able to test them, albeit on old tyres. I'll only ride it across the yard, and I'll be able to sort out several other little jobs in the meantime.

To start with, I've been looking at the rear of the mudguard. The seat hides two of the bolts:


Or at least, it does if the seat is mounted in the wrong place. The mounts on the frame are slotted, and if you push the seat forward it not only closes up the ugly gap behind the tank, but you can get those bolts out too!


Saturday, 21 September 2024

FH - dual seat

 After a lot of welding and modifications to the seat base to accommodate threaded fasteners, all previously shown in the blog, it's time to finish the seat. 

The first job, and this is part of painting activity, is to get the seat base coated with two-pack:


With the seat base on the bench we put some strips of double-sided tape on top of base. This is going to retain the rubber and stop it sliding about as we try to fit the cover.


This is the original foam rubber:


This is probably not the original cover, because it's PVC and not Rexine. I might be wrong of course because I don't really know when the industry stopped using Rexine for seat covers; all I can say is that my 1960s cars always had Rexine covers and not this very compliant PVC material.


The key thing with these covers is to make sure that the orientation of the seams line up with the appropriate parts of the base. Once this is done, it's sensible to retain them with as many clamps as possible. I've got a lot of these little spring clamps, which are very cheap, just for this job and a million others:


I've experimented with the different areas around the edge of the seat base to decide where I should start gluing. Some areas are much easier to access than others and some areas prevent access to other areas when folded over.


I'm using a contact adhesive from Screwfix which I use for laying lino. It seems to work very well and goes off in a couple of minutes. I've started at the front of the base and held it all in place with three large clamps. When this has dried enough to be very sticky I move backwards down both sides of the seat simultaneously.

When the sides are done I move on to the back. This is the most difficult bit, but cutting darts into the cover enables the glue joints to sit down quite nicely. You tend to go around the cover pushing the fabric into place as the glue goes off. I used a small hammer to knock the retaining spikes back because actually the glue does a far better job than those little metal spikes which are never in the right place.

That's it, finished and ready to go back on the bike.

I think it looks great. Some people think the seat looks better in black, but the tan colour is very characteristic to Ariel and I like it.


Wednesday, 22 March 2023

FH -Seat Base Repairs 2

 Following the repair of the FH seat base fixing screws which I wrote about recently, I found a bit of time to finish the repair of the rear end.

You can see how the seat is constructed here. The large shaped pressing that you sit on (Ariel were making more use of steel pressings in the late '50's) is spot welded to two angled sheets which sit on the frame rails and carry the mounting holes. Those angles are closed with two quadrant shaped pieces which rot away.

I cut them out:


Using a bit of cardboard, I made a template to get the shape right:


This pale blue metal was an old bread bin, which has given me the air box for the QR50 amongst other things. It's about 0.9 mm thick and is easily cut with the Wiss snips, followed by clamping the two together and shaping with the linisher.


The paint burns off easily and it's remains are cleaned on the wire wheel. They just need tacking into place:


With both done, you can see how the back of the seat is closed off. The cover will actually come down over these plates, but more of that when it is painted.

I mustn't forget to smooth off those welds before painting!

Monday, 20 February 2023

FH - Seat Base Repairs

The FH kit came with the original dual seat, cover intact, which I dismantled:


There was some foam, some original, some replaced:


The top of the seat base was in very good condition:

Underneath, there is enough space for a sandwich or two and I toyed with making the seat lift up for a while - I even made some hinges to try it out but considering the options for locking I realised that I was on a crusade that would be neat, but wouldn't achieve very much. I put the idea away for another day.

The seats were originally retained with Spire clips and screws, fastened from underneath before the oil tank was fitted - you cannot get to all the screws with the oil tank in place. Most of the holes for these had been damaged over the years, some severely.

As you know, I'm not a cheque book restorer and I hate throwing things away, so I resolved to repair the seat base. Since the Spire clips are not available and were meant to aid rapid assembly - no need for a separate operation to fit weld studs, for example - I decided to repair the holes with small plates with weld nuts.

I cut the holes out with a thin cutting wheel in the Dremel.


Another pet hate is mixed fasteners on bikes - so no metric bolts here, and no Unified series either. While it crossed my mind to make some proper weld nuts out of square bar, I decided no-one would ever see them and opted for off the shelf full hex nuts instead, 5/16" CEI.


I made all the plates and fitted them to the holes I had cut, labelling them A-D, before I drilled the holes for the nuts. I fixed one in place with duct tape and tried it on the bike, marking the bolt position from underneath. I drilled the hole, welded the first nut in place and tacked the plate to the seat base.

Refitting the seat base to the bike, I repeated the process with the second bolt, then the third and fourth so that at each step I could be sure the seat was in the right place and the bolts all fitted.

With them all done, I completed the welding. The metal is about 1.0 mm thick (20 SWG or so) and the SIP HG1800 DC TIG machine was set to 20 A. These are generally autogenous butt welds but I used some filler wire in places.

Not too shabby. There's a bit more to do at the back - those curved closing plates are holed but more of that later.

Thursday, 17 November 2022

W/NG - Pillion Seat

 In my quest to bring the W/NG back to the condition in which it left the factory - but only in terms of equipment - I'm adding a pillion seat and panniers. The seat is going to take a bit of fitting:


This is a civilian one.....The ones fitted to military bikes are usually less wide than this:

A footnote: this approach has been abandoned for the moment. There is no way a conventional Lycett spring pillion will fit with the military carrier - the military bikes use an 'Acumen' pillion which is much less wide. More on this in a future episode, hopefully!

Sunday, 25 April 2021

QR50 - seat overhaul

I hadn't intended to do anything to the QR50 seat, but as the rebuild progressed the seat became the part that let it down - and it occurred to me that I had not recovered a seat for a long time. I had a bit of vinyl knocking around from the FH tool roll, so there was no excuse really...

Here's the seat after I finished scrubbing the red paint off it:


Here's a view of the underside:


The cover is stapled into the moulded seat base, and the staples come out quite easily. Here's the cover, made in 1988:


And that's it. The base and foam are useable, so we will make a new cover:


The seat has a couple of fabricated pieces that prevent the rider's legs pushing the plastic 'skirt' into contact with the exhaust. I made these from some 1.6 mm sheet and a few pieces of 5 mm rod from an old linen drier:

These bolt to the seat base.

To recover the foam, I started by warming the vinyl - actually I did the work at home with the central heating on. With a piece roughly cut to size, I started to fold the cover around the foam retaining it on the edges with bulldog clips:


The temporary bulldog clips help me understand where I was going to have to pull the cover into place, and once I was confident with this I could start stapling:


I stapled away from the centre gradually, making sure the cover was taught and sitting in the right place:


Once I was confident I had enough staples in place for the seat to be kid-proof, I trimmed away the excess cover material and assembled the skirt:


This is an older picture showing those protective pieces & how they protect the plastic from the exhaust:


Sunday, 11 October 2020

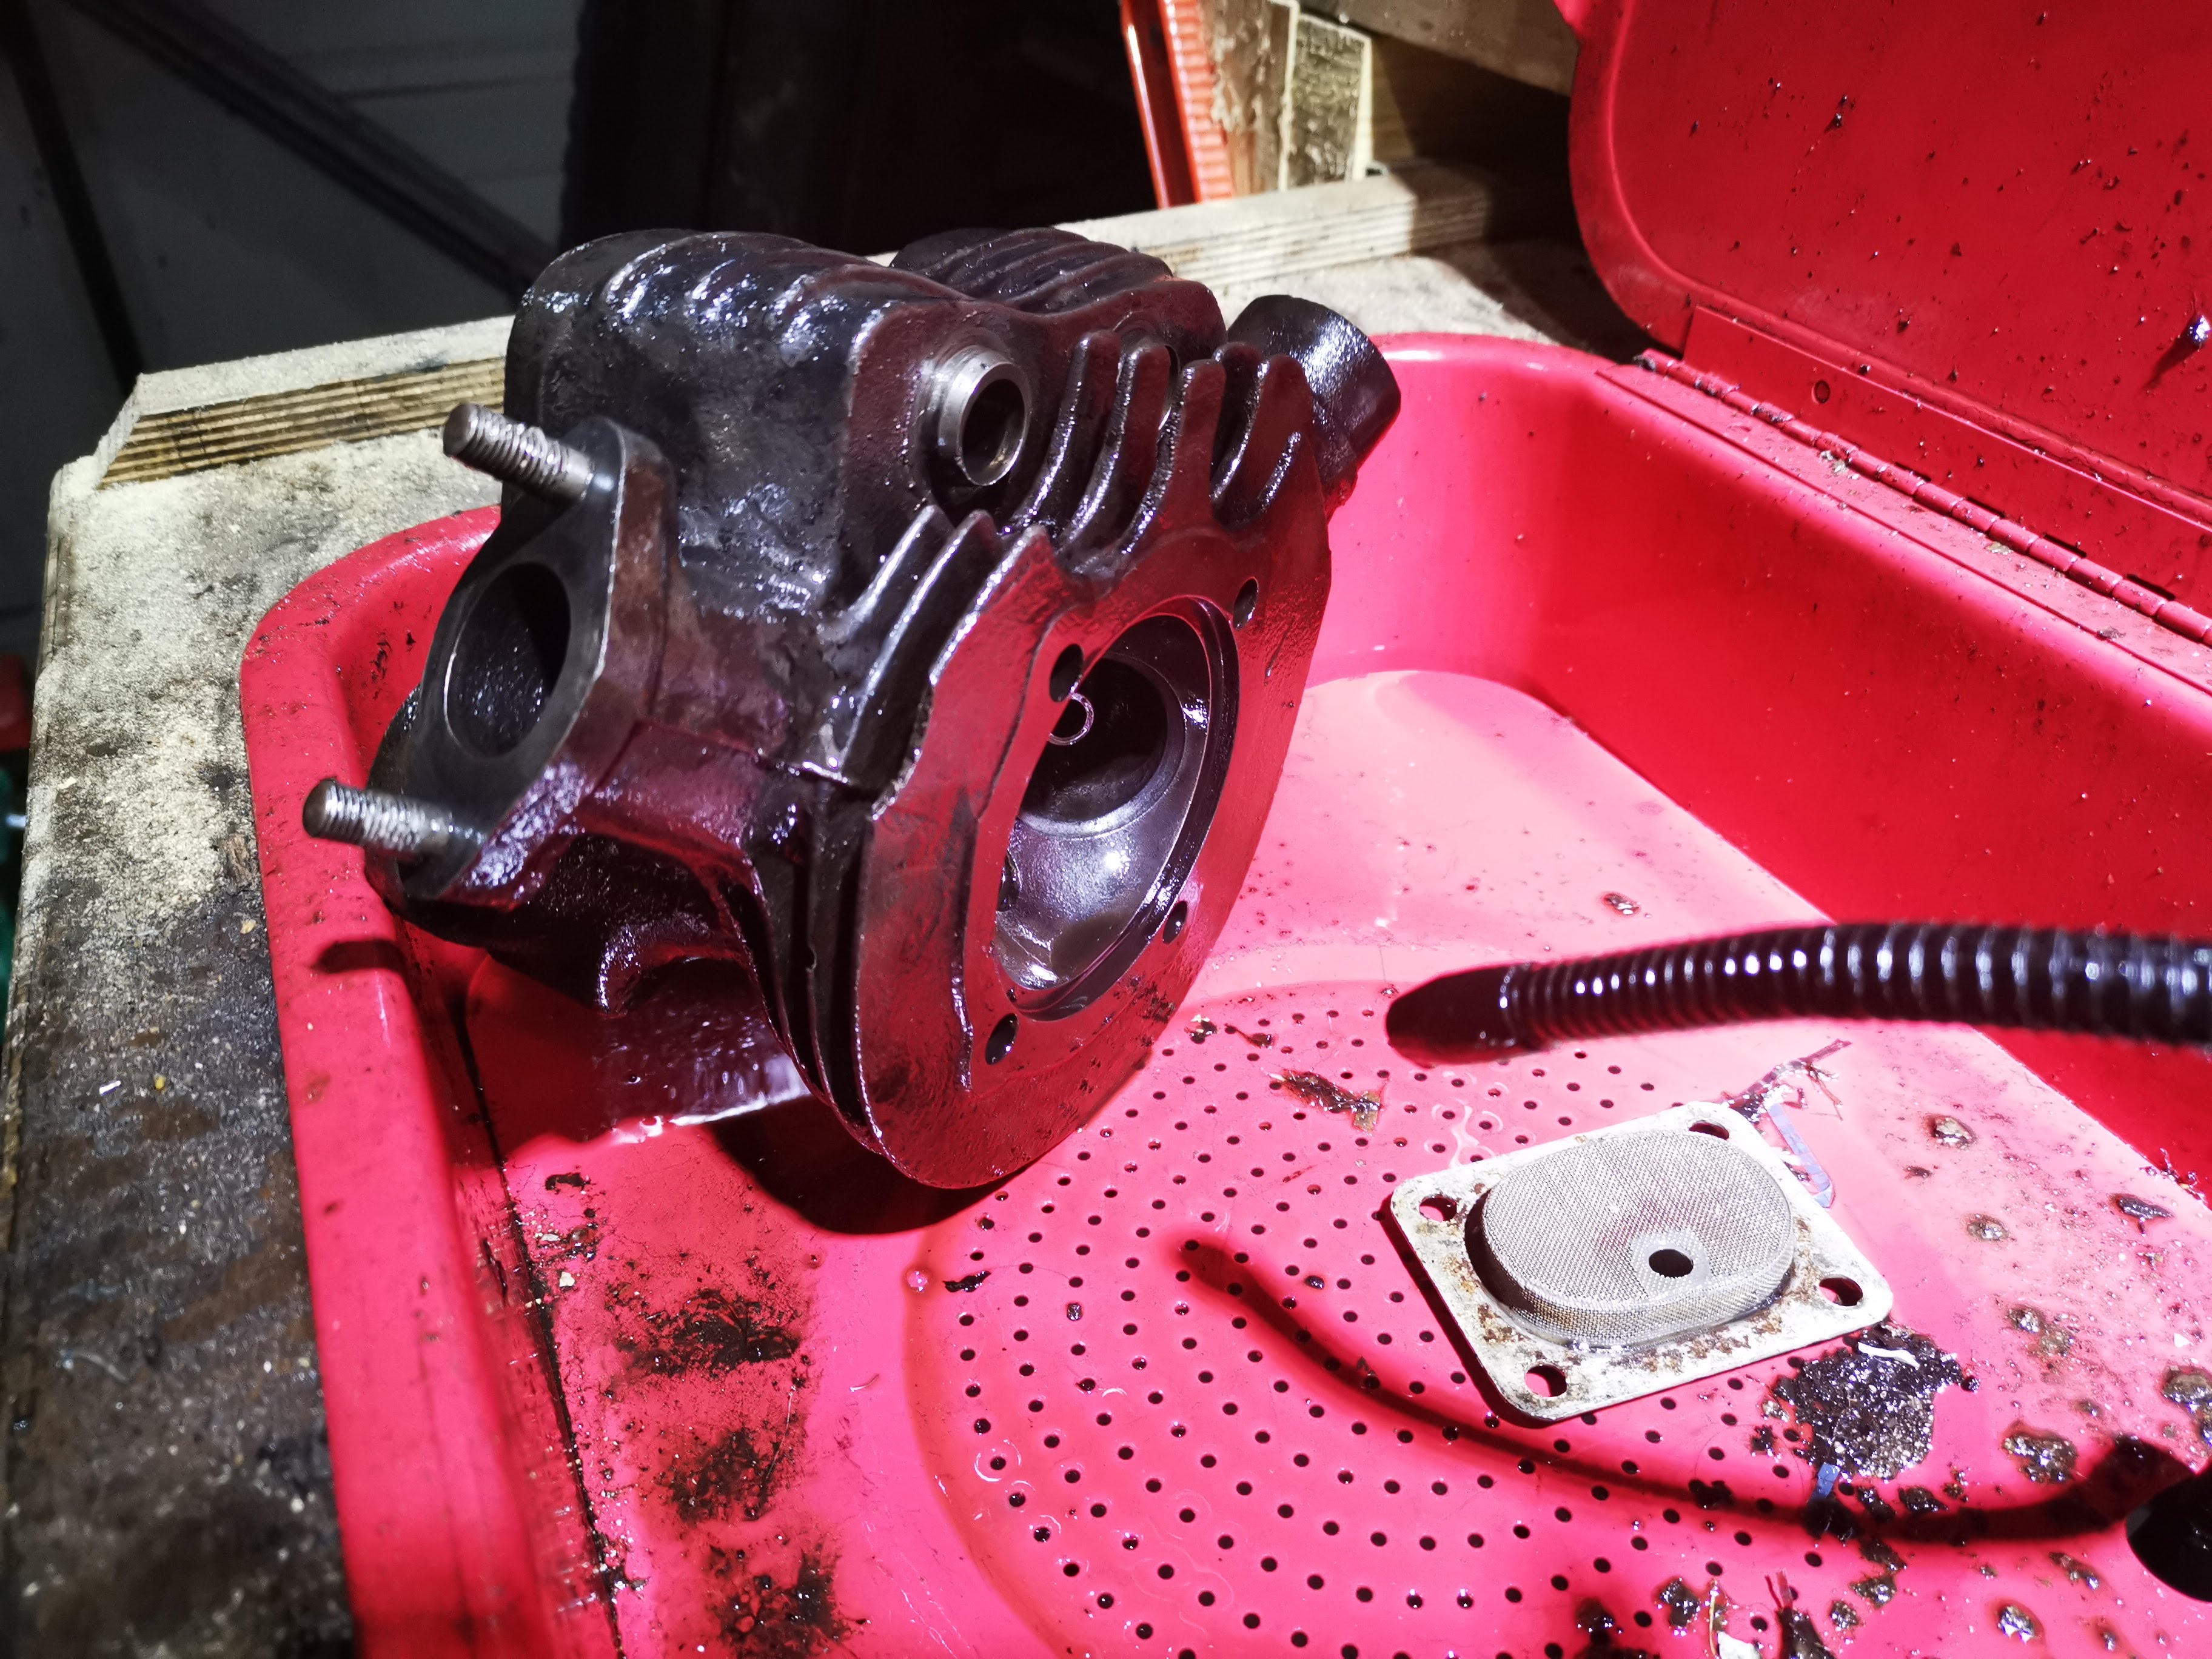
W/NG - Cylinder Head

Now that the barrel is back on and the engine is timed, it is high time I started on the cylinder head. I've stripped it and done a bit of cleaning, and I know the exhaust valve and guide are very worn so I've got some new ones from AOMCC Singles spares. My plan is to get the paint on the head on and setting while I build the primary side, and I have checked over the clutch and ordered some parts from AOMCC Gearbox Spares to allow that to happen, but of course I need to do all the manual work (fitting the valve guides, grinding the valves and probably fitting them) to avoid damaging paint which will probably be soft for quite a while.

The head was pretty filthy, and after stripping it went in the parts washer for a bit of a clean.


My first job was to put a taper on the inlet valve guide, which for some reason didn't have one. These are iron and machine very easily:


Still on the lathe, I made a drift out of some scrap 3/4" bar to support the mouth of the guide while I knocked them in to the warm cylinder head


With the guides in we can have a look at the valve seats. Here, I'm using the traditional 'sucker on a stick' to turn the valves against the seat - there is a smear of coarse grinding paste on the seat.


Another variation on this themes is a bit quicker, and not dissimilar to the suggestion in the manual - in terms of driving the valve stem rather than the head:


However you do it, once you have a continuous grey band around the seat with coarse paste you can improve the sealing capability with fine paste. It should end up something like this:


Now that the valve seats are good and I know that I can assemble the head after painting, I'll start cleaning up. I'll work it all over with a range of wire brushes:


But first off, let's get that greasy head back in the cleaning tank, and give it a dose of brushes and paraffin. I usually do this before I have to go off and do something else, like sleep, have dinner or do some building work so the parts have a chance to dry - this doesn't happen so well in the winter, so I sometimes get the propane torch out and dry them with that.


I'm using the same brushing engine paint that I put on the barrel - time will tell if that was a good idea as it is only rated to 200°C, but my temperature testing with the aluminium-head Square Four does not reach that figure. We will have to see what a thrashed iron head will do.


For the record, I put a couple of coats on the head on the 11th October. It dries in a couple of hours, but I will wait a day or two before starting to assemble it.


Post script: as of November 2022, after a fairly active and very hot summer, the paint is still intact and is showing no signs of distress. 

Friday, 5 April 2019

Welding Nuts

As you will know, the swinging arm Ariels make use of Spire fasteners and matching screws in various places, which look a lot like blunt self tappers. These appear in the rear mudguard and the seat base. Additionally, the bikes use captive nuts in sheet metal cages (I made one here) in the headlight and in the chainguard.

Of course, the captive nut in the chainguard was missing. I thought about making one, and having fiddled around for a while making a 5/16" one for the headlamp, I wasn't about to make a smaller (1/4") one for the chainguard that no-one would ever see, so I decided to weld a nut in.

Now the tab on the chainguard is not so large, and I wanted something larger than a conventional nut to weld to, and secondly I wanted to make sure the thread was in the centre of the square hole in the chainguard, so I came up with a special nut, designed to be welded in:


It's turned up from a piece of 3/4" round bar on the lathe:


It's got a 0.35" diameter journal to fit into the hole, and a lead in chamfer to a 1/4" BSCy thread:


The back is also chamfered, to allow me to make a fillet weld easily:


I'll make some 5/16" ones for the mudguard and seat.