Showing posts with label CDRC. Show all posts

Tuesday, 27 December 2022

W/NG - Lucas DU42

 Originality creeps closer with every passing blog post at the moment, this time with a genuine Lucas DU42 headlamp. The bike has worn an Indian replica since I've had it, and since one came up within the club a while back I've had a plan to replace it, with a bit of help from Wali Taylor who came up with the proper flat glass.

This picture comes from the W/NG workshop manual and shows the BA15 bulb holder, with adjustable focus (C), held in place with the long spring clip and the early rim clip (A) my bike would have worn:

The long spring clips (B) are retained to the reflector with two little sheet metal clips, riveted to the reflector. One of mine was rusted away, so here is the replacement made from a scrap of 0.5 mm sheet steel:


Here's the beginning of a rivet made from 2.5 mm² annealed copper wire:


The next thing we need is the gasket and the glass, shown in this later diagram from a 1944 parts book where the ammeter has been deleted and the headlamp switch moved to under the seat, with the new hi/lo pushbutton in the headlamp panel:


I've decided to use round section foam strip for the gasket; the glass is original, from Wali Taylor of the AOMCC.


The clip came from eBay, but didn't fit until I gave it some attention. The rim was full of dents too, but with a panel beating hammer and a dolly I soon had that smoothed out.


The clip is retained with a bit of piano wire - this is about 2 mm in diameter:


Onto the bulb holder. This is a military pattern bulb holder - there is only one contact for the main bulb, and I guess I will make another. Also very visible here is the clamping screw that allows the bulb holder to move backwards and forwards to position the filament at the primary focal point of the reflector.


Here's the view from the other side. Needs a clean but it is in good shape - it's not distorted at all.


Next is the instrument & switch panel. This is the illustration in the manual:


This is the one that came with the shell: it's a bit early for the W/NG as it has the fitting for the half charge resistor - that little casting between the ammeter and the switch hole:


This switch panel would be 1932-36, as the earlier H52 headlamp is quite different and the half-charge resistor disappeared with the introduction of the MCR1 mechanical charge regulator in 1937. I might use this or perhaps the repro one that is fitted to the bike at the moment.

This is the only original Lucas shell I have with the holes for the rubber string seal. Here it is in place - it’s a 2 mm sponge EPDM round section:


There will be a bit of wiring to do as the repro ammeter currently on the bike has terminal posts and ring terminals, and the headlamp is wired up with Japanese bullets:

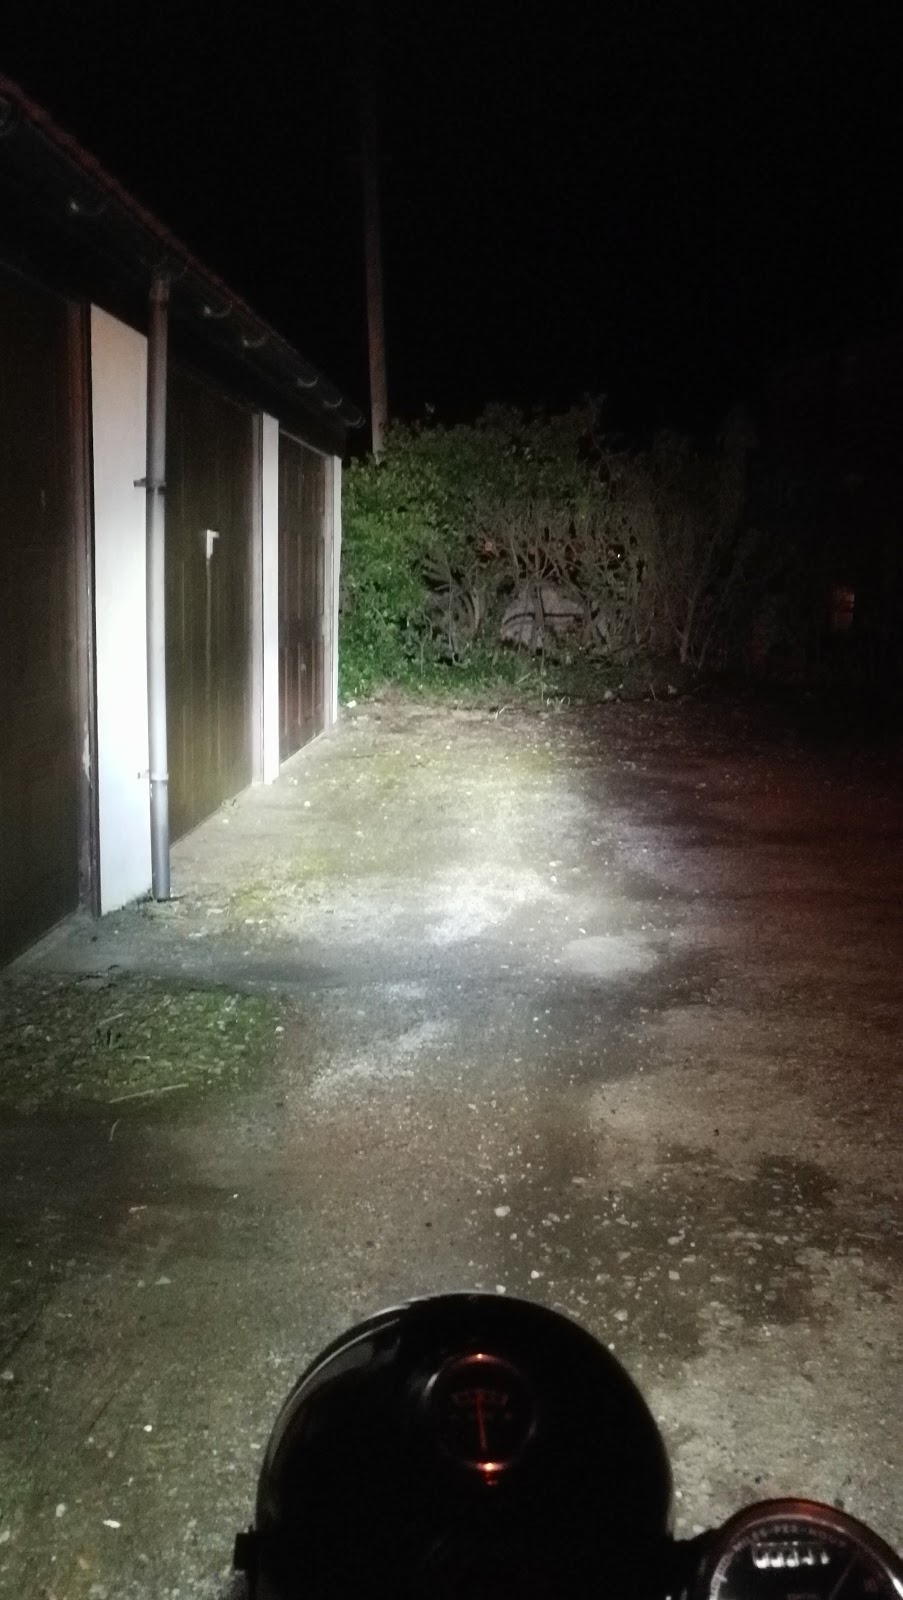
I've chosen a CDRC Double Dipper Pro projector headlamp bulb:


This is the beam it produces, in a picture taken on my phone using the 'night' setting.

With the camera set for daytime you can see the bulb is using the high beam LED and the low beam LED:

The completed headlamp:

Installed:



Monday, 30 July 2018

Lucas Tail Lights

This post is going to start out as an attempt to unravel the mysteries of the Lucas MT110, MT211 and 480 tail lights, used from the 1930's through to the 1950's and I'm writing it to help me understand what's applicable to my Ariels. Looking at advertisements for these lamps, there's a bit of confusion & mis-labelling around the 211 and 480 styles abundant on the world's favourite auction site.

Here's some illustrations of original lamps I have collected over the past few months, together with a few notes on the differences between these lamps.

MT110

This is an original Lucas MT110, advertised recently on eBay.


Note how the mounting flange is part way along the lamp body - you have to reach behind the number plate to remove the bulb holder. The 211 and 480 bulb covers are removed from the other side of the number plate.


This lamp was used from the onset of electrical lighting systems in the mid 1920's, until 1950 - though it was not used on the military bikes, which had the smaller Lucas L-WD-MCT1.

Reproduction versions are available all over the interweb - an excellent one is found at www.vintage-replica.cz.

These use a BA15d bulb.

MT211

This is an original Lucas MT211, advertised recently on eBay.


The number plate window is missing from this one.


Here's the main difference between the 211 and the 480 - on the 211 the cover is retained with a bayonet fixing.


Good luck finding one of these lamps. The reproduction ones sold as MT211s are usually more like 480's - subtle differences and perfectly interchangeable but it confused me for a while!

These use a BA15d bulb.

480

This is an original Lucas 480, advertised recently on eBay.


You won't find this stamping on a reproduction lamp.


Here's the main difference between the 480 and the 211 - on the 480 the cover is retained with a flange fixing with three asymmetrical ears.

Lucas 480s were used for 1951 and 1952 Ariels.

What's really confusing is that reproduction versions of these lamps are usually sold as MT211 lamps. The upside is that they readily accommodate a BAY15d bulb, which offers the facility to have a brake light where none was originally available. Here's mine:


The bulb shown here is one of Paul Goff's LD6RST LEDs, and an excellent bub it is when fitted in my repro Lucas 529 rear lamp. Only problem is, at 43 mm long by 21 mm diameter it is a few millimetres too long for the bulb cover of a 480.


What you need for the 480 is a CDRC LED; mine is an EB1B. They come in 6 & 12V, positive and negative earth - so think before you order!


These fit perfectly in the tiny 480 bulb cover:


And here it is in place:


Catalogue

These 1957 Lucas catalogue pages show these lamps and others:


Interesting to note that by the time this list was published in 1957 Lucas were specifying the 529 tail lamp for all Ariel machines that had previously used the other, older lamps though it does not fit the rectangular pre-war number plate. My SQ4 uses a 529 - it fits in the same screw holes used by the older lamps and is hence a direct, and safer, replacement.


It's considerably less complex than the older lamps and was probably cheaper, so everyone wins.

Friday, 23 March 2018

Out and about on the W/NG

For the record, I put the CDRC headlamp bulb back in the W/NG:

High beam:


Dip beam:


Saturday, 3 February 2018

Headlamp Rims & Glasses

As part of the winter lighting upgrade I had to change the original, rusty BPF reflector to a H4 fit reflector to suit the new bulb; I bought this from Paul Goff and all was well, until I came to fit the rim to the shell and found a very tight fit - much worse than normal.

Pushing too hard, I cracked the new glass: £35 down the drain.


However, after the event I realised that I wasn't too happy with losing the old Lucas BPF glass, with the Lucas logo in the middle and that actually this was a blessing in disguise, though it might not enhance my beam pattern too well. I decided to replace the broken glass with the old one, that I would extract from the original rusty reflector.

I started with the spun edge of the reflector here:


And I introduced it to the bench grinder, removing the metal until I broke through the fold:


The spun edge of the rim could then be prised off and the old glass released. You can see the poor condition of the silvering:


The glass was in need of a clean, but otherwise came through the process unscathed:


The new reflector had the rest of the broken glass removed, by pushing the glass out with a metal bar through the bulb hole and by removing the edges with pliers. The glass is held in with a relatively soft mastic which you can cut easily, and if you are trying to remove a modern glass and keep it whole you can cut the mastic around the glass, and then lift the edge of the reflector off the glass at a small slot in the reflector (seen on the far side of the picture). You can get a small screwdriver in here and start the removal process:


I used a similar product to put the new glass back in:


Getting the rim on was still a challenge. I removed most of the new paint from the edge of the shell; made sure both the rim and shell were circular; fitted the rim without the lamp unit and checked clearances for the W clips around the rim.

It was not until someone suggested greasing the shell (thanks Les!) that it went on - a bit of silicone grease on the rim had it slipping on easily.