Showing posts with label Bantam. Show all posts

Wednesday, 26 September 2018

A new day and a new project

So today is a new day: this morning, we hoisted my Bantam into the back of a van for it to start it's journey to a new home in Teeside:

A Bantam, waiting for a van
It's been a brilliant little bike, attracting a lot of attention and getting me back into a hobby which I love and which I had missed for almost 20 years. It started me off on this writing lark, lots of blog posts, magazine articles and the Bantam Restorer's Guide, if it ever gets published...

But what now? Time for the FH to come down from the loft. It's going to become my fast road bike, possibly replacing the Square Four. My thoughts are:
  • Fully restored - it's in bits, in multiple colours, and several key items are missing. In short, it's got no patina.
  • It's going to be finished in export paint colours, because I like that and because there are a lot of maroon Huntmasters out there
  • I'm going to replace the rims with stainless, with stainless spokes and plated brass nipples - I thought about getting these built at CWC, and ask them to polish the hubs, but I'll probably build them myself as usual
  • I'll use stainless fasteners throughout. I believe Ariel's of this vintage would have had zinc plated (and not phosphated) fasteners, so in view of the proximity of the sea, dull stainless is the way to go
  • It's got a new Mk1 concentric already
  • It's currently got a 2 into 1, though I have two silencers - I think I will keep the 2 into 1, at least for a while
  • I'll tear the engine down before I decide what to do with it, but it will be rebuilt to standard specification
  • The magneto will be rebuilt by Tony Cooper
  • I need to get it built, inspected and dated to retain the original registration number. I'll do a dry build first.
To get moving, I am going to start with the frame and cycle parts. There is quite a lot of welding to do before we get to sending out for painting, so perhaps I will do this:

  1. Strip the top end and timing side off the engine, to release the head, barrel and engine plates for the dry build and to release the magneto and dynamo for reconditioning.
  2. Put the frame on the bench, and assemble the gear box and empty cases into it
  3. Start welding the mudguards, chain guards and seat pan to trial fit tinwear and frame components
  4. Dry build, with fasteners from stock and no engine internals, wiring or cables.
  5. Register, photograph and develop the 'missing & broken parts' list
  6. Send black items (cycle parts) out for powdercoat 
  7. Send the wheels out for rebuild
  8. Send the levers and handlebars out for plating
  9. Send the tanks, toolbox, and mudguards out for paint
  10. Start the engine and gearbox rebuild
  11. Reassemble when it's all back...
  12. Wiring and cables
  13. Shakedown!
We'll see what happens!

Tuesday, 11 July 2017

Getting a grip on Repro Parts

Today, the Bantam got some NOS genuine Amal grips. Much better than the reproduction ones she had been wearing:


Saturday, 1 July 2017

Errands in England's Green and Pleasant Land

Another nice little trip out on the faithful Bantam this weekend, over to Cromer to collect the Ariel W/NG timing case. Read about it here.


Sunday, 25 June 2017

Two Old Relics

I had a nice little trip out on the faithful Bantam this weekend, over to Cromer with the Ariel W/NG timing case. Read about it here.


The pill box is at Aylmerton, and dates from the First World War.

Sunday, 24 January 2016

Competition Bantam

Who needs one? Well, I'd certainly like one, but today proved that you can go slipping and sliding about on a road going Bantam quite happily, if you don't mind getting your boots and trouser muddy!

We went along this nice little track near to East Beckham in Norfolk today, on a round about trip back from the post office.


This is called Mill Lane, leading to Bennington's lane, and is about a mile & a half of potholed farm track. I last drove it about 10 years ago in the dry - today was wet & muddy and I almost lost the Bantam a couple of times. Road tyres!

Looks a bit muddy now! Glad I sprayed it with ACF50 before I set out.


Since I road this track, I have had another look at the Norfolk County Council definitive map - and realised that I completely mis-read the legend. I found that this track is not a BOAT (Byway Open to All Traffic) at all - it is in fact, like most others, a Restricted Byway - horses, bicycles and pedestrians only!

Best not do that again.

Monday, 6 July 2015

Old Bikes & Morris Dancing

This weekend saw the annual Potty Morris Festival here in Sheringham, with 36 teams from all over the country visiting to dance in different traditional styles & costumes. Saturday & Sunday saw the town filled with folk in various regalia with bells ringing on every street & the sounds of the melodeon, fiddle & drum playing to accompany the dancers

The Bourne Borderers, from Lincolnshire
This was the 22nd Sheringham Morris Dance Festival since the event was set up by Clive Rayment & Reg Grimes. For the first time the event was unfortunately without the Sheringham Lobster Potties themselves, but 36 other teams danced Cotswold, Border, North West & Molly traditions over ten dance spots all over the town.

Leicester Morris Men
Holt Ridge Morris at the Crab & Lobster Festival, May 2015
Potty Festival is not complete without Real Ale, and the pubs were filled with revellers & more musical entertainment in the evenings.

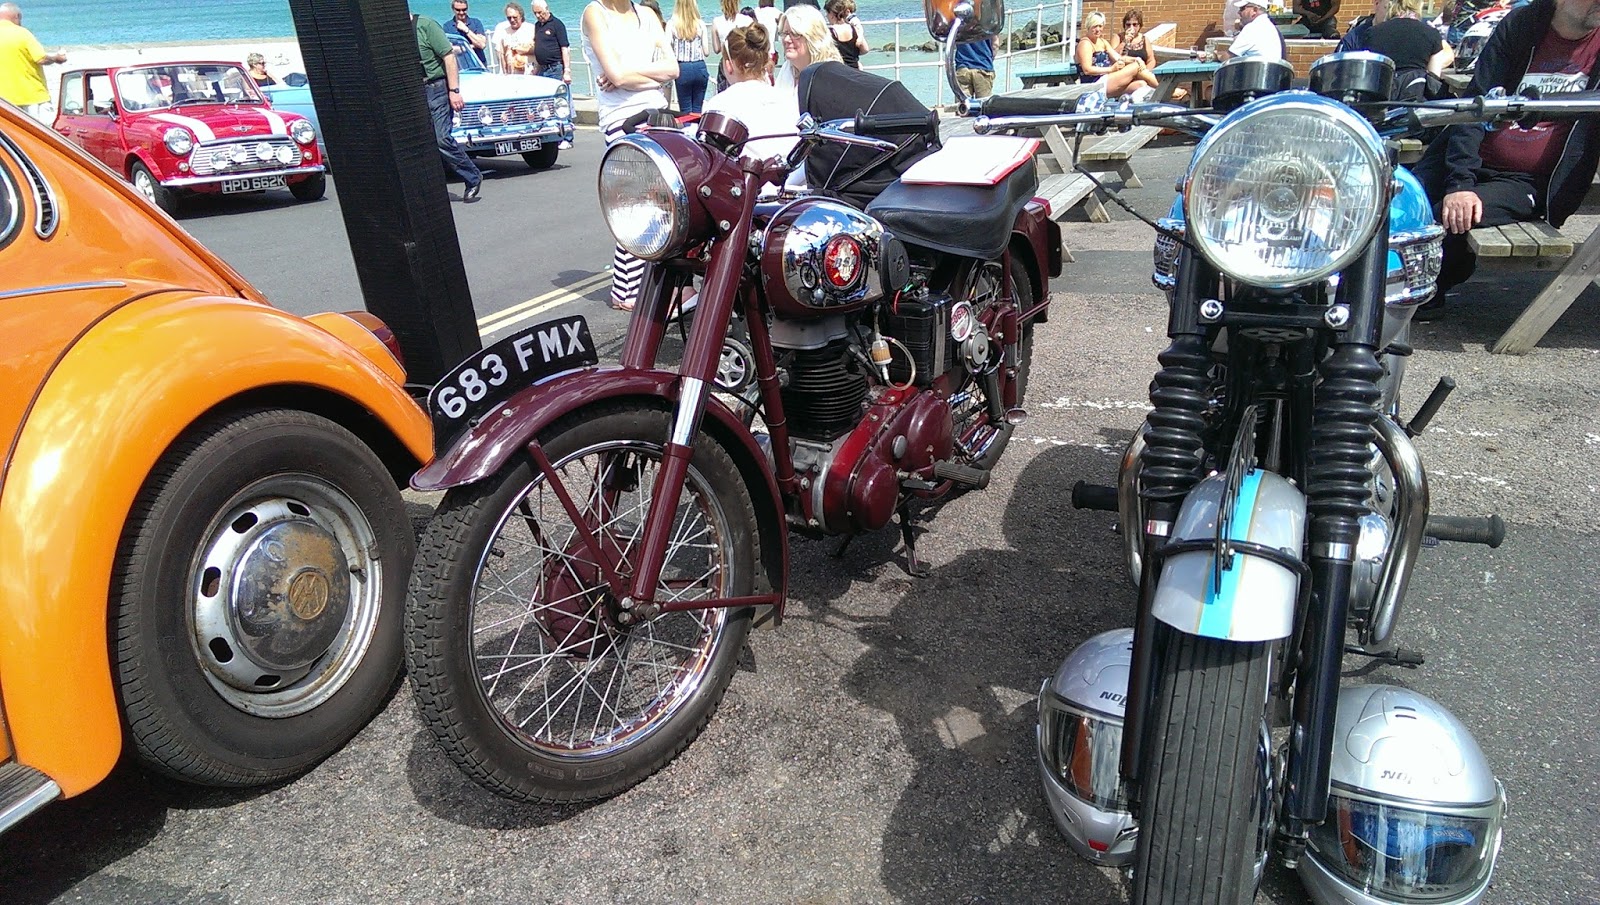
Sunday saw us among the motorcycle exhibits at the Vintage Transport Festival. The bikes park up on Sheringham station platform. The loco, a BR Standard 4 number 76084 was outshopped in 1957 so she is contemporary with many of these bikes. Here's a lovely Norton Dominator 88 with my Bantam in the background, a C15 and another Dominator.


Same scene, a bit later in the day. The sun has gone but we have a Rapide and a Commando Roadster.


Very handsome Dominator, hiding my Square Four from view


A Silver Bantam, and the Suzuki AC50 & BSA SS80 Sports Star seen at the recent Classic Car & Bike Show.


A group of scooters:


A Matchless G9 with a very interesting looking Gold Star:


There were a lot of Velocettes this year:


A nice BSA A10:


The silver Bantam again, with Amelia in the background just to prove she was there:


Sunday, 8 March 2015

17 mile test run; fun with brakes


Lovely test run out to Bawburgh today, about 17 miles around the countryside. Bike is definitely running less hot, since after 8 miles I still had maybe 25 psi oil pressure at 30 mph, but that was dropping to 10 psi on the gauge at the end of the trip. I measured the oil temperature - 95 degrees C in the tank (about 200 F), which is much higher than I have seen after, say, a 5 mile trip.

As you can see the bike is on the sidestand - what I noticed later was that the carburettor drips fuel onto the dynamo in this position. I had left the fuel on though. 

The engine sounds happy enough; I'm not too sure about this gauge - I keep wondering how I would feel if it had never been fitted. I'm tempted to buy one of the club reproduction gauges, or to get this one calibrated.

Out on the road though, the Ariel was handling fine for the first few miles until I became aware of a juddering from the front end, which I initially put down to the road surface. On braking however I found no movement in the front brake lever, and realised the brake was seizing on. Near home, I stopped for traffic lights and saw smoke coming from the front brake (I've been here before, with the Bantam)...


Arriving back I was greeted with grease everywhere. As we all know, hot brakes cause the grease in your hubs to melt...


Stripping the brake down revealed some serious damage to the linings, and bits of lining (2-3 mm bits) all over the drum. The linings you see in the pictures are greasy, but those matt grooves in the middle are way below the wearing surface:

Greasy

Cratered Lining
Now, I don't know if this is a result of heat, or the heat is a result of this breaking down. I'll take it back to the supplier tomorrow and see what they say.

Odd, since it had been bedding in nicely and getting quite effective.

Sunday, 8 June 2014

It's Show Time Again!

The day dawns bright & shiny for the annual Sheringham Classic Car & Bike Show, part of the Sheringham Carnival celebrations.

A few bikes this year and even less photos! Beattie, my Bantam in amongst some Ducatis:


A very nice Triumph

A BSA C12 - a local bike, but I don't know the chap that owns it:

A nice Matchless G2CSR:

Saturday, 1 June 2013

Pussy Galore

Since the summer is here, it is time to take the Bantam to Sheringham for the annual Classic Car & Bike Show.

This is a Sheringham Carnival event organised by the The Lobster pub and every year the town centre is closed off and filled with old cars & bikes for a sunny Sunday at the beginning of June. From The Lobster website:

Our previous three shows were a massive success with over 200 cars attending each year, and each year it has grown; from a 1929 Austin Swallow to a Ferrari 308 GTS. So whether an enthusiast, owner or just on a family day out, a great day is to be had by all.

The main high street and sea front will be closed for the day in order to best display the vehicles. We can accommodate larger groups as well as individual cars and last year had representations from Bentley, Ferrari, Porsche and members of the North Norfolk Classic Vehicle Club. Also on display were MG, Mini, Jaguar, Rover, Triumph Stag, Trojan and Austin A7.

Promoted and organised by the Lobster Pub and raising money for the Sheringham Carnival, the aim of the weekend is to involve people who live and work here, helping foster a real sense of community and fun. Hopefully benefiting local businesses by attracting more visitors who will have such a great time they’ll want to come again and tell all their friends too!

It will be a truly enjoyable event for all ages. Our programme is hoping to include music, dancing, a real ale festival and of course the classic car and bike show.


It's on Sunday 9th June this year, and when the time comes I'll post some pictures. It's a great little show, and followed six weeks or so later by a Harley Owners Group meet, when 400 or so Hogs fill the town - and if you don't go for the bikes, go to the Lobster. It's a great pub and you can take your dog!
Nice Shooting Star at the 2012 Sheringham Classic Car & Bike Show

However, having taken the Bantam up this weekend, I was pottering around town when I stumbled across a couple of lost Panthers, lost in the back streets of Sheringham.

These friendly chaps were on a ride out from their rally meet in North Elmham, Naturally I took a few pictures:

Friendly Panthers on a rather too cool June morning...

More Panthers & nice Goldie

Nice to meet you guys!

Monday, 14 January 2013

There is life in the old blog!

Well, what is new since the weekend? Well...
  • it's snowing
  • the Bantam has been out around the garden
  • Limoncello makes great Martinis
On the bike front, we are still cleaning & inspecting the engine. I've attacked a 14 mm hex socket (not a bi-hex) with a file and have made it fit the connecting rod nuts. The rods are now off and undergoing cleaning. Number 2 is nicely polished.


There are various nicks. This one is typical, but it is minor compared to the abrasion the Ariel fitters cause when they removed the flash around the forging dies:

Hopefully I will show you factory abrasion in another entry - I had cleaned it off Rod No. 2 before I thought to photograph it.

There is a nice little scratch in the cap:

The big end shells are all shot; the journals are a little undersize but are perfectly serviceabe.

All the dings polish out OK. At some point we will do a dye penetrant inspection on these just to be sure there are no cracks.

I have new AOMCC rods in the budget - I am just not yet sure whether I really need to spend the money. The state of the big ends and the mains, which despite white metal flaking were still in tolerance, suggest to me that this engine has had an easy life, though I realise this conflicts with the fact that the bores are 0.020" overbored.

Of course no amount of inspection can tell me what state the material is in - only it's service life could tell me if these rods have been fatigued enough such that they will fail in the next few years. It's a 35 bhp engine - judging by the way I ride the Bantam about Norfolk am I really likely to stress this engine? If I fit the Morgo pump will it see any shortage of lubrication? Shortage of lubrication will trash any big end, old or new - so we are down to loading & rpm...

The crankshafts have now all been cleaned out. Number 3 sludge trap was full past the big end oilway, though there is no damage to the journal or the big end so I think the engine has been lucky.

I've loosely reassembled it all in preparation for taking the bottom end for line boring. Here are the crankshafts back in place:


Here are the cases cleaned up and back together. I am debating what to do with the polishing of these.

And as an aside from the engine, I have been:
  • sketching up a wiring diagram with Microsoft Powerpoint. Currently it has six fuses, no earths (because I haven't put them in yet) and no indicators.
  • I have ordered the engine bearings from Drags
  • I have ordered a replica Lucas 529 rear lamp
  • I've ordered the engine/gearbox mounting set, the coupling gear cover studs and the primary drive screw set from Acme
But now it's back to work. I'm hoping to have a trip to London in a couple of weeks to take the engine down to Ashpoles; that depends on the bearing arriving from Drags.


Tuesday, 4 September 2012

We're back - and it is engine build time.

Well at last. It may be nearing the end of summer, but what better time to get back up and running with the Ariel.

The Bantam is finished - it is now 12 V, and has had it's second engine rebuild. It's just carried me 25 miles around the country south of the city without missing a beat, even through a ford. It still doesn't like ticking over when it is hot though.

The Cyclemaster has been in the workshop for a look over. It is remarkably original as I had thought; it has a coaster brake and is a 25 cc model, but it has been some while with the spark plug loose and is siezed solid. I've put it aside for a rainy day as it's time to get back to the next step with Amelia, building the engine. Regular readers will remember that the gearbox is suspiciously offset, and part of the engine strip will include sitting the bottom end in the frame for an alignment check.

However today, there is not much biking time left. Just enough to make a little start and write a blog post.

So here are some rather grubby rocker covers, taken off for the first time in years, and bringing two of their studs with them.
Here they are again, after a session with some white spirit and a cloth. What I need to do now is source some polishing mops, and some advice on what compunds to use.


And here is what they revealed. Nothing apparently amiss there!

I'm going to spend the rest of the evening relaxing in front of the telly with a book. One by Mr C.W. Waller perhaps.

Friday, 20 July 2012

More Plating...It's been every evening this week...

Well I am persisting with the zinc plating while waiting for my Bantam engine to come back. I've reworked all of the engine fasteners now, not brilliant but usable, along with parts like the clutch adjuster. I've also plated a few spacers, chain adjusters & the brake adjuster:


Quite passable I think!

Monday, 16 July 2012

Plating

So, I've started plating some Bantam parts using a 4 Amp 6V/12V battery charger and Gateros Bright Zinc kit - £59. for enough to make two 4.5 litre tanks. I wanted to clean up the rusty fasteners & clutch adjuster on the outside of the engine.

I started by running a die along all of the fasteners to clean the red Hermetite out of the threads. Then they went in a caustic soda electrolytic bath, followed by a rinse.

Then it's a minute in a 30% hydrochloric acid solution (brick cleaner from B & Q), and straight into the plating tank. It's a struggle to get the voltage right with a rudimentary controller in the form of a coil of resistance wire, but the results are passable - especially as I was really looking for a cadmium plate look-alike, not shiny zinc.

Here are a batch of parts in the plating tank:


And here they are again after about 20 minutes:


A 'before & after' shot:


So having tested that out, onto some more valuable (read scarce) parts. These are the steel parts from Amelia's Solex 26 AHD in the tank. Same process as before:


And here they are after plating. They are still attached to their handling wires here, but they have been  in the clear passivating solution for about 60 seconds.
And here is the carburetter assembled. All the brass has been cleaned with Farecla G3 compound, a toothbrush and a brass wire brush in the Dremel. It all looks to be in nice condition though it will need a new set of seals and some parts from David Jones, including the air bell, the Bi-Starter knob and it's bracket.

The other thing I need is to find out what the cable bracket looks like, if there was an adjuster, and where the throttle return spring goes... anyone got one I can copy?


A pleasing distance from the 'before' shot from last week!