With the Square Four at Tom's house, the initial service on the FH complete and some of the running repairs to the W/NG finished we can swap the bikes around in the workshop and put the Model A on the bench. I've had this bike for 5 years or so and have been steadily making fasteners and collecting bits ever since so it appears very complete although I haven't done any repairs to the broken parts yet.
Let's have a look at a few current pictures.
Five years ago I wrote an article called 'Broken and Missing' which outlined what I found when I took delivery of the bike initially. What follows is most of the text from that article updated to reflect the state of play today. Some of the pictures in the text date from the original article.
Frame
To date, I haven't found any problems with the frame mainly because I haven't dismantled the bike yet. The paint is good, all the threads I have seen have been good or have been repaired in the last few years, but looking at the saddle I suspect the saddle nose mount will be quite worn.
The engine plates are all there, along with a pair of footrests from AOMCC Black Ariel Spares. The footrest bar is bent but is just a bit of 7/16" round bar. I have the two engine plate covers around the dynamo, both of which need weld repairs.
The rear stand came from Ariel Klub Slovakia and I have one of the last of the reproduction Es-way side stands.
Forks
The forks are complete and straight, but feel like they are quite worn - and these forks do not have bushes. The components, with the exception of the grease nipples are all there.
It may be that this bike has been assembled with no balls in the steering head - it certainly wiggles around as though the races are empty. It might be wise to sort this area out first to stabilise the machine.
One of the stay bolt holes in the fork end had a broken bolt in it - I drilled that out and reclaimed the thread a few years back.
Tank
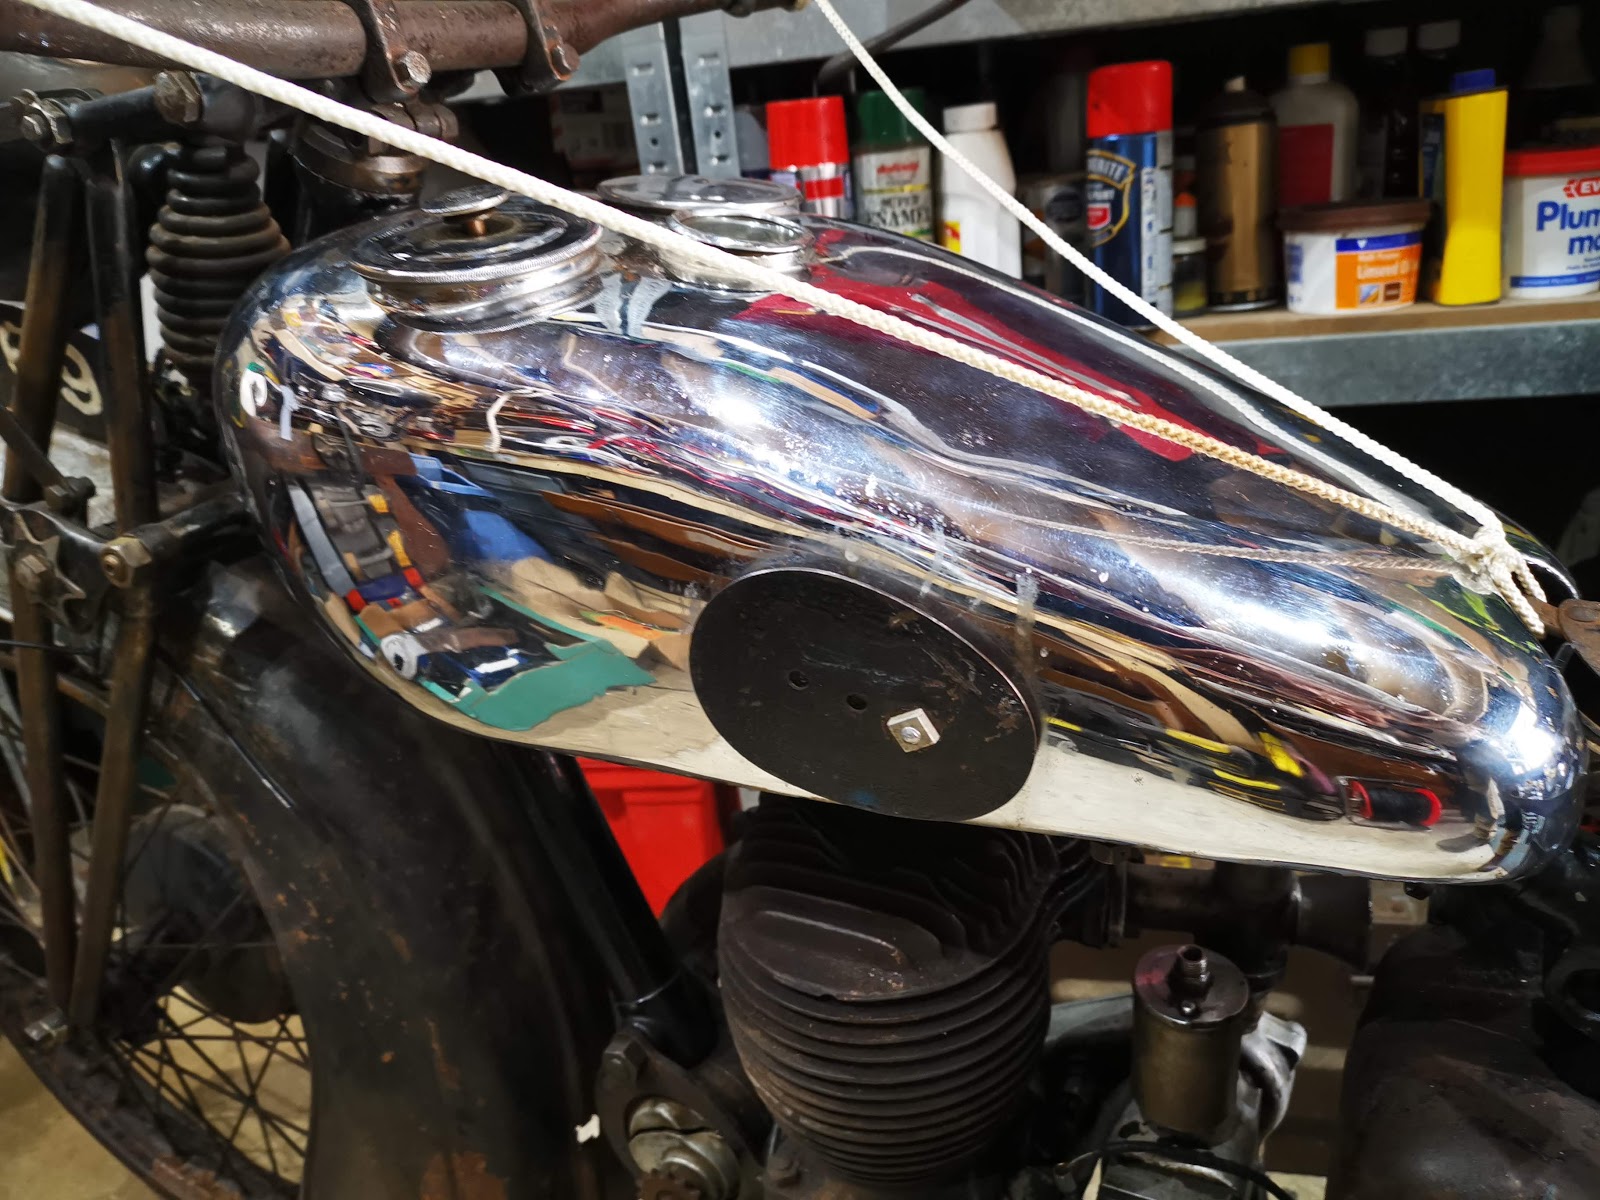
The petrol tank, cap and oil pressure gauge are all there and in nice condition. The cap needs a small repair internally; the tank has a few dents but little obvious rust and the chrome plating is intact. There are three of the original mounting bolts; I will make a fourth. Some of the original mounting rubbers are there, but I have a complete set from Jeff Hunter Engineering.
The knee rubbers and their plates are all there, though the rubbers are thoroughly squashed and unusable. Again I have a replacement set.
The oil pressure gauge pipe and fuel tap are missing. I have acquired a suitable period tap with the correct adjustable corks from eBay:
It's a 1/4" BSP tap and has an adapter. I'll have to make a filter for it.
Front Wheel & Brake
The front wheel needs truing and a spoke replacing. I'm hoping to get away without replacing the original rim, but that will require much closer inspection. The few spokes I have looked at appear sound and the nipples turn - I have dosed them all with Plus-Gas. The wheel turns freely and smoothly.
The brake plate is there - the arm is there and it feels like the shoes are too. I have the brake rod and the torque arm; I've also sourced an adjuster and made the spring box.
You can see that broken stay bolt I mentioned earlier in this picture.
Rear Wheel & Brake
The rear wheel runs true and turns freely, but it is missing at least two spokes. The sprocket, which is integral to the brake drum is worn and will need replacement; the brake plate, arm and shoes are there but the wheel spindle nuts are quite poor, one is missing a spacer and the other is seized on. The chain adjusters were both missing but I have made a new set.
Since I took this shot, I have fitted the rod, made a new rear brake adjuster and realised the cam spindle is very worn. I made a new pin for the rear clevis but the front trunnion is very poor.
Engine
The engine turns over - that is about all I know! It's lost a few fins, and one of the valve caps is broken but I guess that is patina. The timing chain case looks fine. There appears to be a braze repair to the base of the barrel but only an engine strip will reveal more:
There's a lot of broken fins up there. See the big lump of braze?
Primary Transmission & Clutch; Final Drive
The chain & sprockets are there; the clutch looks complete apart from two missing springs and appears to lift when you operate the arm at the gearbox end.
I've seen much worse clutch drums than this:
There are several repairs on the primary chainguard like this, using rivets. The clutch dome is also split. I will probably weld up these riveted repairs as they are not adequately fixing the chainguard in place:
The rear chain guard is there and in good shape.
Gearbox
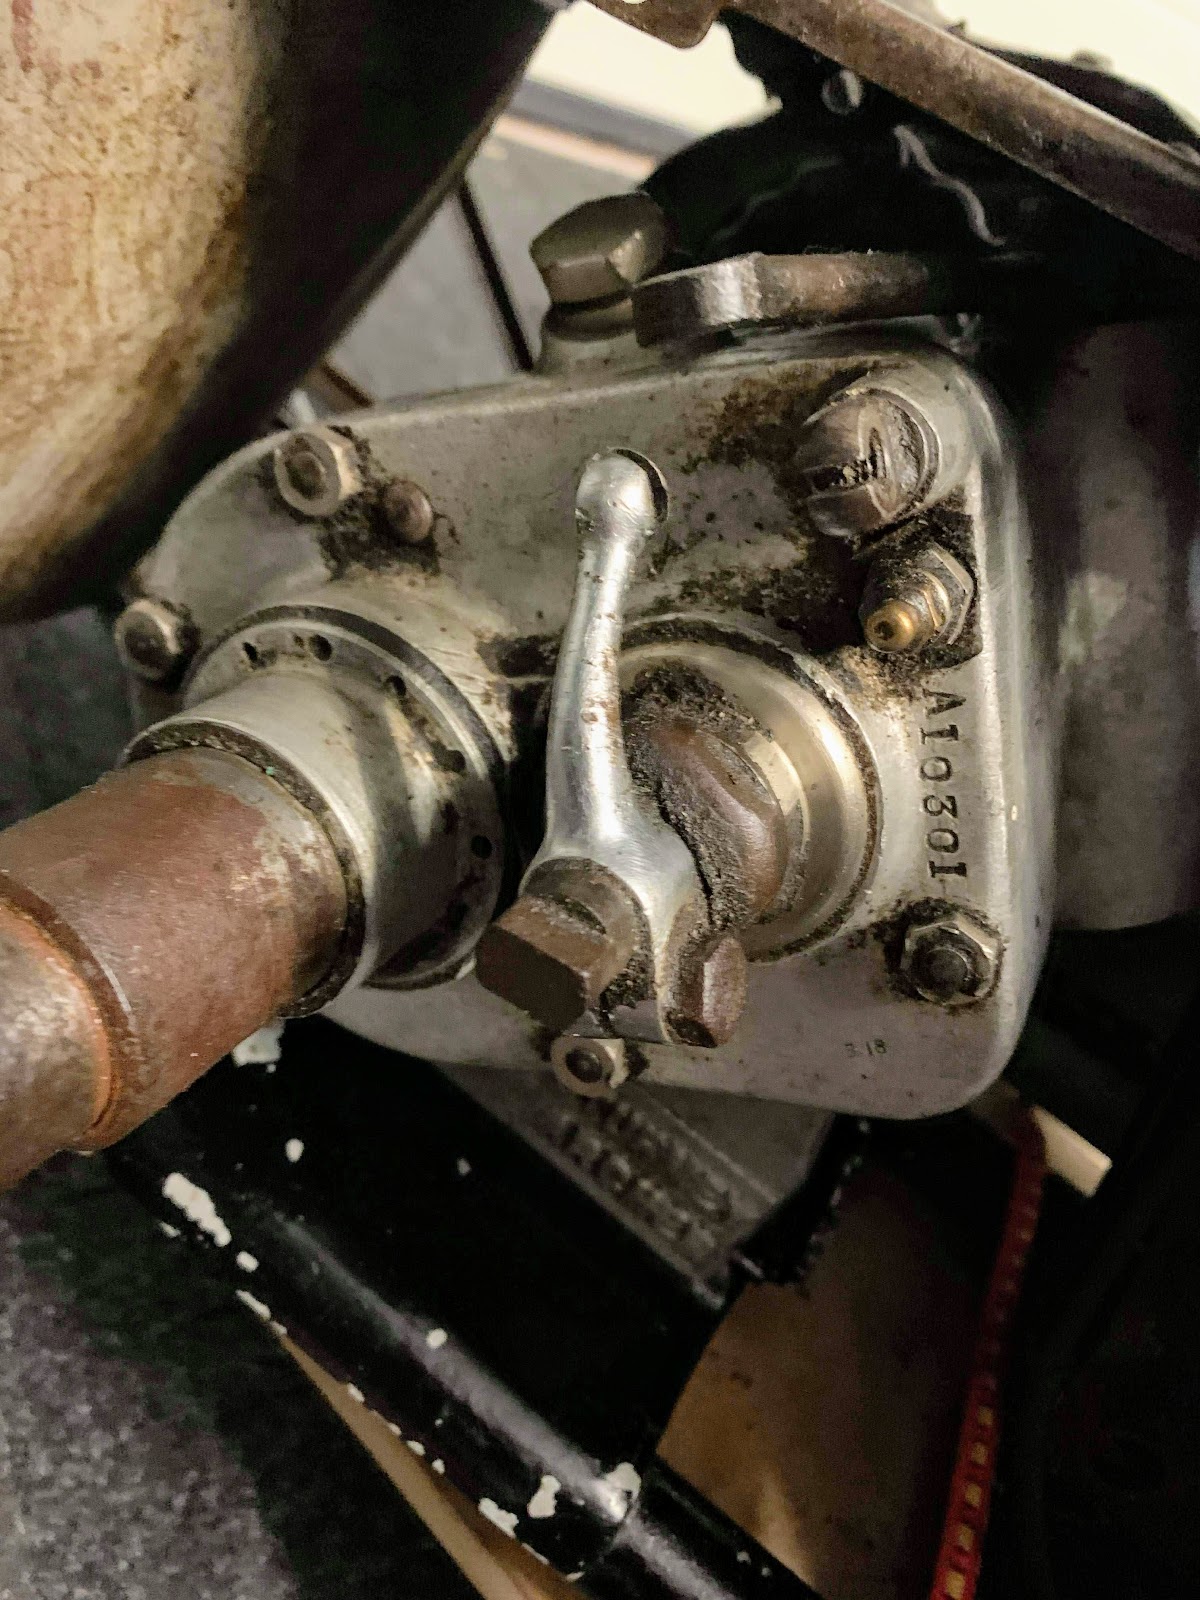
The gearbox appears to be complete apart from the kickstart spring and it's cover, and the kickstart lever cotter. The gearbox engages all three gears, but the hand change rod, one of it's clevises and some of the tank lever parts are missing. These are all parts that can be made on the lathe which is a good thing, as they are unlikely to be available anywhere.
I'm not sure about this kickstart shaft - it looks much longer than any I've seen...
Carburetter
The carburetter is the correct Amal model 6, with the right float bowl but that's where the good news ends. It's probably in very poor condition as I can feel the air and throttle slides rattling about.
We will have to make some difficult decisions about this. It's an old original carburettor and while you can buy a new 276, you can't buy a model 6. Buying a new 276 would be the sensible option of course...
There are no cables but I do have the remains of the fuel pipe.
Exhaust
The exhaust is there, the plating is poor but no worse than many. The fish tail appeared one day delivered to the railway I volunteer on by a very kind club member. The AA badge is missing from the silencer and the silencer bracket is bent; one or two of the clamps are missing:
Another small issue with the exhaust is that the silencer has been pushed into the bracket - which looks a mess.
Oil Tank & Lines
The oil tank is present, as are all the oil lines and unions. The tank cap is missing, but I am using one that came from Italy on the W/NG for the moment.
Mudguards, Stays, Carrier and Number Plates
The front mudguard and it's bridge were missing. I made the bridge using the W/NG one as a model and the guard has been replaced with a pattern D guard from Feked trimmed to the right length and drilled for stays. The original number plate and it's mounts are there, the front stay is also there as is the front stand - the front stand is pretty rusty and will need surgery.
At the rear, both parts of the guard are there but there will be some welding to repair fatigue cracks. The carrier is there and in good shape, but all the fasteners are missing; the double mudguard stay for the detachable section was missing, but was delivered from Scotland after turning up in the previous owner's stash.
Something that looks a little odd, and it seems to be quite common on these late 20's Ariels is that the detachable part of the mudguard doesn't line up properly with the fixed part - leading to the bike looking as though it's mudguard is too big. This may be something to do with where the stays fit, or whether the stay is inside or outside of the mudguard blade.
Headlamp & Tail lamp
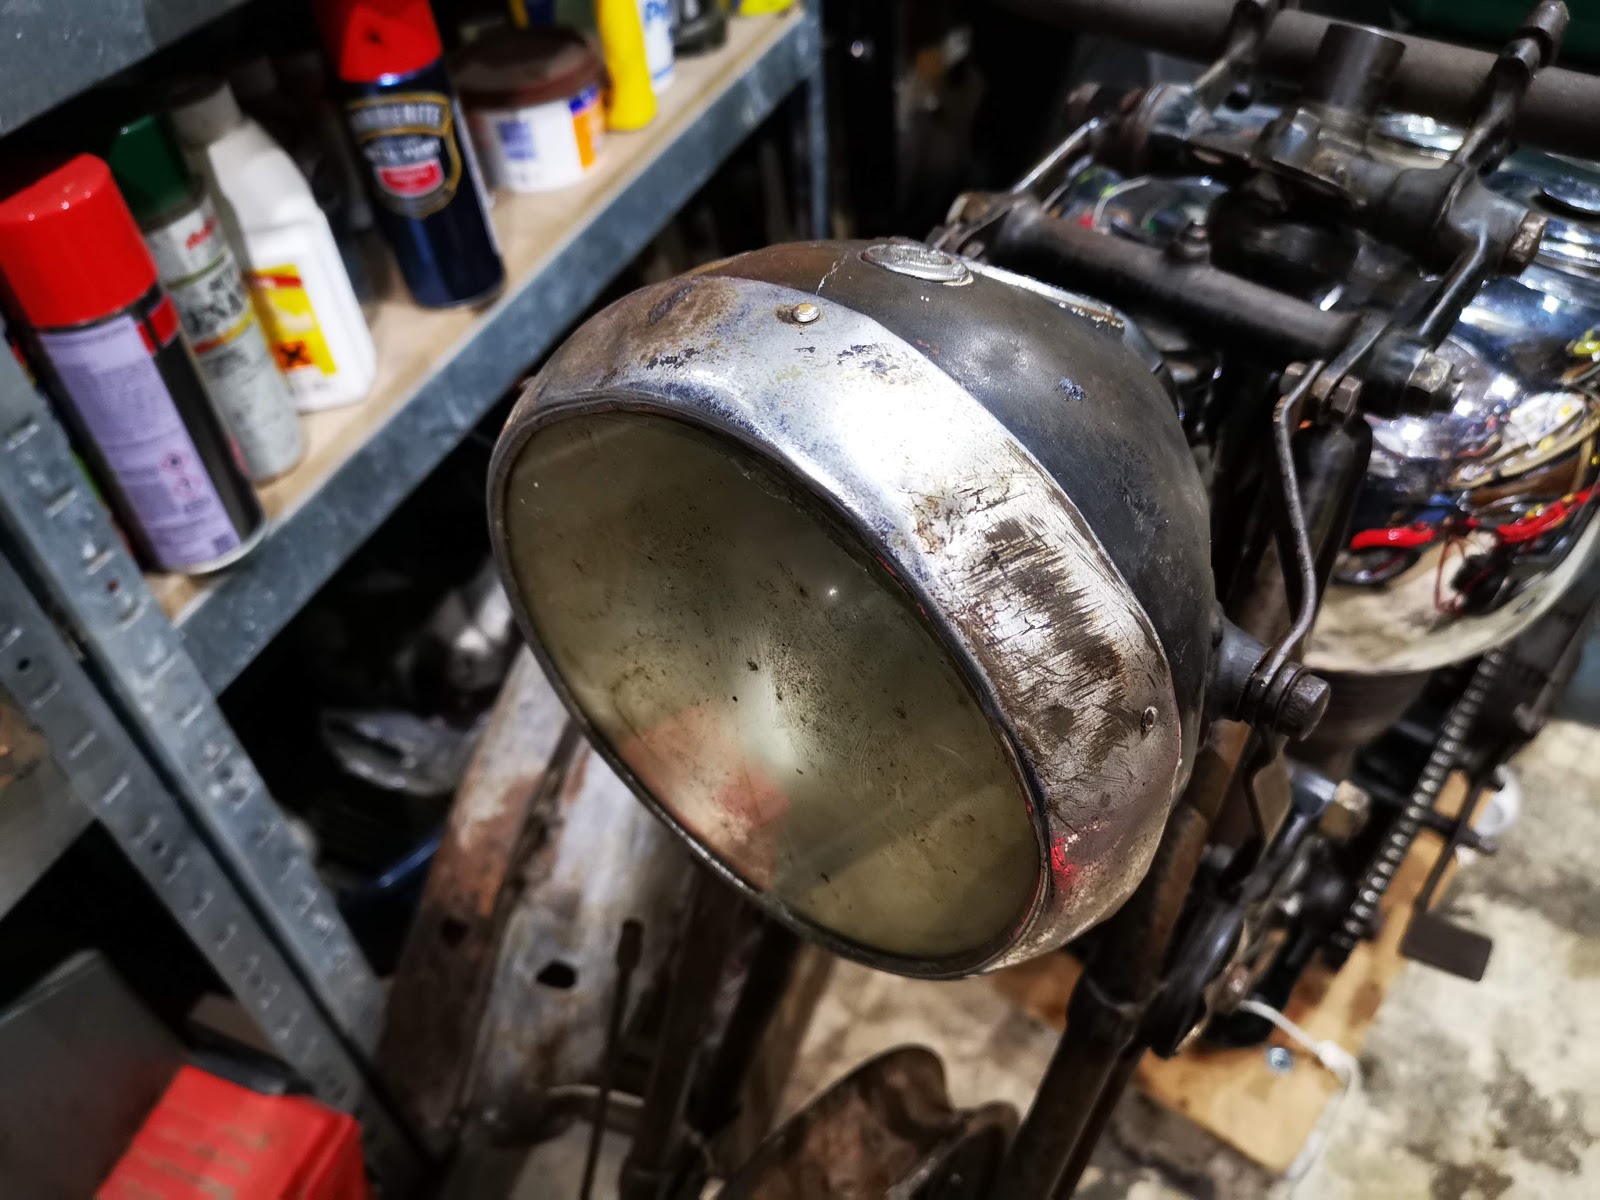
The Lucas H52 headlamp and MT110 tail lamp are both in place; the headlamp is quite battered. The plan is to dismantle both lamps and clean them; I have a sandbag and will knock the headlamp shell back into shape, hopefully the rim as well. The lamp mountings are bent - it looks like the front end took a knock perhaps.
The rim is in particularly poor shape:
The H52 is very interesting - it has no internal wiring, just contacts:
I'm delighted these are all intact.
This is a later number plate. It's clearly an original, but it doesn't have the registration number painted on it - so where did it come from? Perhaps from the previous owner's stash of parts?
Handlebar and Controls
The handlebar, twist grip and both inverted levers are there. There is just enough plating on the bar to show it was once chromed. There are no handlebar rubbers, clips or cables.
I found the Bowden-type clutch lever and the double air/ignition levers from eBay at vast expense.
Dynamo
The dynamo is the correct Lucas E3, and looks to be all complete though I believe part of it's clamp is missing. The drive end bracket has a large crack right across it.
I've realised I don't understand how the dynamo clamping arrangement works - there appears to be some sort of bridge across the engine plates, but haven't seen a picture yet. Something to research.
I'm hoping to get the end plate clean enough to use an adhesive repair.
The chain cover is also there, and will need a weld repair to one of it's feet.
Battery & Electrics
The battery tray and it's clamp are there, though the clamp will need further repair and some nuts turning up on the lathe. There is the remains of the wiring harness attached to the headlamp which looks like it was rubber sheathed; the dip switch, horn button and horn are missing.
The sales catalogue from 1930 indicates that the electric horn option was a Lucas Spartan type so I have sourced a 6 V version and built a handlebar bracket for it. It might be a bit big...
Magneto
The original Lucas KSA1 magneto has been replaced some time in the past with a BTH KC1, so this is probably a period repair or upgrade - the factory despatch record does not mention a non-standard magneto being ordered.
Saddle
The saddle is in place, with all it's springs and spacers - the nose bearing is pretty worn and the cover is missing. I'll make a new cover.
Toolboxes
The toolboxes are both entirely missing. I will make new boxes, learn to work leather and make the leather fronts, and find as many tools as I can. I've started already as you can see from this post...
Next steps
The policy this time is a refinement of the two stage approach I usually take, that of restoring with no painting or plating followed by commissioning and then repainting and plating. This time it's going to the four Rs:
- Replace missing parts
- Repair broken parts
- Rework worn parts
- Refinish everything
I can't wait to get stuck in!