Showing posts with label grease. Show all posts

Tuesday, 8 December 2020

FH - Swinging Arm bushes

A while ago, last May in fact I removed the SilentBloc swinging arm bearings and I wrote about it here. Since then, lots of things have got in the way - not only the Honda stuff, the QR50 and the CX500 but also the rear mudguard and the oil filter for the FH and of course the W/NG engine rebuild. Anyhow, as regular readers will know, the oil filter is done and I am on to the swinging arm. I'm doing this next as I want to check the oil filter will fit (and can be re-fitted) with the FERC in place and I can't do that without the swinging arm fitted, so here goes.

Before I start, the inspiration for this job, the details of the bushes and indeed the spindle (and it's machining) came from Steve Carter, who's done more miles on Huntmasters than probably anyone alive today and who is a stalwart member of the AOMCC and a daily contributor to the AOMCC forum.

Thanks Steve.

So, I have two oil filled bronze bushes measuring 22 mm ID x 32 mm OD x 50 mm long that I bought from Simply Bearings under the part number AM2232-50. The cleaned out journals for the old SilentBloc bushes measure exactly 1 1/4", which is 31.75 mm and we will want an interference fit of maybe 0.002" or 0.05 mm.


Well, you know what is coming next don't you. Charlie will start banging on about the virtues of his mini-lathe. What puzzled me for a while was how to hold the bushes to machine the outside diameters to size - I considered expanding mandrels, grub screws in a mandrel and Loctite. I was nervous of using Loctite as the these bushes are porous and I was worried about getting the bush off the mandrel.

As it happened, I just went for it and did it. This Ever Build cyanoacrylate is old and cold and may not work very well but I put a 1/4" wide ring of it around the 22 mm mandrel and slid the bush on - in a few minutes it was set.


I machined the bushes quickly and easily to size using the power feed and a carbide tipped left hand tool running at about 400 rpm. and it cut beautifully with no complaints from the glue. Actually, the cutting forces probably don't test the glue very much as this bronze is quite soft.

When considering fits, I had thought about cutting a clearance fit and using Loctite 603 Bearing Retainer, but discarded the idea as I should be able to machine a reasonable interference fit and not require a liquid retainer. As it turned out, this worked beautifully with the first bush which had a medium driving fit, but I cut the second one slightly undersize so I used some retainer with that. They both held up to the reaming forces.

The mandrel knocked out very easily and the bushes were pushed in flush with the end of the swinging arm tube, since I knew that there was minimal end float with the swinging arm in the frame:


The spindle material I got from Steve was 7/8", which is about 22.25 mm so we needed to ream the bushes. The spindle needs to carry the original stud through the middle, which created a problem - my lathe is not long enough to drill out a suitable round bar, nor does it have the capacity to pass such a bar through the lathe spindle. This is where Steve comes in again - he had a bit of bar long enough to provide spindles for two of his bikes, mine and another friend’s so he ended up making four. All I had to do was trim it to length to suit my frame, which I could do with a fixed steady. 

With the reaming done, I could oil and fit the spindle - fortunately it fitted both sides simultaneously with out any adjustment, so I was lucky - I had taken no precautions to align the bush I was reaming with the other bush.

The fit is great - there is no play that I can feel on the bench, though it may be a different story when the bike is on the ground.


Last thing I need to do is fit a grease nipple, though I want to assemble the arm back in the bike so I can see where to put the nipple for best access.

Monday, 26 February 2018

Tecalemit Grease Guns

I've seen a few posts recently on Tecalemit grease guns which were often supplied in the toolkits of our bikes. People have problems with them, complaining that they don't work and consequently changing all the grease nipples to more modern types to work with modern snap on grease guns. There's no need for this - these guns work perfectly well if you know what you are doing...

Tecalemit type 7MC toolkit grease gun
There are several different types of grease nipple in the pages of history, but here's the type these guns are used for - The Tecalemit 'Tecazerk' nipple.


Here's one on the girder forks of my Ariel W/NG. Note the cylindrical shape with the rounded end & the tiny ball valve:


These guns are simple to use, but there are a couple of tricks you need to pay attention to to make them work - and keep working. The gun consists of a brass cylinder with spring loaded plunger - the end of the plunger is spun over into a machined recess in the cylinder, so it won't come off; the plunger is attached to the piston which pushes greases into a bore (A) in the cap. Grease is contained in the cylinder (B) above a cork seal. The nose of the gun is is retained into the cap using a fine thread and a hemi-spherical shape is formed in one end to accept the nipple.


Grease gun anatomy


To fill the gun, the end cap is removed and the volume B is packed with grease, pushing the cork seal down to the bottom of the cylinder. The trick here is to avoid leaving any air bubbles in the body of the gun. Do this with a straw inserted right to the bottom (before filling) and withdraw it carefully, filling as you go and by warming the grease before you start. You can pack the cap with grease before you put it on to prevent air bubbles forming in there too.

Filled with grease
To use the gun, start by cleaning the nipple and making sure you can see the tiny ball valve. You might have noticed there is a check valve in the grease gun and another one in the nipple - they are critical to the operation of the gun. If the ball is stuck and you operate the gun with no nipple on the end, you will get air in the gun and it will only work once. Place the gun over the nipple squarely - it helps to put a cotton rag between the nipple and the gun (old tee-shirts are good for this). This improves the seal between the gun and the nipple and the grease will happily go through the fabric. You can then push the plunger as many times as you want, keeping the gun aligned with the nipple.
Operating the gun
Here's how the gun refills itself. When you release the plunger, the springs close the ball valves and the piston, as it moves back, generates a small vacuum in volume A shown by the white space in the drawing.
Back stroke produces vacuum in Volume A
As the piston emerges from volume A, grease moves forward to fill the void, pulled forward by the vacuum. At the same time, the cork washer moves forward, effectively reducing the volume B until all the grease is used up.
Grease from volume B fills void in volume A

This demonstrates the criticality of the ball valves and the use of the cotton rag - the absence of either prevents formation of the vacuum in the cylinder, which prevents recharging of the gun. Without the vacuum, an air pocket will be left in the cylinder and volume A will not refill and the next stroke will not pump any grease out of the gun.

So the moral of the tale is, carefully fill your gun and take a rag with you in your toolbox!

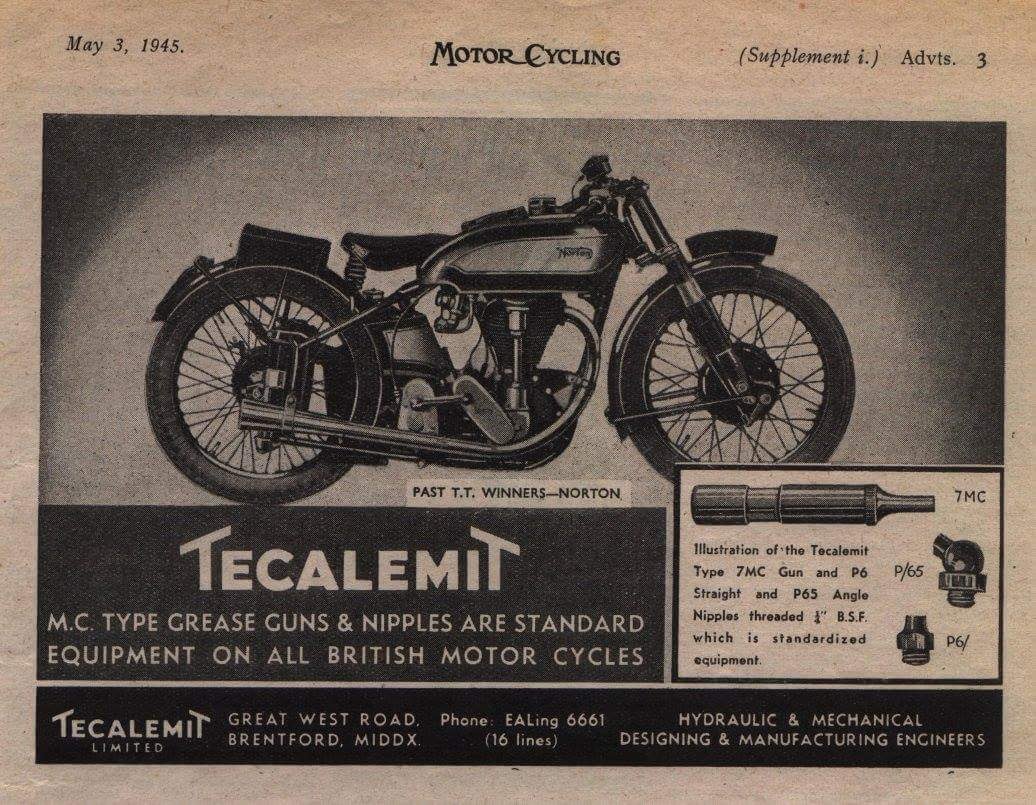
Lovely period advertisement - courtesy Richard Payne

Thursday, 15 February 2018

Front Wheel Bearings - SQ4 Mk1

Here we have an Ariel front hub, with the half width brake. It's the one referred to by Draganfly as the 'Type 3' wheel. It's also the one that deposited that hub full of grease all over the first set of brake shoes I fitted to this bike...


So, this winter it is time for some new wheel bearings. The first job is to pop the cover off the bearing retainer with a large screwdriver:


The bearing retainer needs to be cleaned up and the gunge removed from the holes


This is the tool you use to remove the ring. Don't try and remove those soft brass rings without it...


Once the bearing retainers are out you can drift out the bearings and clean out all the old grease:


Ariel must have changed this hub once or twice, because the assembly described in the parts book and found in my hub does not match the illustration owners manual or in Mr. Waller's book. In my case, the brake side bearing rests on a 1/8" thick spacer in the hub, and has two 1/8" spacers attached to the ID of the bearing, one on each side. One is a top hat, and one a thick washer shown below. To replace the bearing you have to drift them apart, easily done in the vice with a socket:


The bearing is an RLS7 2RS, which is 2" OD, 7/8" ID and 9/16" thick with two soft seals. Easily obtainable on eBay


The non-brake side bearing is an RMS6 2RS which is 2" OD, 3/4" ID and 11/16" thick with two soft seals. It drifts straight into the hub with no extra spacers, followed by the brass bearing retaining ring which in this case was a bit mangled.


The new brake side bearing is easily reunited with its spacers, using another, slightly larger socket to rivet the two halves together again:


The 1/8" spacer goes in first:


Followed by the bearing assembly:


And the retaining ring, with its own retainer. the bearing retaining rings are not fitted with their seals, since these are not needed and seem to extrude into the space occupied by the spindle and the centre of the brake plate.


Job done. Time change the inner tube (it was a cheapo one which leaked slowly) and to refit the wheel.


Saturday, 9 September 2017

Grease Everywhere

Some while back, on a very hot Norfolk Summer day, the SQ4 decided that the rear hub had had quite enough of that nasty, sticky grease thank you and vomited it all over the rear tyre and brake.

The trip home was rather gentle, especially as I had to descend from Norfolk's highest spot (!) to sea level, about 90 metres.

Pulling it all apart, there was grease everywhere. The parts washer is a very useful tool:


There are quite a few parts in the QD rear wheel, which is why I am writing this post. Here's an illustration from Draganfly, where we buy all the parts we need:


Putting wheel back together goes like this:

Put in the 4440B-50 grease retainer
Next comes the bearing. I'm using a modern double seal bearing, so we don't have a repeat of this grease leakage problem:

Knock the bearing in

Add the spacer 4346-50
Use a good quality peg spanner designed for the job, and the locking ring will go in easily. I've omitted the original seals, since I am using double sealed bearings.

Eagle eyed readers will notice the 4346-50 spacer is missing...

Locking ring trial fit
Turning the wheel round, we put in the 4471-50 Bearing Spacer Tube, whose smaller end locates in the 4440B-50 Grease Retainer. The Spacer Tube serves to allow the wheel spindle to pass through both sides of the wheel easily. The larger end of the spacer tube locates in another Locking Ring on the other side:


That's the wheel finished. Next, we turn our attention to the brake drum. Clean the bearing recess thoroughly, and include the slot for the circlip. I use Wagamamma chopsticks for jobs like this. Being bamboo, they are strong, flexible and be carved to the shape of the slot. When its all clean, press in the new bearing.


The pictures show the bearing in place, along with the 4440-50 Grease Retainer and the circlip.

Don't be fooled by this picture though, the fixed spindle comes next, with it's circlip.


With the grease retainer in place, you can fit the fixed spindle but you can't get the circlip in...


Sunday, 8 March 2015

17 mile test run; fun with brakes


Lovely test run out to Bawburgh today, about 17 miles around the countryside. Bike is definitely running less hot, since after 8 miles I still had maybe 25 psi oil pressure at 30 mph, but that was dropping to 10 psi on the gauge at the end of the trip. I measured the oil temperature - 95 degrees C in the tank (about 200 F), which is much higher than I have seen after, say, a 5 mile trip.

As you can see the bike is on the sidestand - what I noticed later was that the carburettor drips fuel onto the dynamo in this position. I had left the fuel on though. 

The engine sounds happy enough; I'm not too sure about this gauge - I keep wondering how I would feel if it had never been fitted. I'm tempted to buy one of the club reproduction gauges, or to get this one calibrated.

Out on the road though, the Ariel was handling fine for the first few miles until I became aware of a juddering from the front end, which I initially put down to the road surface. On braking however I found no movement in the front brake lever, and realised the brake was seizing on. Near home, I stopped for traffic lights and saw smoke coming from the front brake (I've been here before, with the Bantam)...


Arriving back I was greeted with grease everywhere. As we all know, hot brakes cause the grease in your hubs to melt...


Stripping the brake down revealed some serious damage to the linings, and bits of lining (2-3 mm bits) all over the drum. The linings you see in the pictures are greasy, but those matt grooves in the middle are way below the wearing surface:

Greasy

Cratered Lining
Now, I don't know if this is a result of heat, or the heat is a result of this breaking down. I'll take it back to the supplier tomorrow and see what they say.

Odd, since it had been bedding in nicely and getting quite effective.

Saturday, 26 July 2014

Slippin' and slidin'

Moving swiftly on...

Not a huge amount to report today, but the gearbox is now filled with a 50/50 mix of Castrol LM grease and 20W/50 engine oil.

Access to the gearbox filler entails removal of the oil tank, which I don't have the knack for yet. The oil tank is very tight to the frame tube, can't be tilted forward because of the distributor and the frame seat tube, can't be tilted back because of the toolbox and the mudguard and is generally a pain...


However, the gearbox is now filled with about 450 ml of oil/grease mix and the oil lines have their hose clips in place - modern ones unfortunately.

Tomorrow we will have a major step forward - we are having a visit from a local AOMCC member, Patrick Huthwaite, whose inspection is the next step in the registration process.

Hopefully it won't rain.