Showing posts with label shoes. Show all posts

Tuesday, 21 January 2025

FH - more brakes

 Moving on to the front brake, it's time to unearth the mysteries of the full width hub. This is the view from the parts book:


It looks like the brass bearing retainer used in the half width hub is still there but now has a sheet steel ring riveted to it retaining a small felt grease seal. This one has been a bit butchered and the steel ring is loose:


The one on the other side is still in place. That tube passes through the bearing and acts as a centralising mount for the brake plate:


As might be expected, there's a thin coating of rust on the drum, easily cleaned with various abrasive papers.

This spacer fits over the tube in the previous picture, between the brake plate and the fork leg. It was stuck in the fork leg - I guess there is some paint to clean out.


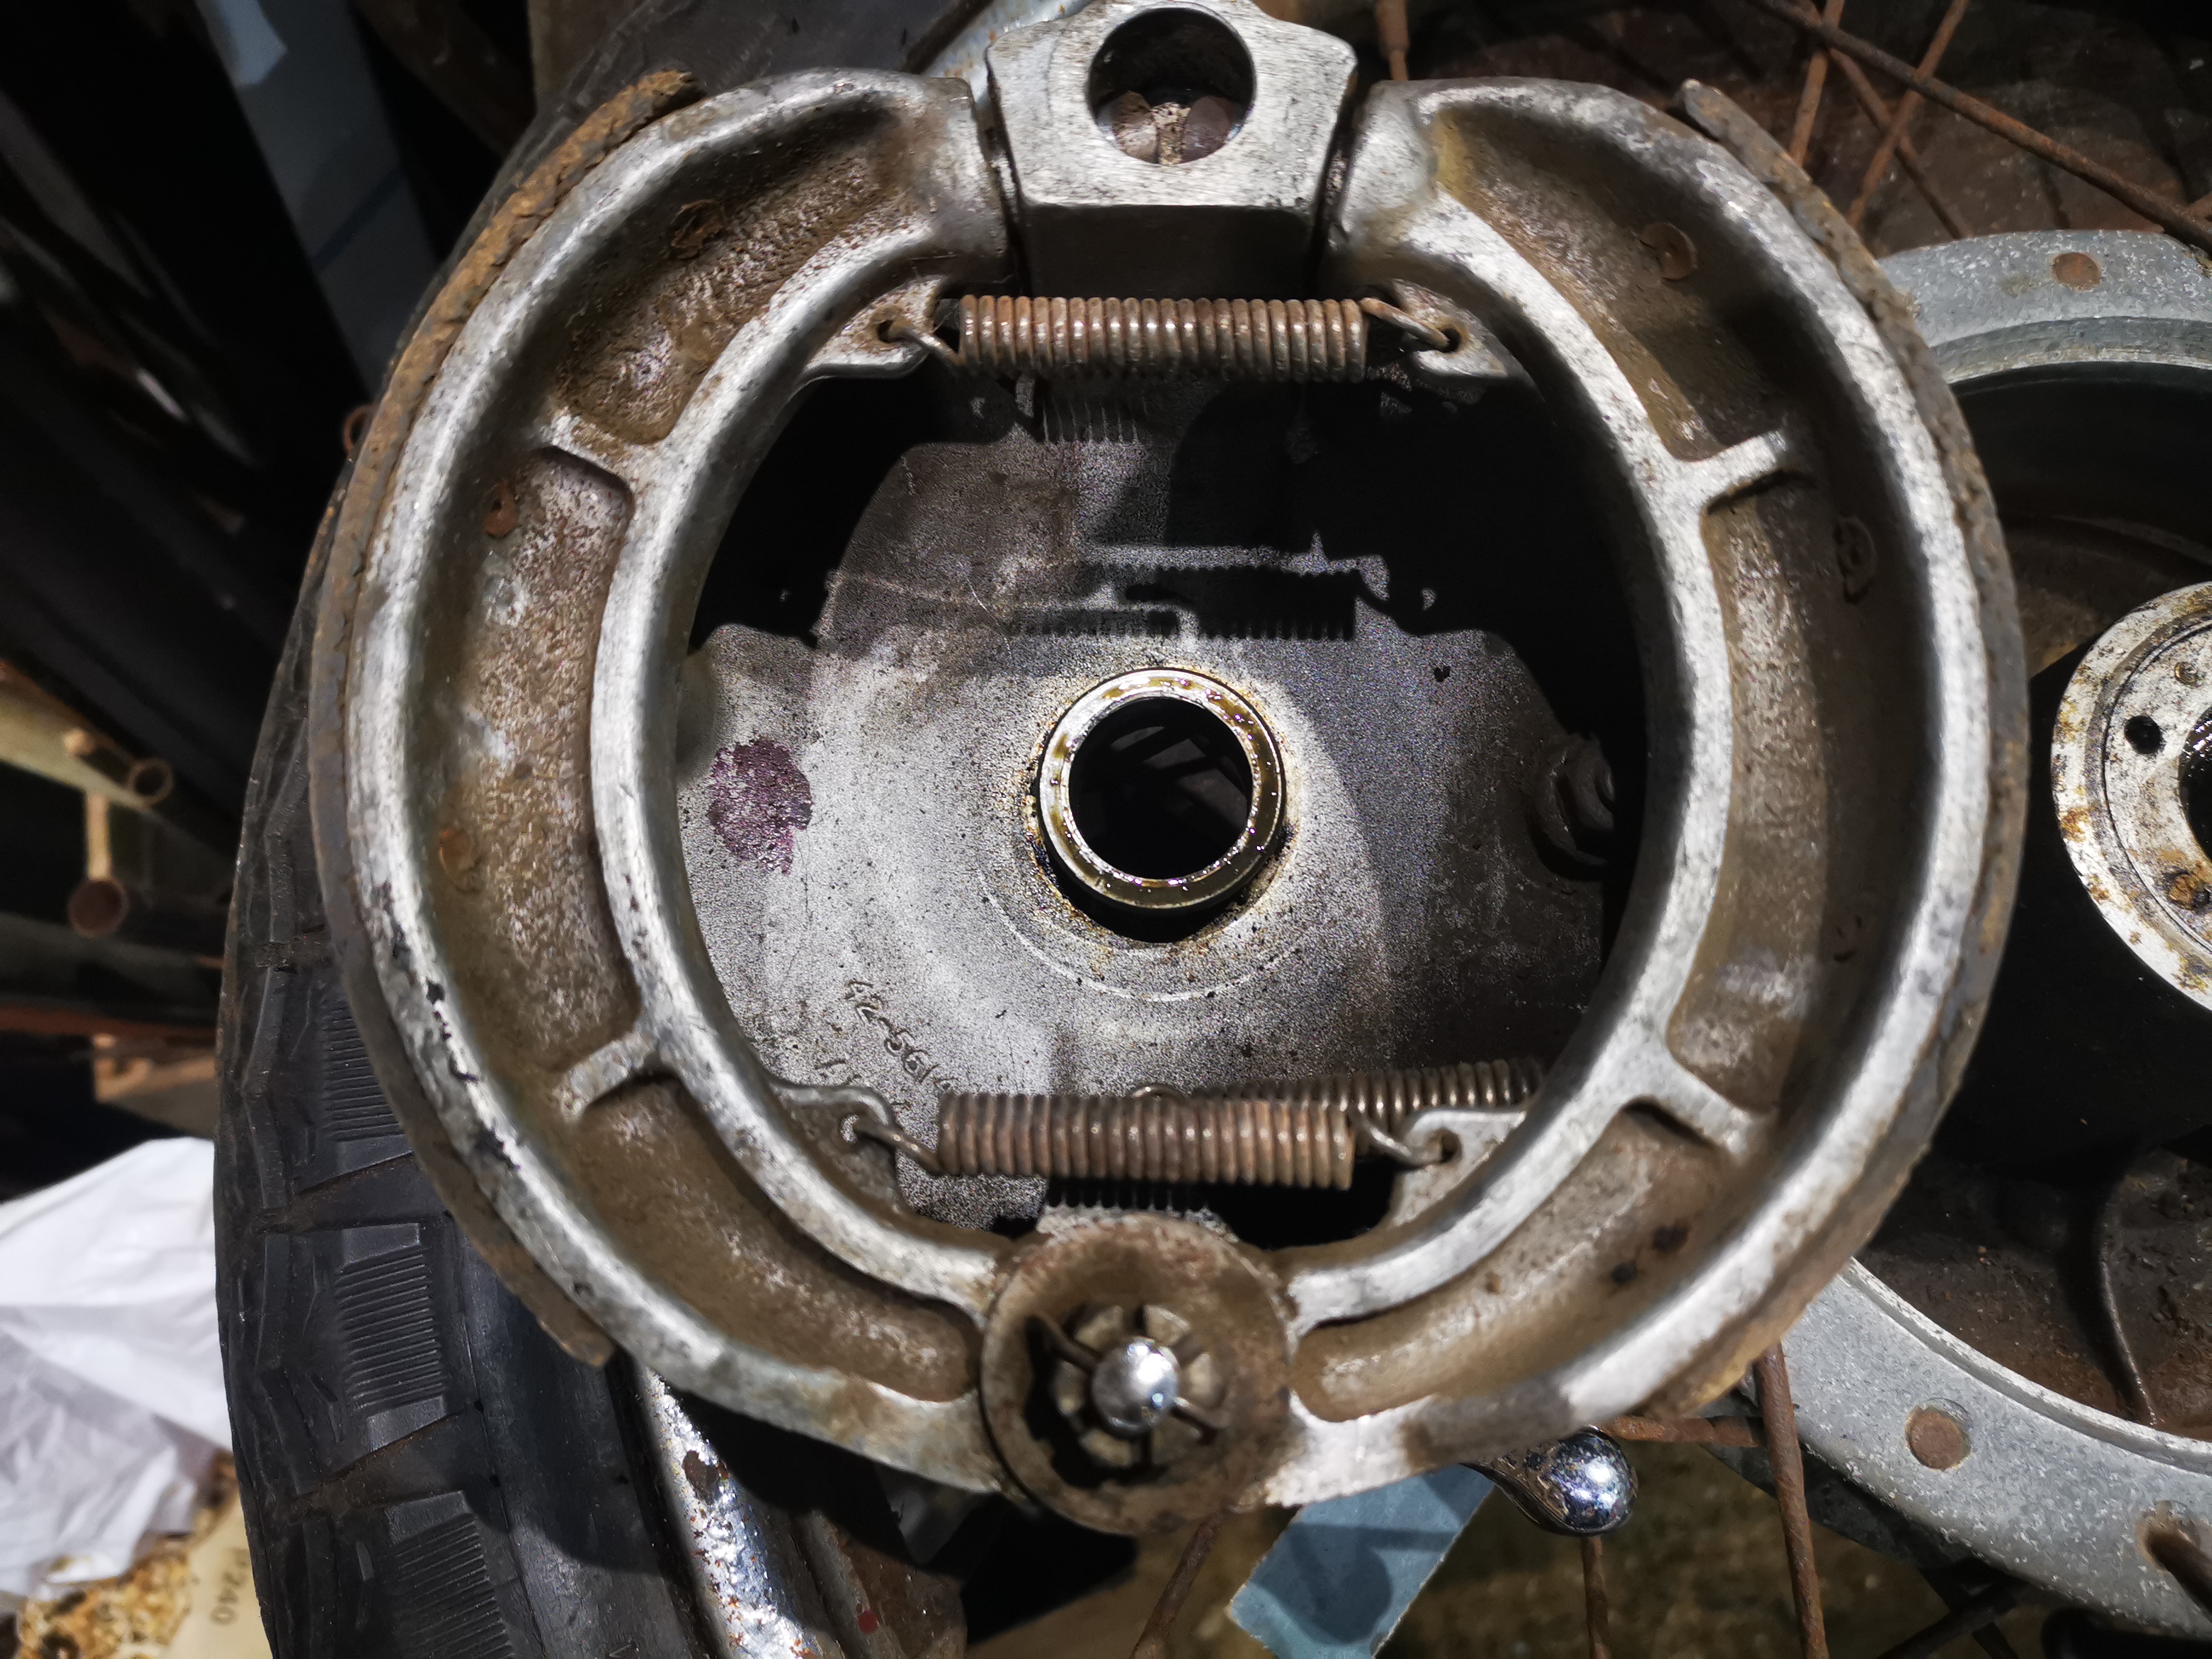
Both the shoes are glazed. This is the trailing shoe:


This is the leading shoe, though there is no lead-in chamfer:


As we found at the rear, the parts are all present and in good shape - but no lead in chamfer:


As an aide-memoire, while I clear out the paint from the front axle clamp in the fork leg, note that the drain plug is missing and there is obviously no oil to damp the fork movement!

Next job is to add a lead-in chamfer to both shoes and to reassemble & retest. After that it's:

  1. Fit the tank knee rubbers and aluminium trims
  2. Fit the tank, not forgetting to soak the fuel tap first
  3. Sort out the wiring routing under the dashboard and find the dashboard fixing screws
  4. Replace the rims and spokes when the tyres turn up.

Wednesday, 4 January 2017

Wheels & Tyres

Now that the dynamo is finished, its time to sort out the tyres. I've had a set of Dunlop K70s I bought from http://www.vintagetyres.com/ at a good price, with new tapes and Michelin tubes in the shop for a while. I'm using genuine Michelin Airstop tubes this time, after an early failure on another brand. Two years on, that Michelin tube in the rear of my SQ4 still only drops 1-2 psi per month - the tube in the front drops more like 7-8 psi each month.

First step is to remove the front wheel using the front stand. I'm using the bikes own tool kit for this work, and nothing else.


Taking the rear wheel out is delightfully easy as well. Here's the mudguard raised up:


The rear tyre is a 3.00-19 CEAT; the front is a Michelin of the same size. Both are too small for the rims:


Before I got started, I refitted the relined brake shoes. These were done by Villiers Services - very quickly and efficiently.


The rear brake shoes are not so worn as the front, but one of the springs is missing:


Using the little tool from the Dunlop #6 pressure gauge, I removed the valves stem to fully deflate the tyre:


Breaking the bead was easy - I could do it with my fingers.


The 'helping hand' tyre lever is very useful getting started:


We can soon get the first bead off. The wheel comes out of the second bead easily, with the rim and tape.


Inspect the rim for rust, protruding, bent or loose spokes and run the wheel in the truing jig. Now is the time to fix any run-out problems.

Add the new tape, aligning the valve hole:


Settle the rim in the new tyre, and start to move the first bead into position by hand:


Keep pressing it over, using tyre levers for the last bit if necessary:


It's not quite so easy to get the wheel back in the new 3.25-19 front tyre. At this point, inflate the tube a little and  squash it into place, avoiding folds and twists in the tube.


When you have it in place, remove the valve core to allow the tube to deflate completely


Manouevre the valve stem into its hole in the rim and retain with one of the nuts.


Start working the tyre onto the rim


Inflate, ensure the valve stem is straight, tighten down the nut and add the dust cap.


Refit the wheel:


Sunday, 8 March 2015

17 mile test run; fun with brakes


Lovely test run out to Bawburgh today, about 17 miles around the countryside. Bike is definitely running less hot, since after 8 miles I still had maybe 25 psi oil pressure at 30 mph, but that was dropping to 10 psi on the gauge at the end of the trip. I measured the oil temperature - 95 degrees C in the tank (about 200 F), which is much higher than I have seen after, say, a 5 mile trip.

As you can see the bike is on the sidestand - what I noticed later was that the carburettor drips fuel onto the dynamo in this position. I had left the fuel on though. 

The engine sounds happy enough; I'm not too sure about this gauge - I keep wondering how I would feel if it had never been fitted. I'm tempted to buy one of the club reproduction gauges, or to get this one calibrated.

Out on the road though, the Ariel was handling fine for the first few miles until I became aware of a juddering from the front end, which I initially put down to the road surface. On braking however I found no movement in the front brake lever, and realised the brake was seizing on. Near home, I stopped for traffic lights and saw smoke coming from the front brake (I've been here before, with the Bantam)...


Arriving back I was greeted with grease everywhere. As we all know, hot brakes cause the grease in your hubs to melt...


Stripping the brake down revealed some serious damage to the linings, and bits of lining (2-3 mm bits) all over the drum. The linings you see in the pictures are greasy, but those matt grooves in the middle are way below the wearing surface:

Greasy

Cratered Lining
Now, I don't know if this is a result of heat, or the heat is a result of this breaking down. I'll take it back to the supplier tomorrow and see what they say.

Odd, since it had been bedding in nicely and getting quite effective.

Thursday, 13 February 2014

Brakes

Since I'm working on small fill-in jobs at the moment, due to a lack of spare time, I have been tidying up the control cables and making new ones. Before I fit the chain and chainguards, I need to sort out the rear brake as well. So it makes sense for me to visit the guys at Charles Johnson Bus & Truck Parts to get the brakes re-lined with a suitable modern material. This will enable me to finish & fit the front brake cable, finish the rear brake rod, fit the chain and top chain guard and sort out the bracket on the lower chain guard (which comes off a single I think - not a Square Four at any rate).

Brake shoe linings are made from soft and tough heat resistant materials mixed with compounds such as iron, brass, ceramic, and graphite. The lining can be either riveted or glued to the shoe. The lining has to create the maximum friction force from the meagre load you provide to the shoe using your hand on the lever, or the much greater load you can create using a modern hydraulic system. These materials have replaced the asbestos linings that were used with great effect until the ‘80’s, but which were shown to cause pleural and peritoneal mesothelioma, forms of cancer in people handling braking components regularly.

It’s almost inevitable that an old bike has asbestos brake linings. This is a hazard – particularly in the powdered form you meet inside an old brake drum. NEVER breathe brake dust. Assume that every brake system you are working with is hazardous and dispose of any brake dust properly.

Of course, like anything else in life, not all brake linings are created equal. A lining may be relatively soft, which will be quick to bed in and which would give medium to high friction forces relative to the load applied to the shoe. They would be suitable for normal road use, but would wear out quickly.

Or, you could specify a tougher material for heavier duty road use and touring which might also be suitable for some competition applications. This might last longer, but would need more force from the lever or hydraulics.

These days, most brake lining material is glued to the brake shoe using an adhesive designed to operate in the aggressive temperature to which the lining is subject. The lining is useful until the brake has run out of adjustment or has become ineffective.

Linings can be riveted to the shoe if required, and this is the traditional way. The disadvantage of riveted linings is that the rivet heads nestle part-way through the lining, meaning that the lining which is available for braking is much less thick and will require replacement sooner than a bonded lining.

So there we go. In a week or so, Amelia will have a new set of soft modern shoes. A few years ago, I was proud to be told by Danny (my MOT tester) that the brakes fitted to my 60 year old Bantam were better than those fitted most of the modern scooters he had in his shop.


So a week later I have my new shoes, with Ferodo 3921 lining material bonded to the original shoes. They are a much better fit in the drum, and although I have only tried them by hand, feel much more 'sticky'.


Tuesday, 12 February 2013

And stopping.

With the wheels in motion, we can start to look at the brakes. The front is still on the bike, but the back is off and apart:

There is nothing particularly horrendous to report at first sight. The linings are nice and thick, there is only a moderate amount of grease and gunge around and everything operates as it should.

Closer inspection reveals that the adjuster is missing - easily fixed, from Draganfly; a 1/2" BSC tap can be used to clean up the thread, and the sliding parts degreased. No problem.

But what is this? This little bodge is revealed when the cam is removed. The brake cam shaft measures 1/2" OD and is unworn. The hole in the brake back plate measures 5/8" ID and is unworn, so what is going on? I would have guessed that this little 'sleeve' was doing service to fill up a worn hole, but no. A session with the Ariel parts book and Drags 'List 15' leaves me none the wiser.

However, a chat with Mick at Drags reveals all. Having found me my missing adjuster, Mick goes to look at their stock of brake plates and finds that one of them has a bush pressed into this hole - part of the brake plate, hence no separate part number or identification in the parts book.

So now I have some 5/8" x 16 SWG seamless tube on the way from eBay.. 
Unworn cam shaft and brake plate hole.

Another mystery, a riveted cover over a hole in the brake plate. This hole is for a lug forged into the left hand Anstey link 'stirrup' which serves to prevent the brake plate turning.
The hole has a sheet aluminium plate and a paper gasket held in place by a few brass rivets, some of which are missing. It appears to be there to stop debris getting inside the brake drum.

Talking of the brake drum, here it is, treated to a coat of Finnegan's finest:

And here is the back plate and shoes. The backplate has a lot of dings and nicks, the worst of which have been dressed. We'll see how it fares on the abrasive mop before deciding what else to do with it.