
Well, its been a beautiful day here in North Norfolk, the sun is shining, it's quiet but I have spent most of the day in the office. A lunchtime walk revealed the tide out and an empty beach, just to underline how lucky we are to live here.

I had a couple of hours spare in the evening to repair some floorboards and make a start on servicing the Square Four. I had a number of jobs to look at before the summer season, so stripping had to start.
Its always a bit of a fiddle to get the oil pressure gauge line undone, and as usual I used only the tools I carry on the bike. This revealed that you need two 3/16" BSW open spanners, so I added another to the tool kit. Once the tank was off, I planned to remove the plugs, carburetter and distributor in order to re-torque the head and cylinder bolts.
The spark plug spanner I made last year is intended to replicate the one in the spare parts list, and it works well in getting to the number two plug which is now confined by the new bi-starter parts:

The plugs themselves, one to four from left to right are a little sooty; we will keep an eye on that, but there is no evidence of any oiling. The oil comes from the weeping head gasket!

Once I had the carburetter off, I was able to tackle the head bolts with the usual variety of spanners including my new baby torque wrench, using the torques Ariel specified.

I was able to get a half turn on most of the bolts, which I expected.

I planned on removing the distributor to turn it through 180 degrees, to put the condenser 'bulge' near to the oil tank and give myself enough clearance for a carburetter insulator. Having done this, and attempted to re-time the engine I realised that the position of the distributor did not now allow it sufficient movement to adjust the timing. Furthermore, there was no way I could add a carburetter insulator without new manifold studs - so back to square one.
However on putting the distributor back in I realised it was not turning freely - so off it came again. I found that the shaft was so stiff I could barely turn it by hand. It freed off, with WD40 and some light oil, but how was it intended to be lubricated? I could see the 3/32" hole in the body, and the milled flat down into the drive housing, but there was nothing to introduce oil to the shaft. Was I missing something? I think that there was a modification in this area for the Mk2?
Actually the modification Ariel recommended was to allow oil to drain out of the distributor but Paul Ptak, on the AOMCC Forum came to the rescue. He said:
Pull the rotor arm off and drip some light oil into the shaft? The machine screw under the rotor arm is drilled though and I believe the shaft is cross drilled to allow the oil to get from inside the shaft on to the bushings.

Why didn't I think of that? I've done it hundreds of times on distributors on various cars... I must be losing the plot. Thanks Paul!

And I also stared to look at various missing clips. Having bits in stock, especially fasteners, is a wonderful thing. These are from Draganfly:

Here's one I made earlier:

Obviously needs a hole and some paint but we will replace the one holding the brake cable to the mudguard with this.

I had a couple of hours spare in the evening to repair some floorboards and make a start on servicing the Square Four. I had a number of jobs to look at before the summer season, so stripping had to start.
Its always a bit of a fiddle to get the oil pressure gauge line undone, and as usual I used only the tools I carry on the bike. This revealed that you need two 3/16" BSW open spanners, so I added another to the tool kit. Once the tank was off, I planned to remove the plugs, carburetter and distributor in order to re-torque the head and cylinder bolts.
The spark plug spanner I made last year is intended to replicate the one in the spare parts list, and it works well in getting to the number two plug which is now confined by the new bi-starter parts:

The plugs themselves, one to four from left to right are a little sooty; we will keep an eye on that, but there is no evidence of any oiling. The oil comes from the weeping head gasket!

Once I had the carburetter off, I was able to tackle the head bolts with the usual variety of spanners including my new baby torque wrench, using the torques Ariel specified.

I was able to get a half turn on most of the bolts, which I expected.

I planned on removing the distributor to turn it through 180 degrees, to put the condenser 'bulge' near to the oil tank and give myself enough clearance for a carburetter insulator. Having done this, and attempted to re-time the engine I realised that the position of the distributor did not now allow it sufficient movement to adjust the timing. Furthermore, there was no way I could add a carburetter insulator without new manifold studs - so back to square one.
However on putting the distributor back in I realised it was not turning freely - so off it came again. I found that the shaft was so stiff I could barely turn it by hand. It freed off, with WD40 and some light oil, but how was it intended to be lubricated? I could see the 3/32" hole in the body, and the milled flat down into the drive housing, but there was nothing to introduce oil to the shaft. Was I missing something? I think that there was a modification in this area for the Mk2?
Actually the modification Ariel recommended was to allow oil to drain out of the distributor but Paul Ptak, on the AOMCC Forum came to the rescue. He said:
Pull the rotor arm off and drip some light oil into the shaft? The machine screw under the rotor arm is drilled though and I believe the shaft is cross drilled to allow the oil to get from inside the shaft on to the bushings.

Why didn't I think of that? I've done it hundreds of times on distributors on various cars... I must be losing the plot. Thanks Paul!
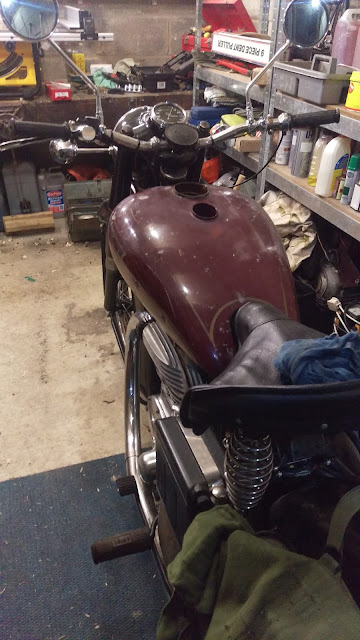
So that was almost it for the evening. I didn't fancy rebuilding the distributor (good thing - I was obviously tired) but I did try the new-first-paint tank in place:


And I also stared to look at various missing clips. Having bits in stock, especially fasteners, is a wonderful thing. These are from Draganfly:

Here's one I made earlier:

Obviously needs a hole and some paint but we will replace the one holding the brake cable to the mudguard with this.
I was just read your article that was really superb got much pleasure to read that post.
ReplyDelete