Now that the dynamo is finished, its time to sort out the tyres. I've had a set of Dunlop K70s I bought from http://www.vintagetyres.com/ at a good price, with new tapes and Michelin tubes in the shop for a while. I'm using genuine Michelin Airstop tubes this time, after an early failure on another brand. Two years on, that Michelin tube in the rear of my SQ4 still only drops 1-2 psi per month - the tube in the front drops more like 7-8 psi each month.
First step is to remove the front wheel using the front stand. I'm using the bikes own tool kit for this work, and nothing else.
Taking the rear wheel out is delightfully easy as well. Here's the mudguard raised up:
The rear tyre is a 3.00-19 CEAT; the front is a Michelin of the same size. Both are too small for the rims:
Before I got started, I refitted the relined brake shoes. These were done by Villiers Services - very quickly and efficiently.
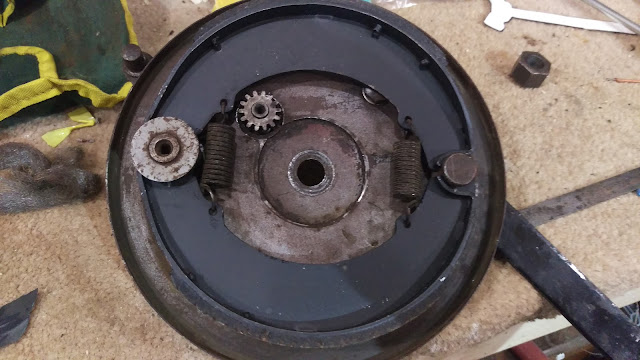
The rear brake shoes are not so worn as the front, but one of the springs is missing:
Using the little tool from the Dunlop #6 pressure gauge, I removed the valves stem to fully deflate the tyre:
Breaking the bead was easy - I could do it with my fingers.
The 'helping hand' tyre lever is very useful getting started:
We can soon get the first bead off. The wheel comes out of the second bead easily, with the rim and tape.
Inspect the rim for rust, protruding, bent or loose spokes and run the wheel in the truing jig. Now is the time to fix any run-out problems.
Add the new tape, aligning the valve hole:
Settle the rim in the new tyre, and start to move the first bead into position by hand:
Keep pressing it over, using tyre levers for the last bit if necessary:
It's not quite so easy to get the wheel back in the new 3.25-19 front tyre. At this point, inflate the tube a little and squash it into place, avoiding folds and twists in the tube.
When you have it in place, remove the valve core to allow the tube to deflate completely
Manouevre the valve stem into its hole in the rim and retain with one of the nuts.
Start working the tyre onto the rim
Inflate, ensure the valve stem is straight, tighten down the nut and add the dust cap.
Refit the wheel:


No comments:
Post a Comment