
These plain journal engines run close tolerances and need a decent oil filter. Modern oils keep the dirt in suspension and if there is no filter, the oil becomes contaminated very quickly.
The SQ4 has a Norton commando oil filter, like this one, fitted under the gearbox where:
- you can't see it
- you can get to it easily
- it doesn't ground on kerbs
There's a lot of space behind the engine, between the engine/gearbox plates - but not for this filter, which is marginally too big for this location.

Beneath the swinging arm and in front of the mudguard is a likely location used by many FH owners. I'll need to find a location where I can easily mount the filter and where the oil lines will be able to get to and from it without kinks - and it must also fulfil the other criteria I listed above.

This is probably no good - there is nowhere to mount to and the oil line routing could be a bit tortuous:

This is an example of a mounting used in that area:
This one is on AOMCC forum member Steve Carter's Ariel Cyclone.
And another - this is AOMCC Kieth Mettam's filter:

Another one from Steve Carter, this well used Huntmaster carries a Morgo filter - these are smaller than the Commando filters and easy to place - but they are quite expensive and it makes sense to me to use a unit I already have elements for, commonality of spares and all that:


It's too far back, and the oil lines foul the gearbox casing:

Time to cut it up and shift it around:

To become this ugly but effective thing, including a bit of butt welding practice:

Also pictured is the beginning of a special bolt that will locate the filter bracket in the sidecar mount.

This is better. It's further inboard to allow the oil lines to pass the gearbox outer casing, and further forward to guarantee the filter clears the mudguard and rear wheel:

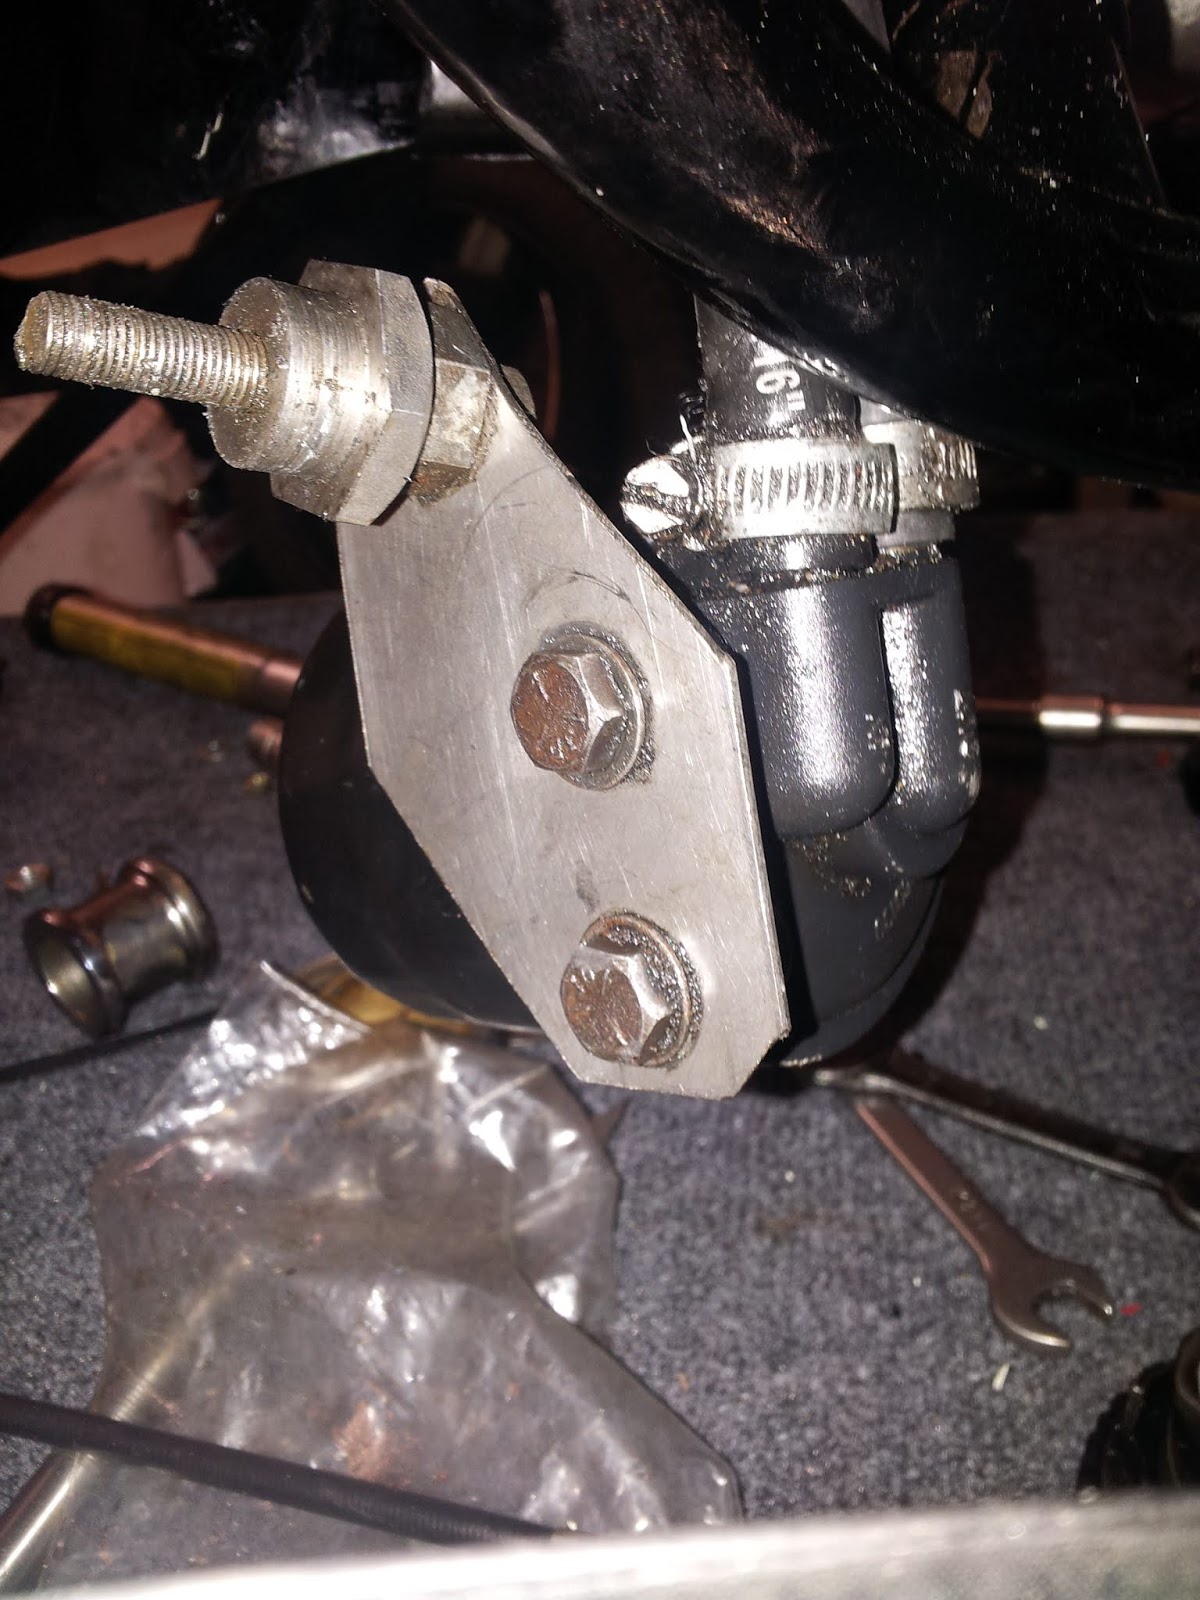
The next step is to replace the bracket with one made from 3-4 mm sheet, and finish the special bolt that holds it in place. I'll use the same old sleeve nut, but I will probably machine a journal in it to fit in the hole properly.
Here's the finished bolt:

It's in the wrong side, but I'm just testing for fit. I wanted to make it look like the swinging arm nuts.
I'm tubing up using a mixture of Huntmaster and BSA A10 oil lines. The long A10 lines stretch from the engine right around under the gearbox to the oil filter:

I've spent a long time faffing around with these connections, even considering moving the filter altogether. In the end, after a session mulling it over one night in the workshop with my son, we concluded we could get it all in there if we modified the fittings:

I've shortened the unions in the lathe and gained about 5/16" which is enough to give the gearbox it's full range of adjustment. This allows the gearbox to move and the oil lines to follow the routes I'd laid out. A minor problem is that the return to the tank is touch on the long side and the route has to cover a 120° bend on top of the gearbox, which is a bit unsightly.

Final filter bracket:

No comments:
Post a Comment