Updated: First published December 2020
After making some tank bolts for the W/NG, I thought I would make a start on all the missing fasteners for the Model A. After all, I like turning and I'm a bit fed up with welding after the QR50 exhaust. I'll need:
- 2 off E1/58 special bolts for the rear stand. I have the 1/2" Thackeray washers to go with them. E1/58 was renumbered to 5505-26, which is used on the W/NG and many other Ariels. I can copy these.
- 1 off E8/245 petrol tank bolt, like the one I made here.
- 2 off E8/921 special bolts for the rear mudguard stays, with their nuts. The bolts look like Ariel parts 5655-30, which is used on the W/NG so I can copy these; their nuts, E8/922 are not the same so I will have to find out what these look like. Looking around the reference pictures I have, it appears the hex size on these matches the stand bolts, whilst the hex on the W/NG ones is smaller and matches the bolt they attach to.
- E8/762, the big nuts for the top of the oil tank. These are different from the later ones as used on my W/NG and SQ4, because the oil tank bracket has a smaller hole as does the sidecar mount in the frame and the later nuts would not fit. E8/761, the stud that goes with this nut, was renumbered to 0182 and is a standard Ariel part. It's a 5/16" CEI x 1 15/16" stud.
- The lock nuts for the chain adjusters, E8/925 renumbered to 5744-30 and the the chain adjusters themselves, E8/924 renumbered to 5740-30. Both of these are used on the W/NG so I have patterns I can copy for these.
I'm making a start with the stand bolts, since I have the Thackeray washers, the stand and and the springs. All these bits will get lost if I don't make the bolts and get them attached to the bike.
I'm starting with a bit of 0.82" hex in EN1, since I will be chemical blacking these and don't want to use stainless. In this picture I have turned the 1/2" OD register for the washer and the 3/8" major diameter for the thread
Here's the thread going on using a 3/8" CEI die in the tailstock die-holder:
Here's one, mostly finished. I have to turn a chamfer on the other side, but I will make a few more bits before I rig up for that:
Turning the head chamfer, after facing off the head and discovering that my parting tool was not quite square!
Finished and ready for blacking:
I'm going to make the E8/921 special mudguard stay bolts next, by copying the ones on the W/NG. These bikes are so easy to work on, properly designed for easy maintenance:
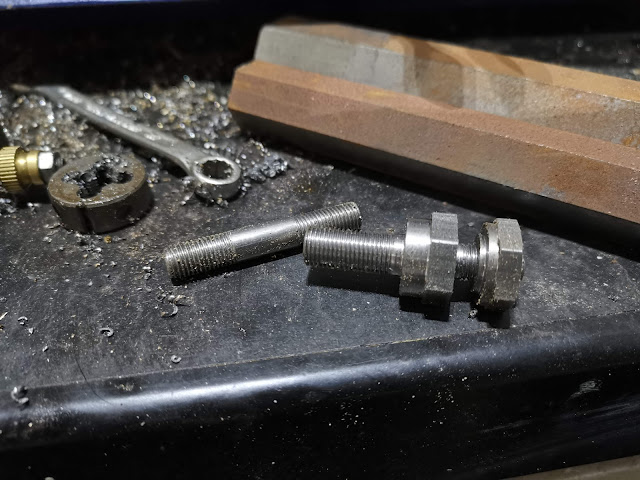
Here is one of the bolts, with it's locknut and the special nut which fastens the moving part of the mudguard:
Using the same set up in the lathe, same turning and parting tools, the three jaw chuck and the tailstock die holder with the 3/8" CEI die, I'll make a couple of these bolts to this stage:
Since the next stage for both these and the stand nuts requires me to put the threaded end in the chuck, I will change over to the ER25 collet chuck to avoid damage. I only want to do that once, so with the the hexagon bar stock still in the 3 jaw chuck I'll make the two special nuts:
So in this picture, we can see one of the completed E8/921 special mudguard stay bolts with it’s E8/922 nut, which retains the detachable stay. Also pictured is the E8/761 (0182) 1 15/16 stud for the top of the oil tank.
These are the E8/762 nuts that retain the oil tank to the sidecar lug. The sidecar lug is much smaller on the 1930 frame than the one on my 1942 W/NG.
Last thing on the list is the chain adjusters. The nuts are first, and these are made from a bit of 0.445" hex in the lathe. They have a short 5/16" BSC thread inside, and most of the outside is plain:
The adjusters themselves are a bit more involved. They are basically 5/16" round bar, but they will have a 1/8" BSW size hex (3/16" BSF) which is 0.34" across flats. This is unobtainium, so I will build up the rod with weld and mill the hex in. I'll start in the lathe, just to start the threads square:
The hex is not much bigger than the diameter of the bar:
Here they are again built up with TIG. The two tubes are the footrests for the QR50.
Here's the setup in the Mini-Lathe. Usual vertical milling slide replaces the compound on the cross slide, and the rotary table is attached to the vertical slide. The saddle is locked to the bed, and the tailstock backs up the vertical slide:
We are passing the work over the cutter, to avoid making climb cuts; the plan is to make a pass, turn the table 60°, and make the next pass. After one turn we will advance the work using the vertical slide - otherwise the vertical slide is locked. I've also tightened the lock screw on the cross slide gib a bit, to take out as much play as I can:
Here's the first one. The target is a 0.340" hexagon, which is 1/8" BSW. It's barely bigger than the 5/16" bar (0.3125" diameter). Currently it is 0.007" oversize.
Next step is to tidy up the hexagon and face the end to length, adding a small chamfer.
Next, we'll cut the rest of the thread:
And that's it, apart from the finish:


No comments:
Post a Comment