Thursday 12 January 2017

New Blog: Classic Bike Tech

A large part of the enjoyment I get from bikes & biking is from the technology. It’s in the blood – I’ve enjoyed 35 years in engineering so far both professionally and in my private life.

My new blog describes the technology behind the machine and old bikes in general – a basic 'how it works' – covering the engine, gearbox, cycle parts, and fuel & electrical systems. 

The blog is at http://classicbiketech.blogspot.co.uk/

It's based initially around Britain's favourite two-stroke learner bike, the BSA Bantam. I'll add to it as I come up with technical stuff that might be useful to others.

I hope you enjoy it.


Sunday 8 January 2017

Ariel Lower Chainguards

I have two bikes with missing lower chainguards, and two lower chain guards on the shelves. Here they are:


The two bikes are my W/NG and my Anstey SQ4. I'm hoping to make a chainguard to fit each bike out of these two but I don't think either of these is a straight fit on either bike. I believe that the upper of the two in the pictures is for an Anstey frame single, and Paul Jameson of the AOMCC has confirmed the lower is from a rigid SQ4.

W/NG Chainguard

One of them looks like it is close to a fit for the W/NG, at the front:


Clearly the rear bracket is in completely the wrong place:


If we change the rear mount to suit the rigid frame, we can trial fit the front more effectively. Right now, the guard looks like it will foul the chain oiler so perhaps it will need a little adjustment. We'll see.

Thanks to Vincent van Ginneke (again) we know what it is supposed to look like:


So to get started, we will use the cut off wheel in the Dremel to make a tidy job of removing the rear bracket from the anstey frame chainguard:


We'll use this mount  to convert the SQ4 chainguard, or perhaps to make a completely new one:


Using the rigid frame chainguard as a guide, we can mark the position of the rear bracket with chalk:


Below the frame, we can see it sitting in the right place:


So off we go. First job is to clean up the old mounting position with the wire brush & bench grinder:


Then we cut & drill a piece of 1/8" sheet to make the new top mount. It seems I forgot to take a picture, but here it is held in place with a magnet and mounted in the frame:


Now TIG welded in place:


This converted Anstey frame chainguard does not fit too well at the front - the guard fits higher up in an Anstey frame which provides more clearance at the front, as we can see in Vincent's picture


Marked up:


Trimmed with the shears and refitted:


Square Four Chainguard


The other chainguard is for a Square Four, but a rigid model which means the rear bracket is in the wrong place, or rather, it does not reach the mounting bolt. The width of the shock absorbers increase the distance from the frame to the chain run, and necessitate a wider bracket on the lower chainguard like the one shown fitted to the W/NG. We can see here that the chainguard will fit around the sprocket and is more or less aligned with the mounting bolt, along the length of the bike:


We can see here that the length is about right, as it looks like it will align with both mountings:


And here, that the front mounting is correct and will fit. We can see also that the chain oil can still reach the chain:


This story is continued in https://ariel-square-four....sq4-chainguard.

Wednesday 4 January 2017

Wheels & Tyres

Now that the dynamo is finished, its time to sort out the tyres. I've had a set of Dunlop K70s I bought from http://www.vintagetyres.com/ at a good price, with new tapes and Michelin tubes in the shop for a while. I'm using genuine Michelin Airstop tubes this time, after an early failure on another brand. Two years on, that Michelin tube in the rear of my SQ4 still only drops 1-2 psi per month - the tube in the front drops more like 7-8 psi each month.

First step is to remove the front wheel using the front stand. I'm using the bikes own tool kit for this work, and nothing else.


Taking the rear wheel out is delightfully easy as well. Here's the mudguard raised up:


The rear tyre is a 3.00-19 CEAT; the front is a Michelin of the same size. Both are too small for the rims:


Before I got started, I refitted the relined brake shoes. These were done by Villiers Services - very quickly and efficiently.


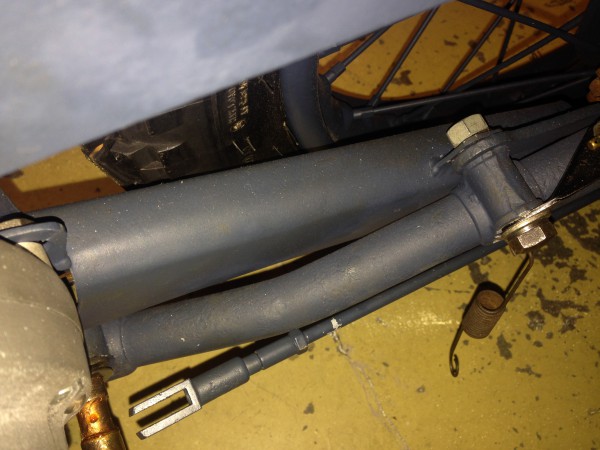
The rear brake shoes are not so worn as the front, but one of the springs is missing:


Using the little tool from the Dunlop #6 pressure gauge, I removed the valves stem to fully deflate the tyre:


Breaking the bead was easy - I could do it with my fingers.


The 'helping hand' tyre lever is very useful getting started:


We can soon get the first bead off. The wheel comes out of the second bead easily, with the rim and tape.


Inspect the rim for rust, protruding, bent or loose spokes and run the wheel in the truing jig. Now is the time to fix any run-out problems.

Add the new tape, aligning the valve hole:


Settle the rim in the new tyre, and start to move the first bead into position by hand:


Keep pressing it over, using tyre levers for the last bit if necessary:


It's not quite so easy to get the wheel back in the new 3.25-19 front tyre. At this point, inflate the tube a little and  squash it into place, avoiding folds and twists in the tube.


When you have it in place, remove the valve core to allow the tube to deflate completely


Manouevre the valve stem into its hole in the rim and retain with one of the nuts.


Start working the tyre onto the rim


Inflate, ensure the valve stem is straight, tighten down the nut and add the dust cap.


Refit the wheel: