Things are moving on... Not much progress lately, because despite the fact that I am not at work at the moment there is a house to be refurbished and summer weather to be enjoyed! Plus, I have a little Off-Grid Garage project to tell you about later.
So, bottom end is in and now we can fit the coupling gears. Easier to do on the bike, since we will be heaving the cranks about and we don't want the engine moving about.
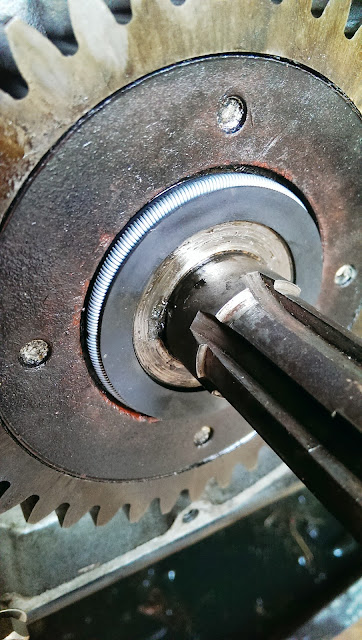
Here is the coupling gear 'pusher' tool, supplied by Drags, and an essential piece of kit. It has two large adapter nuts each with two threads - one for the pusher rod, and one for the crankshaft. You'll note that the threads on the cranks are different, hence the need for two adapter nuts. At this point, you will have the Woodruff key in place, and the coupling gear keyway aligned with the key. You won't be able to see it in a moment!
The pusher tool is actually a puller, since it pulls the crankshaft into the coupling gear. You need the coupling gear puller to go with it. The puller is assembled onto the gear - and now you don't know where the keyway has gone... Grease that pusher rod thread (to avoid it galling) and start turning - you will need a significant torque and you will have to lock the crankshaft using a bar through one of the rod small end eyes. Use two timbers to prevent damage to the crankcase mouths. Oh and a word of warning - do not swing the crankshafts about without the coupling gears fitted. The rods WILL hit each other and you don't want any nasty dings.
You need to make sure the coupling gears are properly aligned. The gears will only go onto the crankshafts one way, and there are dot marks to align the front and rear cranks properly. Align the gears so that the tooth marked with one dot meshes between the two dot marks on the other gear.
Whilst the coupling gears are identical, one of them will be marked 'F' for 'Front'. Fit this one at the front, and you will maintain the wear pattern established when the engine was last running.
When you are done, fit a new oil seal to the rear crank and do up the nut on the front crank.
Next, trial fit the coupling gear cover. No bearing in this one yet, but those studs are in two different lengths. The long ones pass through the dowels at 3 o'clock and 9 o'clock.
Then the primary case inner:
Then the outer, tensioning the sidestand spring
Then you find the clutch cover screw holes are stripped, and that's why we do trial fits!
Then the battery carrier. The shiny fibreglass battery is going to need some matt black paint and a spray of oil or WD40:
Looking good isn't it!


No comments:
Post a Comment