
It's fun when new jobs come along, as each time you have to discover new techniques & tools to achieve the goal.
This one is about spring winding. Over the years we've had a few elderly bicycles (and of course the dear departed CycleMaster), often with rod brakes and it transpires that the return springs for the handlebar levers are not available - even our old-school cycle shop cannot find them anymore.
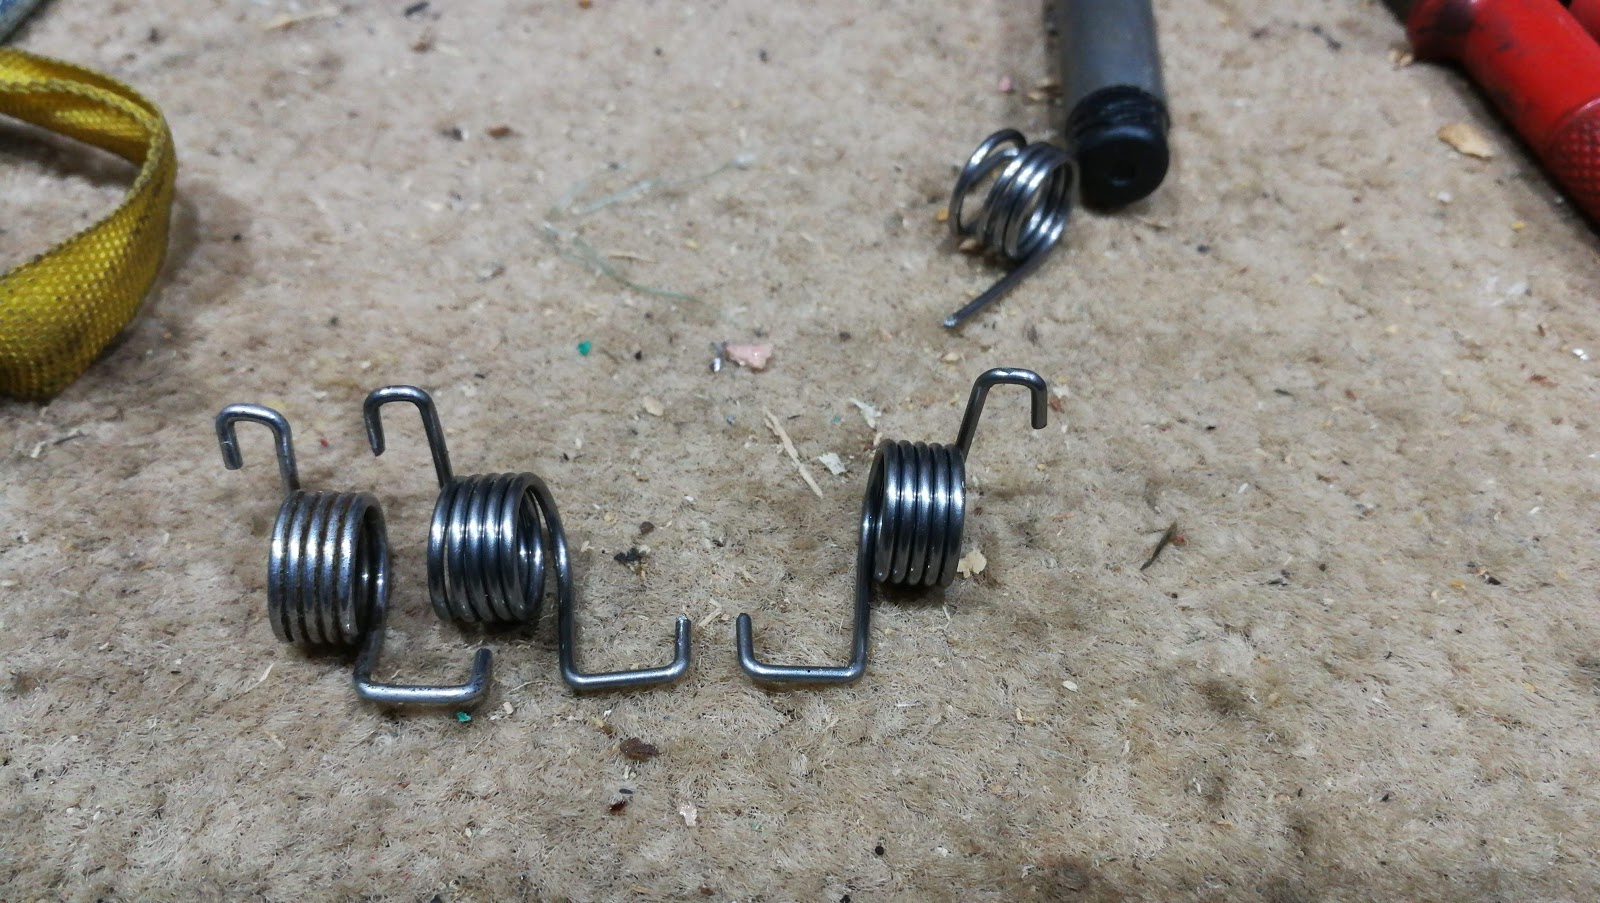
These levers use a special torsion spring wrapped around the lever, which hooks around the lever and bears on the handlebar. The springs are handed, and we have an example:

It's a torsion spring of about 5 turns, with a double bend at each end; I plan to wind a few of these springs, of both hands. I don't plan to plate them; I'll probably paint them black. The plan is to bend one of the right angles into one end, wind the spring and then make the other bends. Whether we can do that without heat remains to be seen, and the spring will need to be tempered to reduce the residual stresses left after the bending operation.
First though, I need to establish some dimensional parameters in order to make the tools to wind the springs. The micrometer shows us the wire is 0.060" diameter in it's plated condition; I was able to buy some 0.055" piano wire easily from eBay.

Click the picture to get a link to this calculator. Based upon the number of turns and the wire diameter, the calculator tells me that I need to have a mandrel of 0.344" diameter, which I will turn up on the lathe:

The mandrel will need a 'flag' to trap the first end of the spring, like this:

I've welded this in place:

The flag needs a notch to trap the first end of the spring

You can use the notch to form the first end:


Forming this way does not produce a neat square end like the original.
However, in the interest of learning I made a prototype in the lathe. I turned the lathe in gear, power off using a tommy bar in the chuck key slots. I formed the spring using hand tension only and produced this first spring. the second end was formed with pliers:

Not too shabby; I know that the mandrel is still too large as I planned to avoid taking the finishing cuts until I had welded it so it is no surprise that the spring is slightly too big - I am on the right track though.
In the next few pictures, I show my latest method. Not wishing to put too much time into tooling for two springs, I took short cuts until I could prove the method. If I can successfully and repetitively make these springs, I might make some better tooling.
I folded a bit of 1.5 mm sheet over the wire to make a tensioner. This is notched at the rear so the tension goes into the lathe tool post, and it has a 5 mm hole at the front, so the grub screw retains the tensioner in place without adding to the wire tension; the other three grub screws tension the wire. There is a piece of 6 mm square bar under the tensioner, packing it up. The mandrel is the correct size to the calculator.

From the top down, you can see that I've put a notch in the front of the tensioner. This is to to guide the wire onto the mandrel at the appropriate point.

Here you can see the wire going onto the mandrel:

I think I've cracked the method for bending the springs now. These are bits I've developed:

The first prototypes proved that I needed a better method of forming the bends, as the method of bending with pliers wasn't producing crisp bends. These two pictures show what I did:


Here's one in situ, showing that the wide end is way too long. It's supposed to fit around that pedestal the the bar is mounted on:


This one is about spring winding. Over the years we've had a few elderly bicycles (and of course the dear departed CycleMaster), often with rod brakes and it transpires that the return springs for the handlebar levers are not available - even our old-school cycle shop cannot find them anymore.
These levers use a special torsion spring wrapped around the lever, which hooks around the lever and bears on the handlebar. The springs are handed, and we have an example:

It's a torsion spring of about 5 turns, with a double bend at each end; I plan to wind a few of these springs, of both hands. I don't plan to plate them; I'll probably paint them black. The plan is to bend one of the right angles into one end, wind the spring and then make the other bends. Whether we can do that without heat remains to be seen, and the spring will need to be tempered to reduce the residual stresses left after the bending operation.
First though, I need to establish some dimensional parameters in order to make the tools to wind the springs. The micrometer shows us the wire is 0.060" diameter in it's plated condition; I was able to buy some 0.055" piano wire easily from eBay.
Click the picture to get a link to this calculator. Based upon the number of turns and the wire diameter, the calculator tells me that I need to have a mandrel of 0.344" diameter, which I will turn up on the lathe:

The mandrel will need a 'flag' to trap the first end of the spring, like this:

I've welded this in place:

The flag needs a notch to trap the first end of the spring

You can use the notch to form the first end:


Forming this way does not produce a neat square end like the original.
However, in the interest of learning I made a prototype in the lathe. I turned the lathe in gear, power off using a tommy bar in the chuck key slots. I formed the spring using hand tension only and produced this first spring. the second end was formed with pliers:

Not too shabby; I know that the mandrel is still too large as I planned to avoid taking the finishing cuts until I had welded it so it is no surprise that the spring is slightly too big - I am on the right track though.
In the next few pictures, I show my latest method. Not wishing to put too much time into tooling for two springs, I took short cuts until I could prove the method. If I can successfully and repetitively make these springs, I might make some better tooling.
I folded a bit of 1.5 mm sheet over the wire to make a tensioner. This is notched at the rear so the tension goes into the lathe tool post, and it has a 5 mm hole at the front, so the grub screw retains the tensioner in place without adding to the wire tension; the other three grub screws tension the wire. There is a piece of 6 mm square bar under the tensioner, packing it up. The mandrel is the correct size to the calculator.

From the top down, you can see that I've put a notch in the front of the tensioner. This is to to guide the wire onto the mandrel at the appropriate point.

Here you can see the wire going onto the mandrel:

I think I've cracked the method for bending the springs now. These are bits I've developed:

The first prototypes proved that I needed a better method of forming the bends, as the method of bending with pliers wasn't producing crisp bends. These two pictures show what I did:


So these are the two prototypes I've made, left hand and right hand:
Here's one in situ, showing that the wide end is way too long. It's supposed to fit around that pedestal the the bar is mounted on:


No comments:
Post a Comment