Saturday, 6 August 2016

Old Warrior joins the stable

Well, I've been looking for a girder forked single for a while and finally the right one at the right price has appeared. Advertised on Car & Classic as a 1948 Red Hunter, and located in Castiglion Fiorentino, a small town in Tuscany we have this rather splendid Ariel owned by Massimo Bruni.


Massimo collects Italian classic bikes of the 50's & 60's. Last year, visiting Terni in central Italy (Umbria region) to see two old Gilera motorcycles he bought this 350 cc Ariel single. Massimo wanted to sell it to purchase a Parilla 175, and consequently his friend Nicola IlGordo was enlisted to help sell it on Car & Classic.

It was for sale at a good price, and after many, many emails and exchanges of pictures between myself & Nicola, I decided to buy my first Ariel single.

Thanks to Massimo & Nicola I was able to see the Italian registration papers for the Ariel and this picture, from 1953, shows the previous owner (the only one before Massimo) with his son on the Ariel. The previous owner died two years ago (in 2014) and his son decided to sell it.


So what have we bought?

The previous owner was clearly not the first owner of the bike because, as keen Arielisti will have spotted, this is a fine, civilianised example of Ariel's war horse, the W/NG. A few key features: It has the field stand lug, the kickstart clip, the two tool boxes and the downward bend in the frame tubes that distinguish the military bike from the civilian NG; moreover the engine, frame and gearbox numbers all point to W/NG - we will have to wait and see what gear ratios it has. Other details include the unplated exhaust and the military gear lever.

Here it is emerging from the garage. Nicola's father is attempting to get it running again:


Out in the Tuscan sunshine, looking like a straight, well cared for and rather original W/NG, dressed up to look like an Italian bike from the 1950's.


So is there much wrong?

That's an Indian reproduction headlamp. It's very shiny, and the switch doesn't have the 'tail only' position that a military bike should have, and it may be the 7" version rather than the flat glass DU42 6 1/2" version in use during the war (it is actually an Indian copy of the MU42 domed glass 6 1/2" version, and quite a good copy too); the S443M military speedo is also missing - hardly surprising as it's miles would have been rather useless measuring Italian kilometres; or maybe it was broken:


Here's a view of the engine. A few observations:
  • Float bowl is on the wrong side of the correct Amal 275 carburetter
  • Oil pipe appears to have a gauge connection. Correct to the parts list, but why?
  • no fuel pipe - should be a solid copper pipe
  • Looks very clean. Maybe there is no oil in it!
  • Altette horn, angled horn bracket and the bracket spanning the engine plates are missing
Otherwise it looks good!


More Indian parts: the fuel cap and possibly the tank as well. Welded lugs for the fuel cap, no chain hole to retain the cap point to an Indian repro tank, but the picture is a little fuzzy. The square arch in the tank to clear the frame top member is different to my three SQ4 tanks, but (thanks to Steven Carter on the AOMCC forum) it appears that W/NG tanks are made like this. We will have to see when it arrives. Cap is very different from the Ariel design though.


 Domed cap says repro as well:


This is the SQ4 tank cap, showing what they are supposed to look like:


More general views. Non-standard knee rubbers - 1940 bikes have standard Ariel knee rubber arrangements, 1944 bikes have none. What is this?


Original rear mudguard and unusual rack with pillion seat lugs:


Original oil tank and gearbox; kickstart lever is missing but the clip is still in place. Footrests look home made:


Exhaust pipe bend looks a little strange; probably a replacement - this bike is only 74 years old in a few months:


Original seat, mudguard stays & saddle; odd looking rack & rear number plate; dummy star washer missing from forks on this side; the lower chain guard is missing (but I happen to have one in stock):
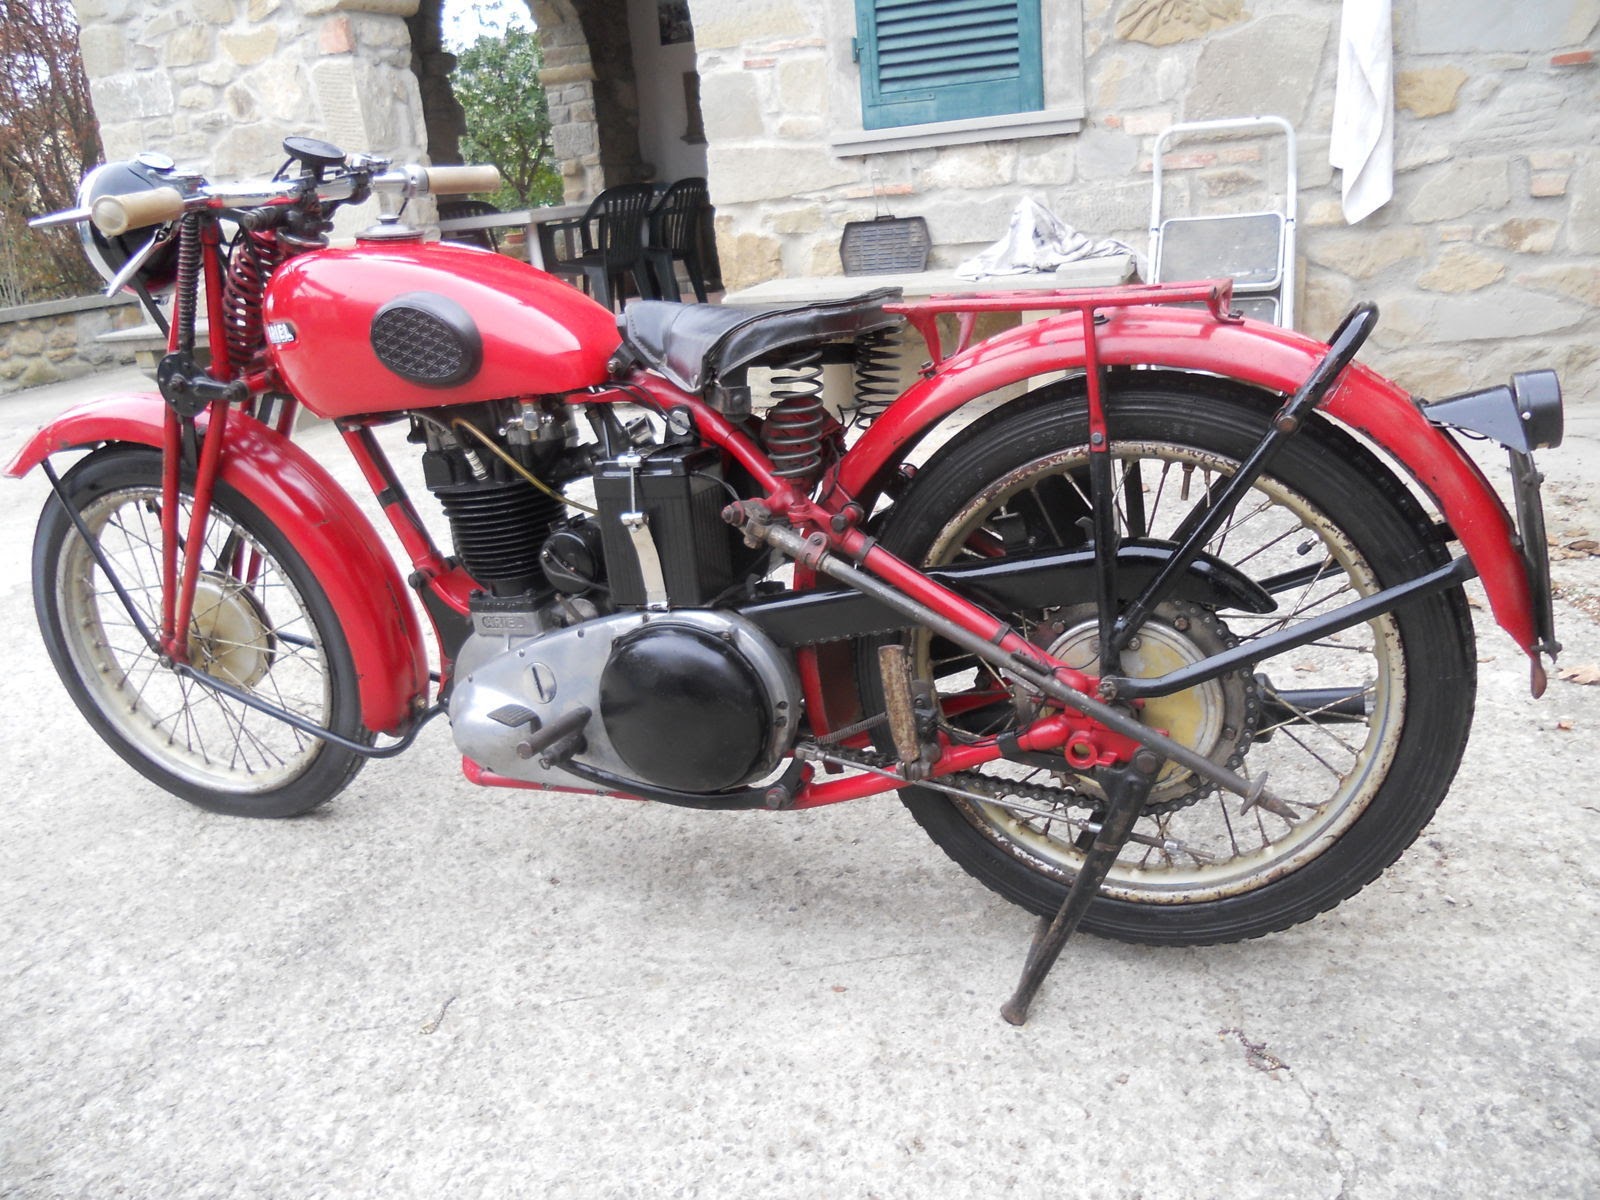

Original Ariel forks, with correct length side plates & steering damper. Later handlebar clamps, presumably still for 1" bars so should have packing pieces:


Italian style handlebars and controls - white grips, welded levers; not at all Ariel, but look like they have been there for a while?


Original field stand! Original cable clips! Look at the blue pinstripe on the silver wheels. Why was it painted like this?


 Original toolboxes with odd fasteners keeping them closed. Is there anything inside I wonder?


Original front mudguard; speedo drive still there:

Provenance

The numbers all add up to a late 1942 W/NG. The details are:
  • Frame: XG 31708 
  • Engine: BH 20968 
  • Gearbox: XICPBL96343 
This points to contract number C12450, delivered to Tewkesbury in Gloucestershire; the WD number could have been C4851938 or thereabouts; there were 2000 bikes built to this contract, plus 100 engines, 100 frames and 100 gearboxes. The contract was placed with Ariel on the 24th January 1942 and the machines were delivered between 11th August and 29th October the same year.


The bike is still carrying it's Italian registration number, TR3188, and the Automobile Club d'Italia page from the registration book shows the previous owners name, Marco Gatti, dated August 1950:


The registration book, with two renewals, is dated July 1960 and shows the bike sold by the ARAR, of which more later. Clearly the same bike - same registration, frame number etc.,  and even the tyre sizes are correct:


Secondly, I have the registration from the Automobile Club d'Italia licensing the bike to Sr. Gatti, from August 1950.

So why is it painted like that?

There are a few features which make me curious about this bike:
  • the red paint on the frame has been professionally done
  • the wheels have silver paint with blue lining; both match
  • the silencer has an odd, restrictive cap
  • the carrier looks like it was professionally fitted, but is not the carrier normally found on a W/NG
Now, this is either an enthusiastic owner from the past with a tired W/NG and a picture of a Red Hunter, or there is more to it. I will ask the Italian AOMCC and see where we go from there.
But how do I leave it? If it something special I will leave it; I rather like the idea of a demilitarized military bike, but it would look the part for '40's weekend in green...

So what's next?

First thing is to get it checked out by the Machine Registrar and AOMCC Archivist, and then we can start the registration process; then we need to sort out some parts & do some work:
  1. A kick start from AOMCC Singles Spares
  2. A petrol pipe, flexible from stock initially, then a copper one
  3. Buy a horn bracket and fit the spare horn
  4. Fit the chain guard I have in stock
  5. Fit the spare VRLA battery I have in stock
  6. Have a look at the footrests and see what needs doing
  7. Find a bicycle speedo until a chronometric turns up, then buy a cable from Johnson Cables
  8. Have a look at the tyres and see what I want to replace them with
  9. Get a dummy star washer for the LHS damper
  10. Sort out the tool box knobs
  11. Sort out the regulator shield, and get one for the SQ4
  12. Think about the handlebars and levers
  13. Think about a pillion seat
Of course, some of these things are essential, and some will not get done for years. The main thing is to get it going, and spend some time blatting about Norfolk. The fun will begin when it arrives next week!

Friday, 29 July 2016

Sticky Legs

You will remember from a recent post that the forks were stuck down again. After a long trip to Manchester (over three days - graduation ceremony) it's time to sort it out.


It was fairly obvious that the front end was going to come out, so that was all quite straightforward and nothing I haven't done many times before. Remembering that I had dented the front mudguard, that needed to come off too.


Oddly, the wheel spindle was not forthcoming and I started to suspect that one fork leg may be free while the other was stuck. Manoeuvring the mudguard out revealed the wheel cocked over at a strange angle and I realised that the brake side leg was stuck and the other side was free.

I thought that a luggage ratchet strap would do the job, allowing me to compress the free leg and extract the fork spindle. I looped it over the top yoke and down under the lug on the bottom of the fork slider.


This worked nicely and I was able to take the wheel out


Next, I shaped a piece of stout timber such that it would locate on the wheel spindle and tie-wrapped it to the fork leg. A sharp few taps on the end had the fork leg free again, until next time.


Thursday, 14 July 2016

Ride like a veteran...

Out on a commuting run yesterday showed me that the fork bushes still have clearance issues. The forks are stuck again:


I rode it half way across Norfolk like that; now I know what the London to Brighton Run feels like; and the speedo is stuck again.

Looks nice in the rain though! Could have been taken 50 years ago, if it weren't for the wheelie bins.


Back in the workshop, my usual approach with the plywood caul, shown here, didn't work:


Unfortunately, it seems to be more firmly stuck this time and a bit more force dented the top of the mudguard:


It'll knock out.

Sunday, 3 July 2016

Potty Festival & Vintage Transport

So another sunny weekend in Sheringham brought the annual Potty Festival and the NNR Vintage Transport Festival. Check the pictures - Amelia is there as is Beattie, my Bantam:

First, a few old push bikes:


NNR Volunteer Andrew Dawson brings his collection of Seagull outboard motors along each year, which he is happy to demonstrate in a dustbin full of water.


Nice to see some smaller machines:


A Francis-Barnett:


My Bantam, and in the background one of several local Velos:


A couple of Vincents this year:


And lastly, a view of the 9F, just arrived from Holt, taken from the new footbridge opened this month and paid for by donations.


Now, on the same weekedn as the Vintage Transport Festival is the Potty Festival. For the uninitiated, the Potty Festival is Sheringham's annual Morris Dancing competition.

The Sheringham 'Lobster Potties' were first formed in 1986 as a 'one off' to raise funds for Sheringham Health Centre. Such was their success that they were asked to perform at several events and have gone from strength to strength. 

Using the Lobster Public House as their headquarters, and being considered by some as 'potty', the name Lobster Potties was obvious! They dance the traditional Norfolk morris style and the group has performed in many parts of Europe as well as the U.K. 

In 1994 they started the annual 'Potty' festival with just a few visiting groups, and this has grown over the years, and sides come from all over the U.K. and Europe to take part. This years festival features some twenty teams of varying styles will be in the town delighting hundreds of visitors and residents alike. 

A history of the festival is shown on the Potty's website here.

Her's a few random pictures from the weekend:


Wednesday, 1 June 2016

All quiet


Nothing happening here. The weather is terrible, but the tappets are done. Number 8 was strangely loose, and I don't think the 1 1/2 thou feeler gauge will last much longer.

Next I need to read this article, which may help me understand what is going on with these NGK B6HS plugs:


They look rather too cold to me. Maybe I should try a set of B5HS which will burn off that carbon.

Meanwhile, as it has been raining, I have been writing an article for the AOMCC magazine, Cheval de Fer.

Saturday, 7 May 2016

Clips & cables

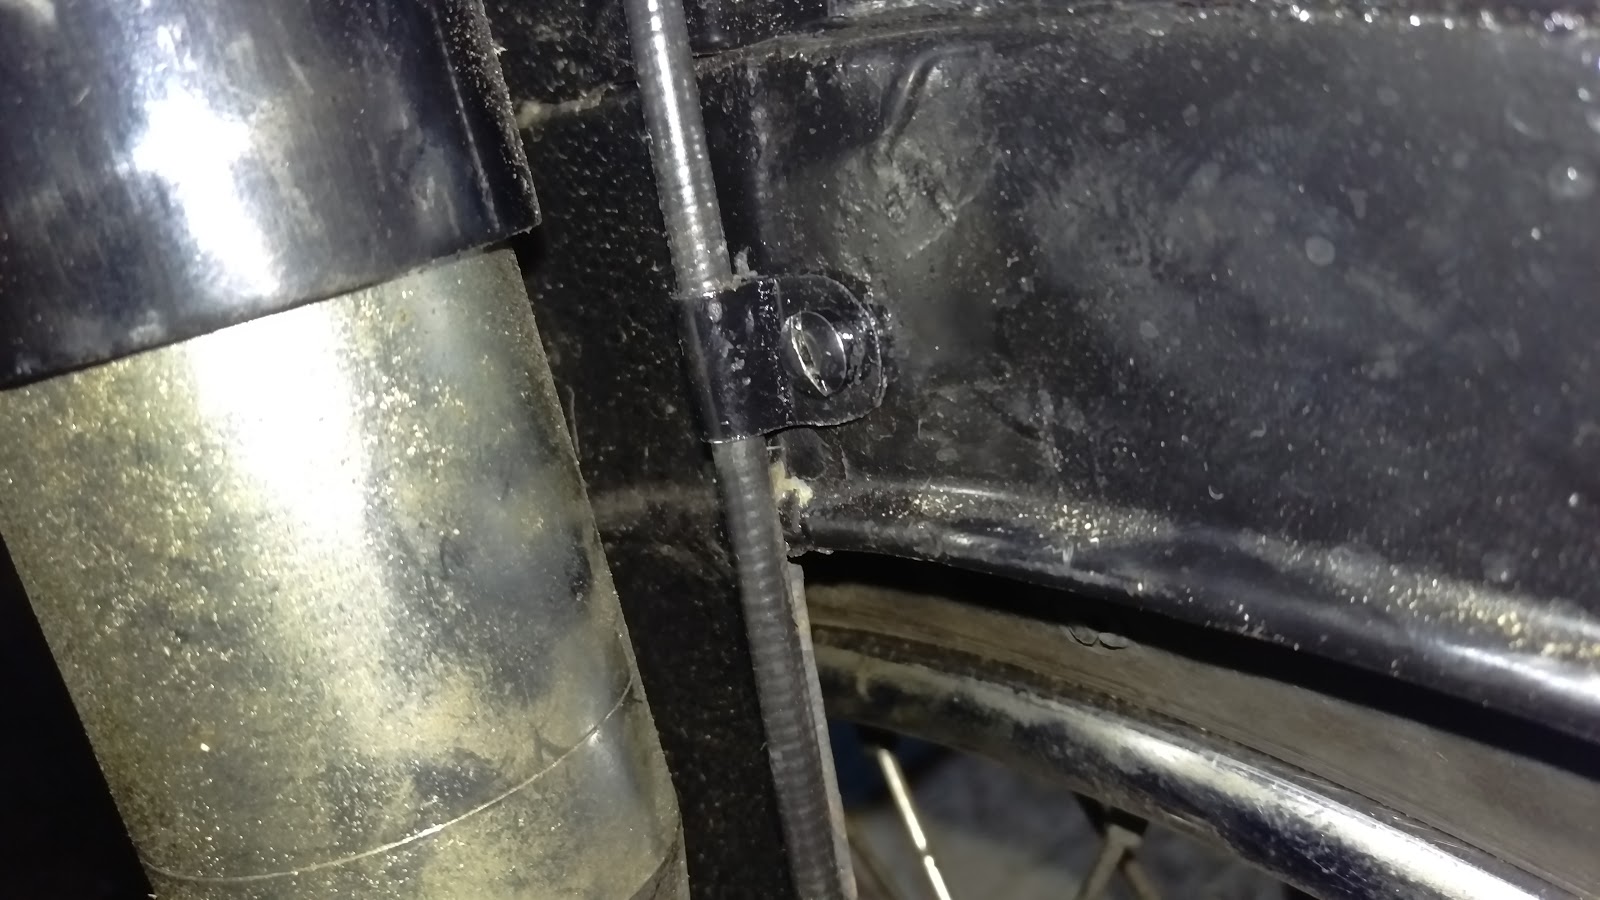
In a recent discussion on cable clips, to which I contributed, I learned from Ray Tolman's post to the AOMCC forum that the front brake cable clip on the mudguard until 1955 looked like this:


Which was not what I had fitted, and it is not obtainable. So this is my version of the H33-46 with a fillister head 3BA screw, shakeproof washer and nut holding it to the mudguard, inspired by Ray's post:


It's just  a simple piece of folded sheet. It shouldn't have such a small radius curve on the end, as that would be more difficult to press cleanly:


On a similar theme this is a 4842-32 cable clip:


And here is one with a fillister head 3BA screw, holding the clutch and throttle cables to the head stock on my SQ4:


And here is the one on the other side, with the main harness:


Friday, 6 May 2016

Servicing begins

Well, its been a beautiful day here in North Norfolk, the sun is shining, it's quiet but I have spent most of the day in the office. A lunchtime walk revealed the tide out and an empty beach, just to underline how lucky we are to live here.


I had a couple of hours spare in the evening to repair some floorboards and make a start on servicing the Square Four. I had a number of jobs to look at before the summer season, so stripping had to start.

Its always a bit of a fiddle to get the oil pressure gauge line undone, and as usual I used only the tools I carry on the bike. This revealed that you need two 3/16" BSW open spanners, so I added another to the tool kit. Once the tank was off, I planned to remove the plugs, carburetter and distributor in order to re-torque the head and cylinder bolts.

The spark plug spanner I made last year is intended to replicate the one in the spare parts list, and it works well in getting to the number two plug which is now confined by the new bi-starter parts:


The plugs themselves, one to four from left to right are a little sooty; we will keep an eye on that, but there is no evidence of any oiling. The oil comes from the weeping head gasket!


Once I had the carburetter off, I was able to tackle the head bolts with the usual variety of spanners including my new baby torque wrench, using the torques Ariel specified.


I was able to get a half turn on most of the bolts, which I expected.


I planned on removing the distributor to turn it through 180 degrees, to put the condenser 'bulge' near to the oil tank and give myself enough clearance for a carburetter insulator. Having done this, and attempted to re-time the engine I realised that the position of the distributor did not now allow it sufficient movement to adjust the timing. Furthermore, there was no way I could add a carburetter insulator without new manifold studs - so back to square one.

However on putting the distributor back in I realised it was not turning freely - so off it came again. I found that the shaft was so stiff I could barely turn it by hand. It freed off, with WD40 and some light oil, but how was it intended to be lubricated? I could see the 3/32" hole in the body, and the milled flat down into the drive housing, but there was nothing to introduce oil to the shaft. Was I missing something? I think that there was a modification in this area for the Mk2?

Actually the modification Ariel recommended was to allow oil to drain out of the distributor but Paul Ptak, on the AOMCC Forum came to the rescue. He said:

Pull the rotor arm off and drip some light oil into the shaft? The machine screw under the rotor arm is drilled though and I believe the shaft is cross drilled to allow the oil to get from inside the shaft on to the bushings.


Why didn't I think of that? I've done it hundreds of times on distributors on various cars... I must be losing the plot. Thanks Paul!

So that was almost it for the evening. I didn't fancy rebuilding the distributor (good thing - I was obviously tired) but I did try the new-first-paint tank in place:


And I also stared to look at various missing clips. Having bits in stock, especially fasteners, is a wonderful thing. These are from Draganfly:


 Here's one I made earlier:


Obviously needs a hole and some paint but we will replace the one holding the brake cable to the mudguard with this.

Tuesday, 3 May 2016

Speedometer Clutch Repair

I have intermittent faults with my speedometer, as I may have mentioned once or twice - either sticks at zero or runs around to full scale and stays there. This is caused by the clutch slipping and leaving the camshaft either with the commander pinion engaged, driving the needle right round, or failing to engage the pinion at all, leaving the needle at zero. As with many speedo failures, this is caused by over lubrication.

The first step is to pull the speedo out. Fed up with trying to maneuvre my hands under the top yoke, I removed the headlamp first:


This means that you can remove the cable, the speedo lamp and the little M6 nuts securing the speedo into the yoke very easily.

This post is not going to be a speedo rebuild tutorial. There is a lot of that already on this blog, and more in my forthcoming book. No, this post is just to record the rebuild of the speedo clutch; this first step is to strip the speedo down to the movement and then take the movement apart for cleaning and inspection.


This is the clutch, disassembled with the parts in the correct sequence. I have cleaned them with methylated spirit and a brush.


They are lying on a sheet of white paper - very useful for cleaning wheels!